Introduction to the Auth0 Fine-Grained Authorization (FGA) Playground
What is Auth0 FGA Playground?
The Auth0 FGA Playground is a learning tool meant to help you learn and play with Auth0 Fine-Grained Authorization (FGA). It allows you to easily create, visualize, share and test your authorization models.
Currently on the Playground, store security is through obscurity; to access a store you need to know its UUID, but there are no other checks. Please use identifiers and do not store any PII or data that cannot be public.
Tour of Auth0 FGA Playground
If this is the first time you visit the Auth0 FGA Playground, it will ask you to go through a tour to explain how you can use it. We suggest taking a moment to complete the tour there before coming back to this post.
-
In your browser, open https://play.fga.dev in a new tab.
-
You should see this page if this is the first time you click on that link:
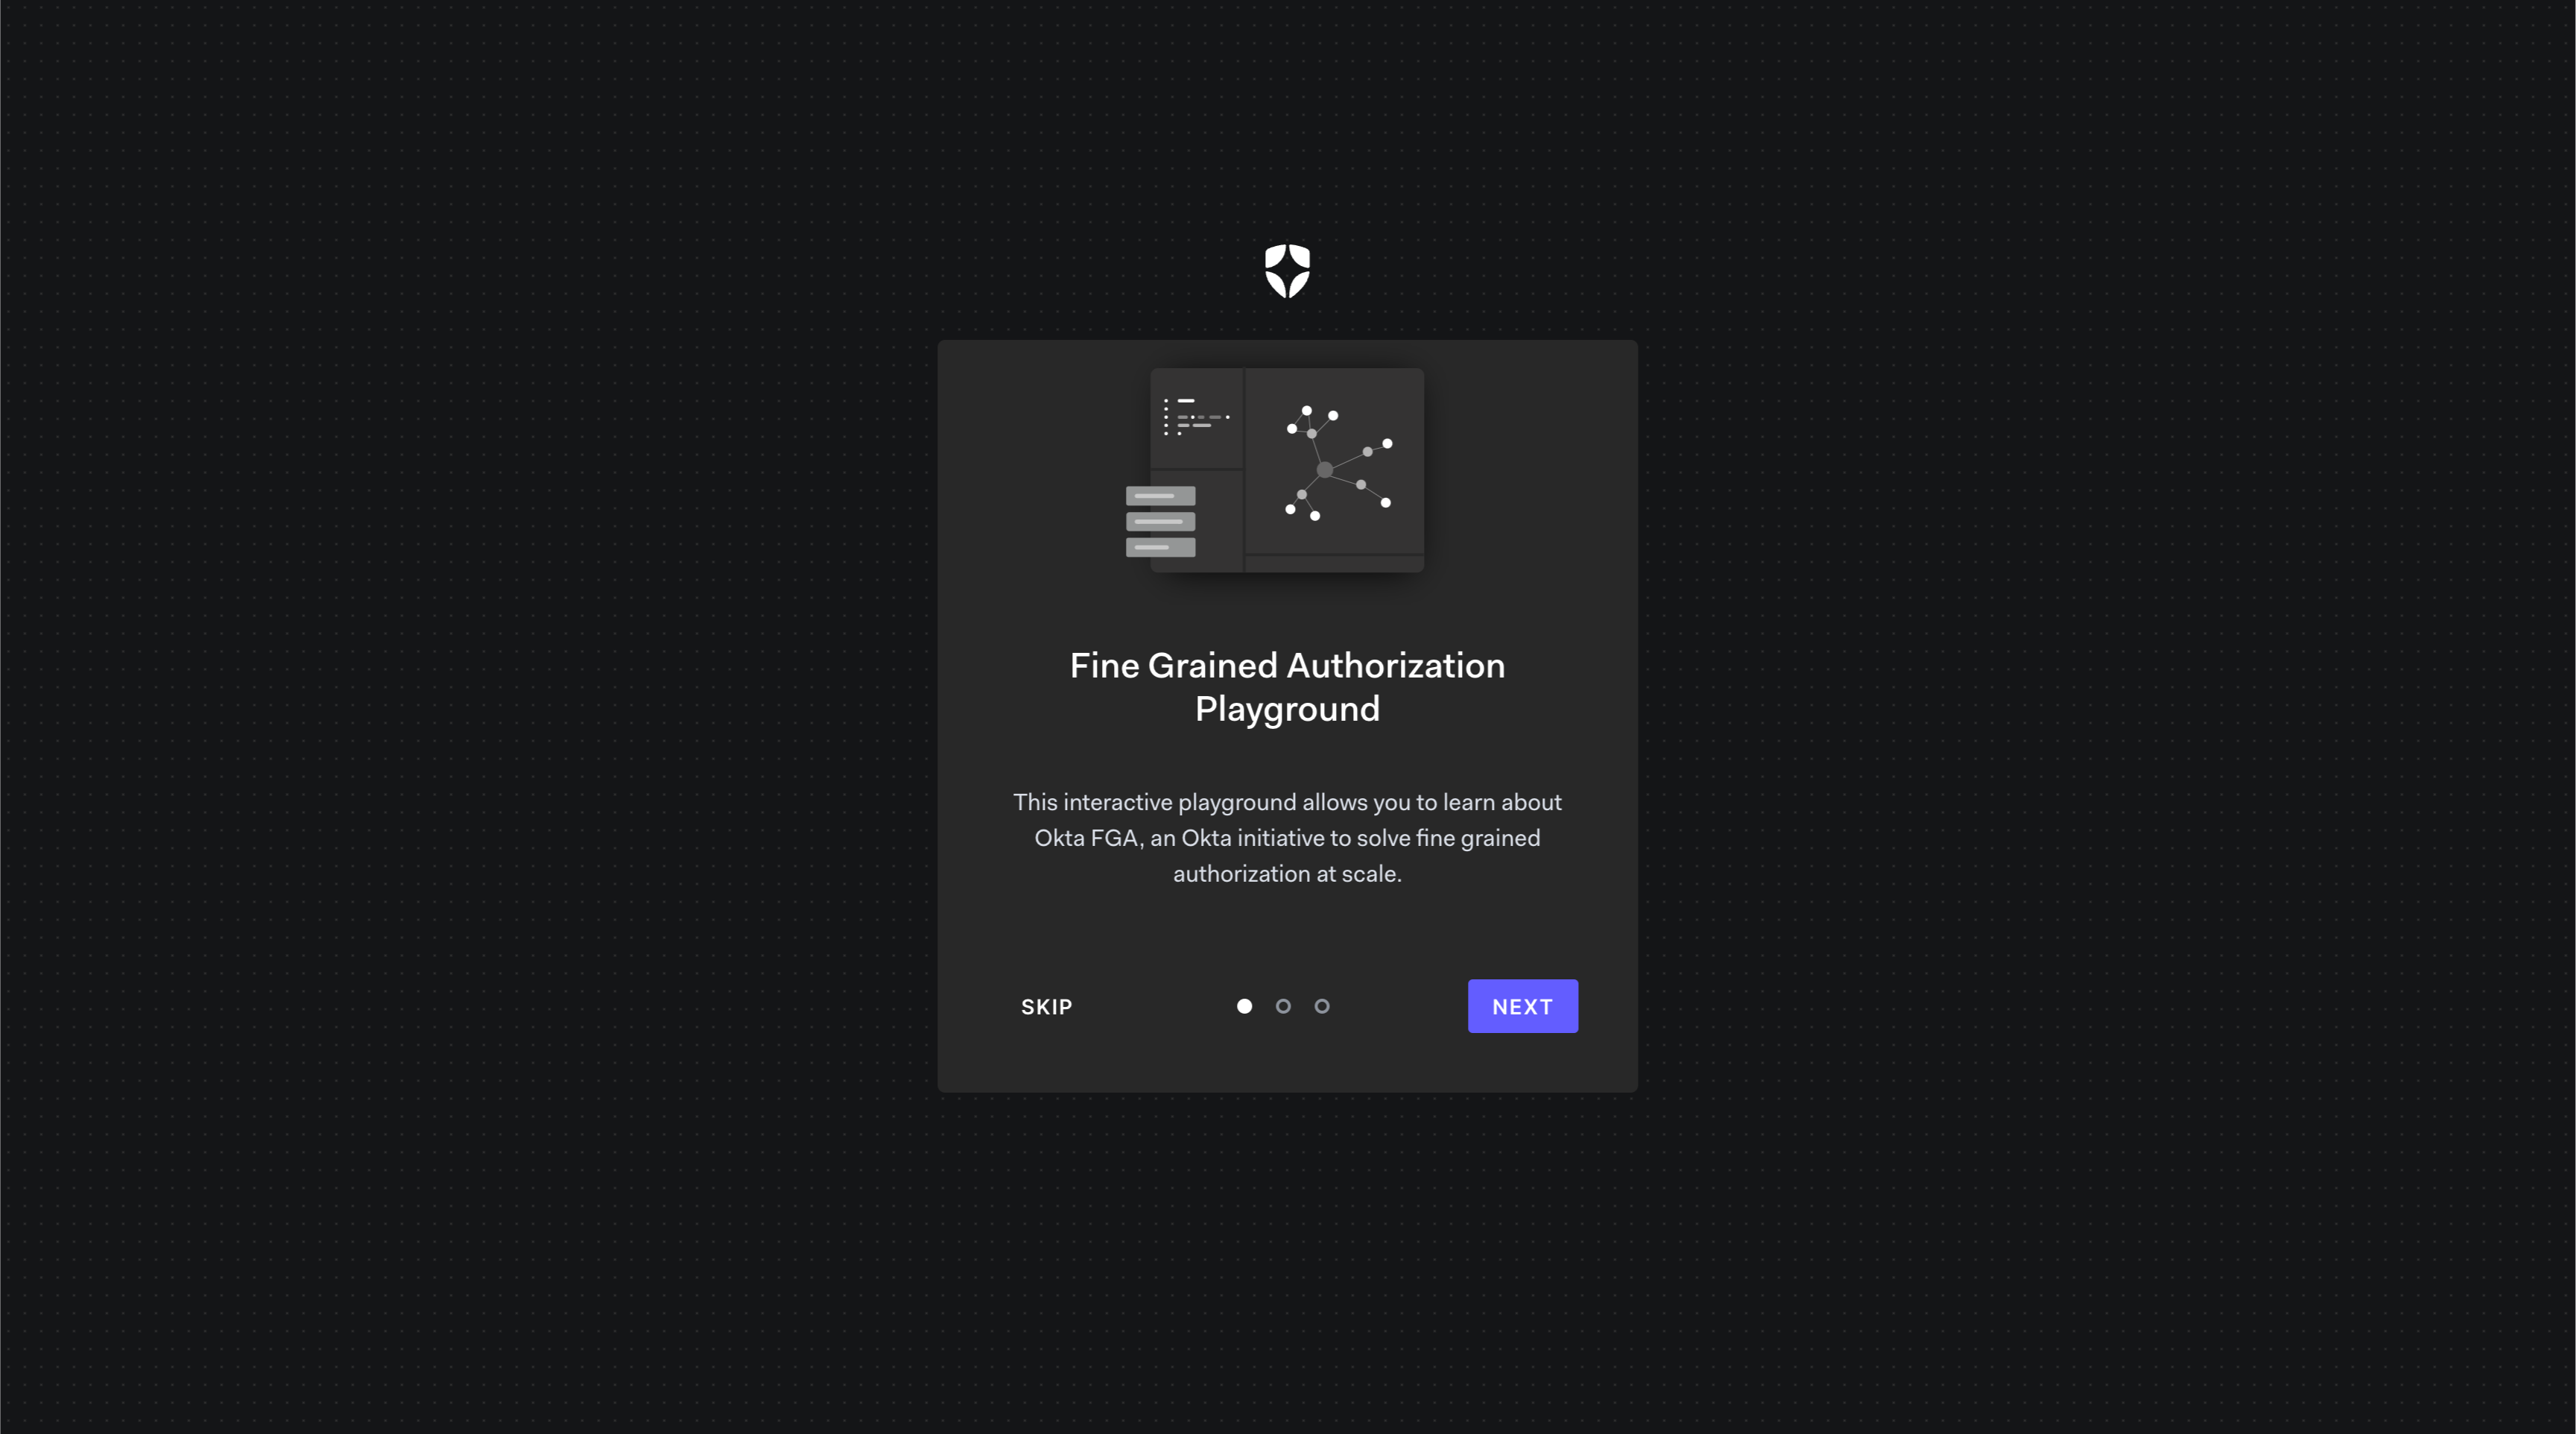
The Auth0 FGA Playground asking to complete the tutorial. Press NEXT to see the intro or SKIP to skip it
-
If you skip or complete the intro, you will be asked if you would like to go through the tour:
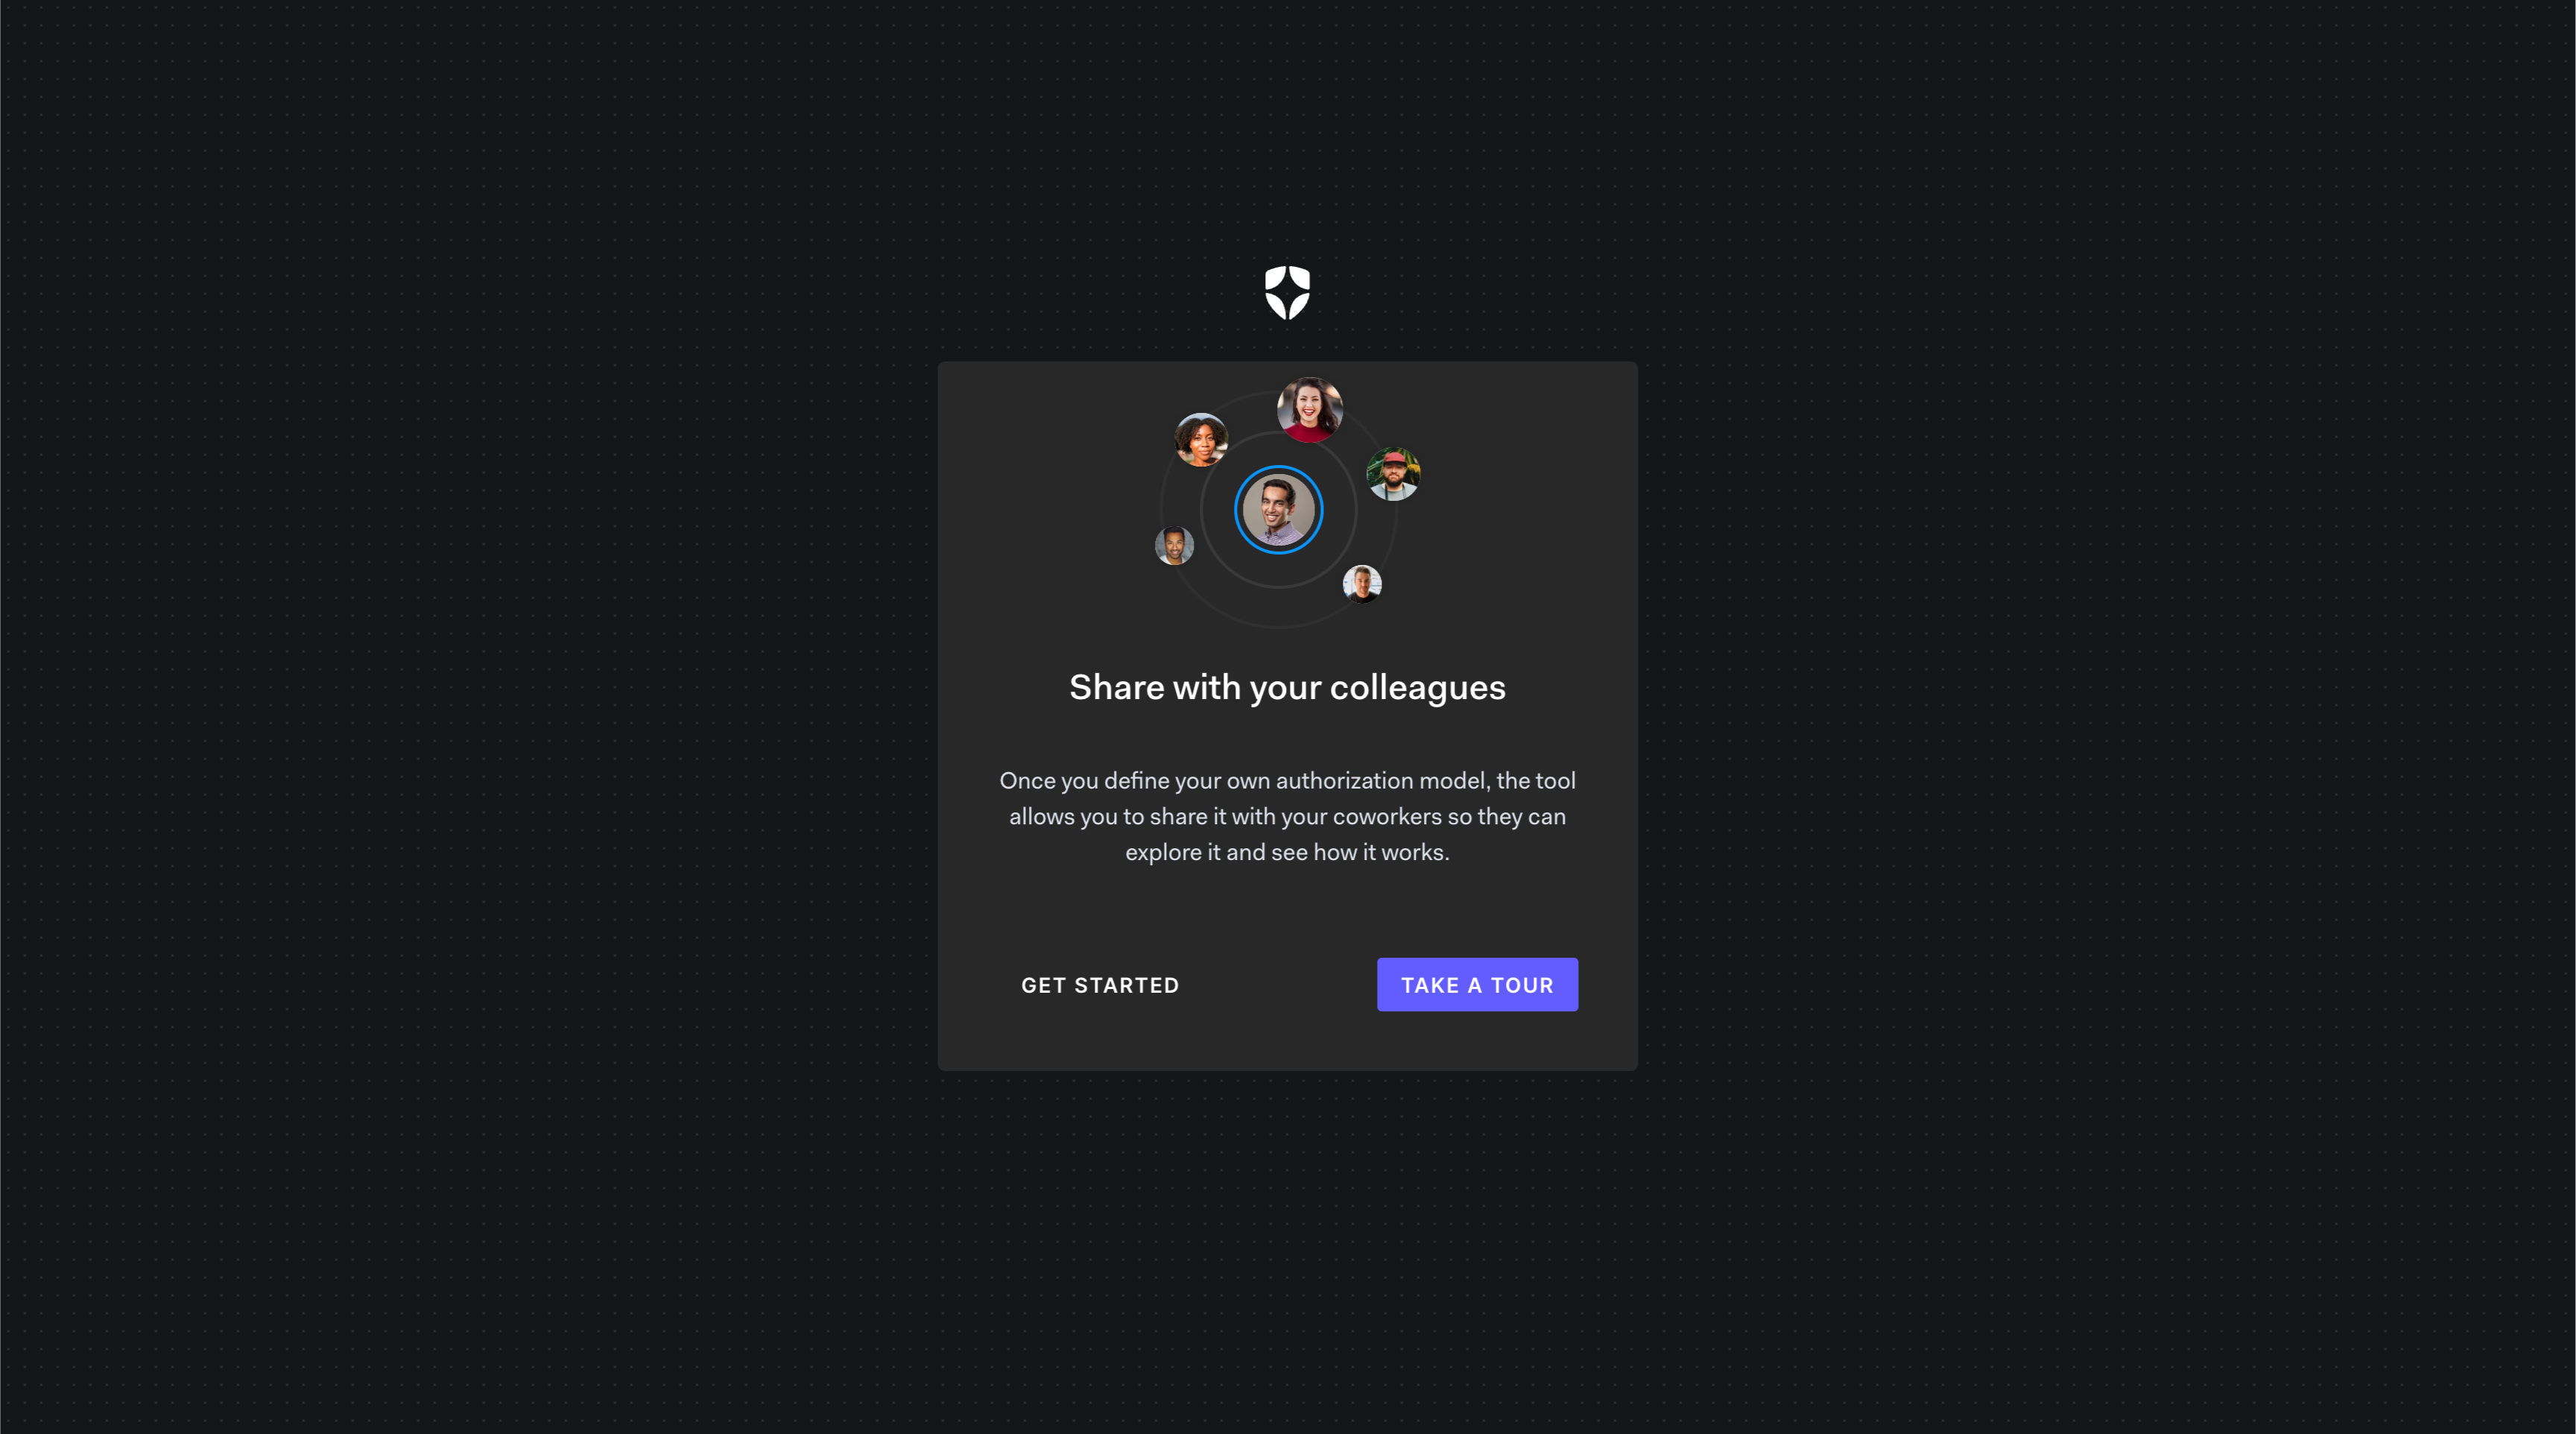
The Auth0 FGA Playground asking to complete the tour. Press TAKE A TOUR to start the tour or GET STARTED to skip directly to the playground
-
You should see this page if you have completed the tour
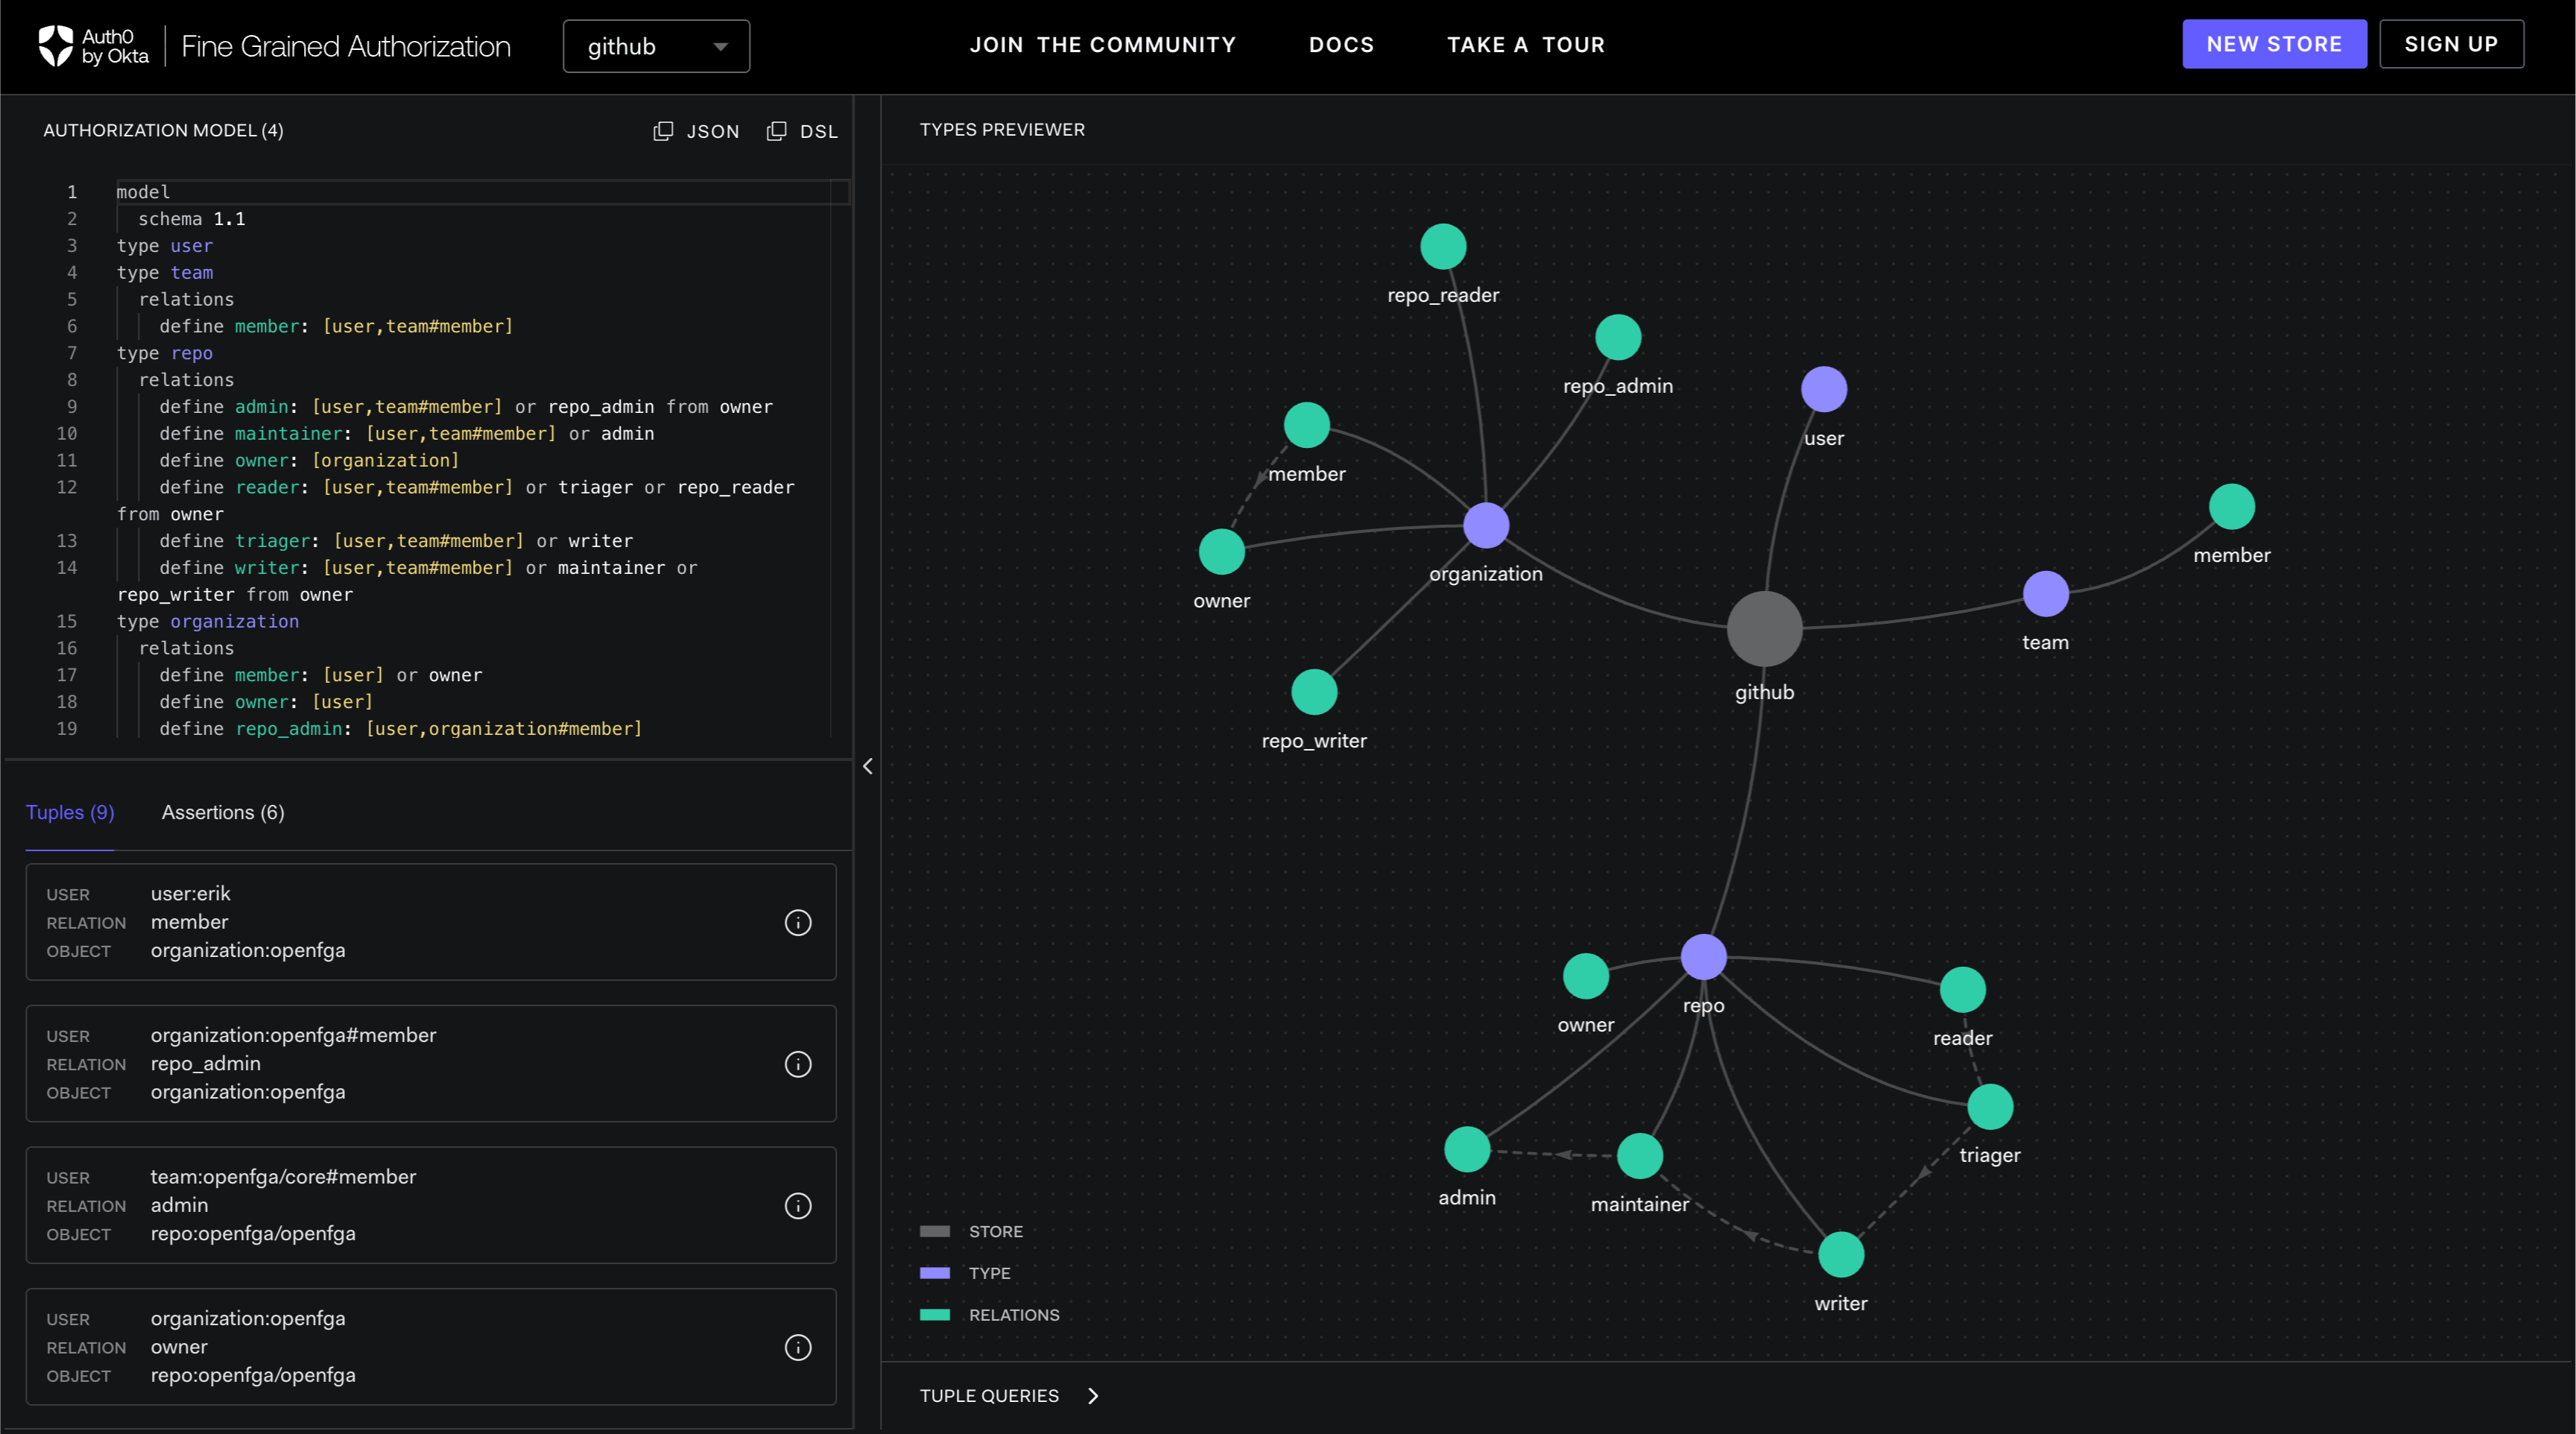
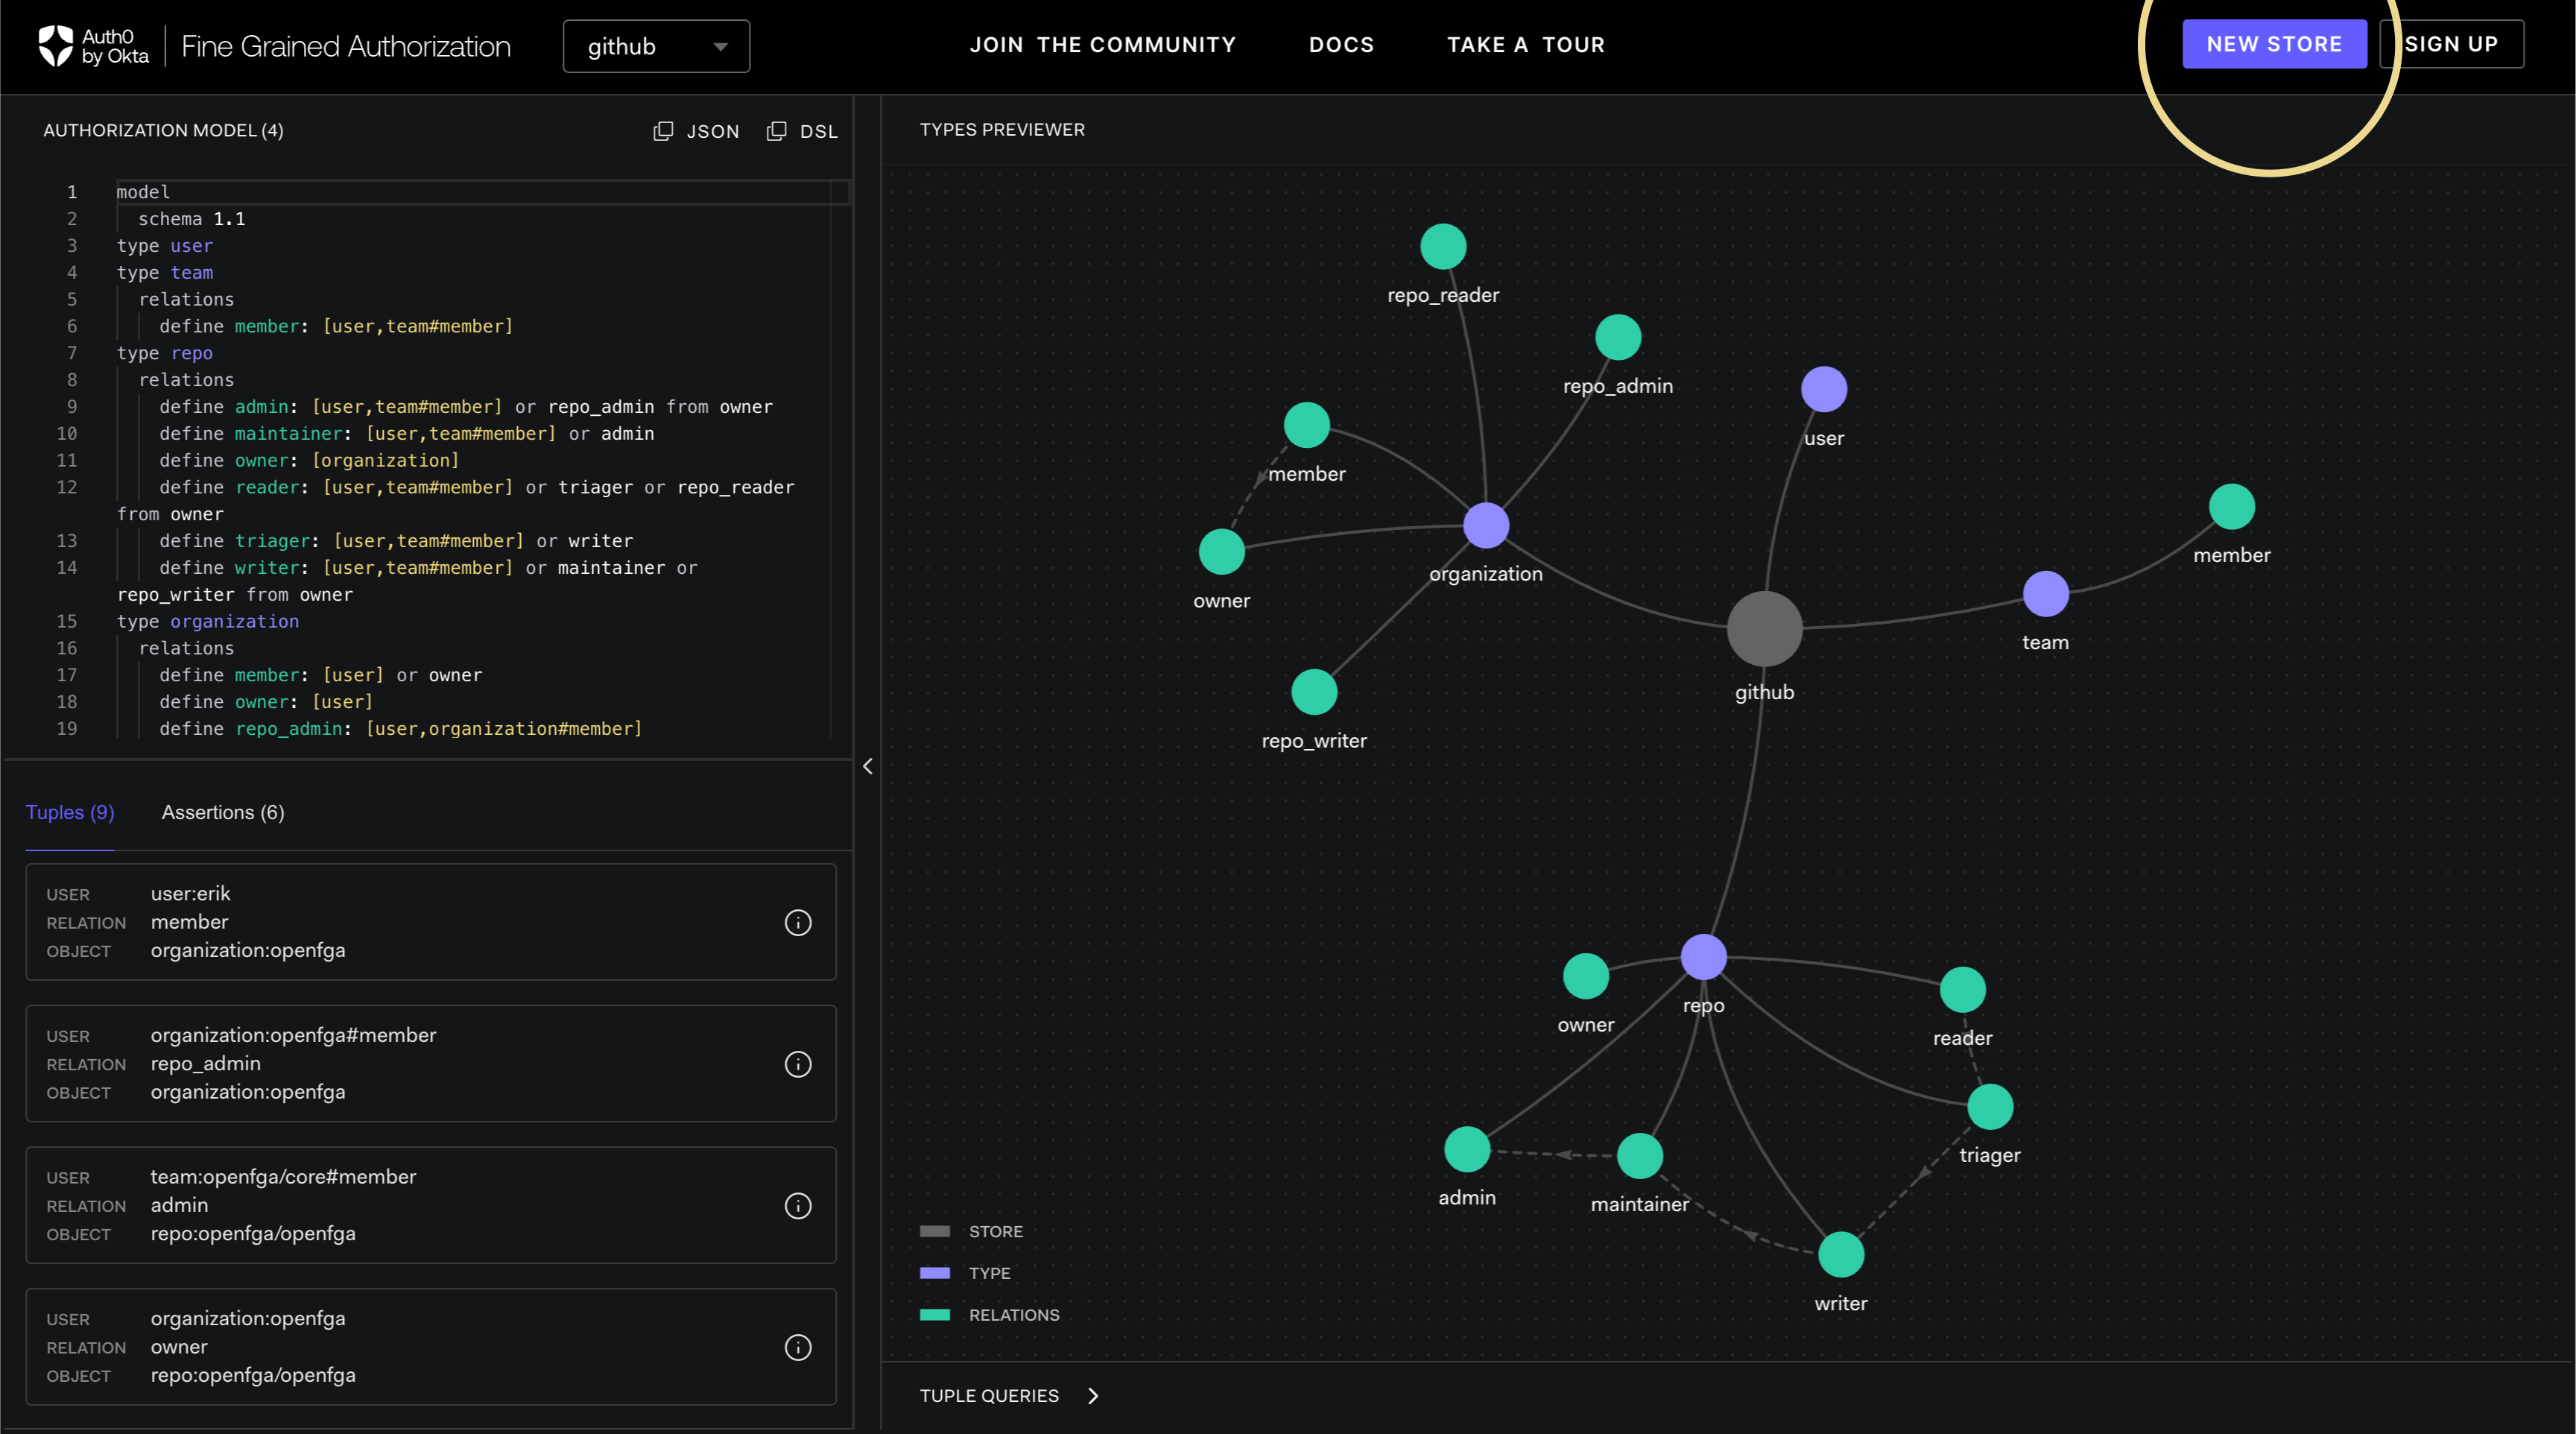
The Auth0 FGA Playground once the tour is completed
Default Stores vs. User Stores
The Auth0 FGA Playground has both default stores and user stores.
Default stores have authorization models, relationship tuples and assertions that are pre-populated by Auth0 FGA and are not modifiable. They are samples to allow you to better understand advanced use cases.
User stores are user defined configurations. The authorization models, relationship tuples and assertions may be modified and saved.
Creating a new store
-
Click the NEW STORE button on the top right hand corner of the screen.
-
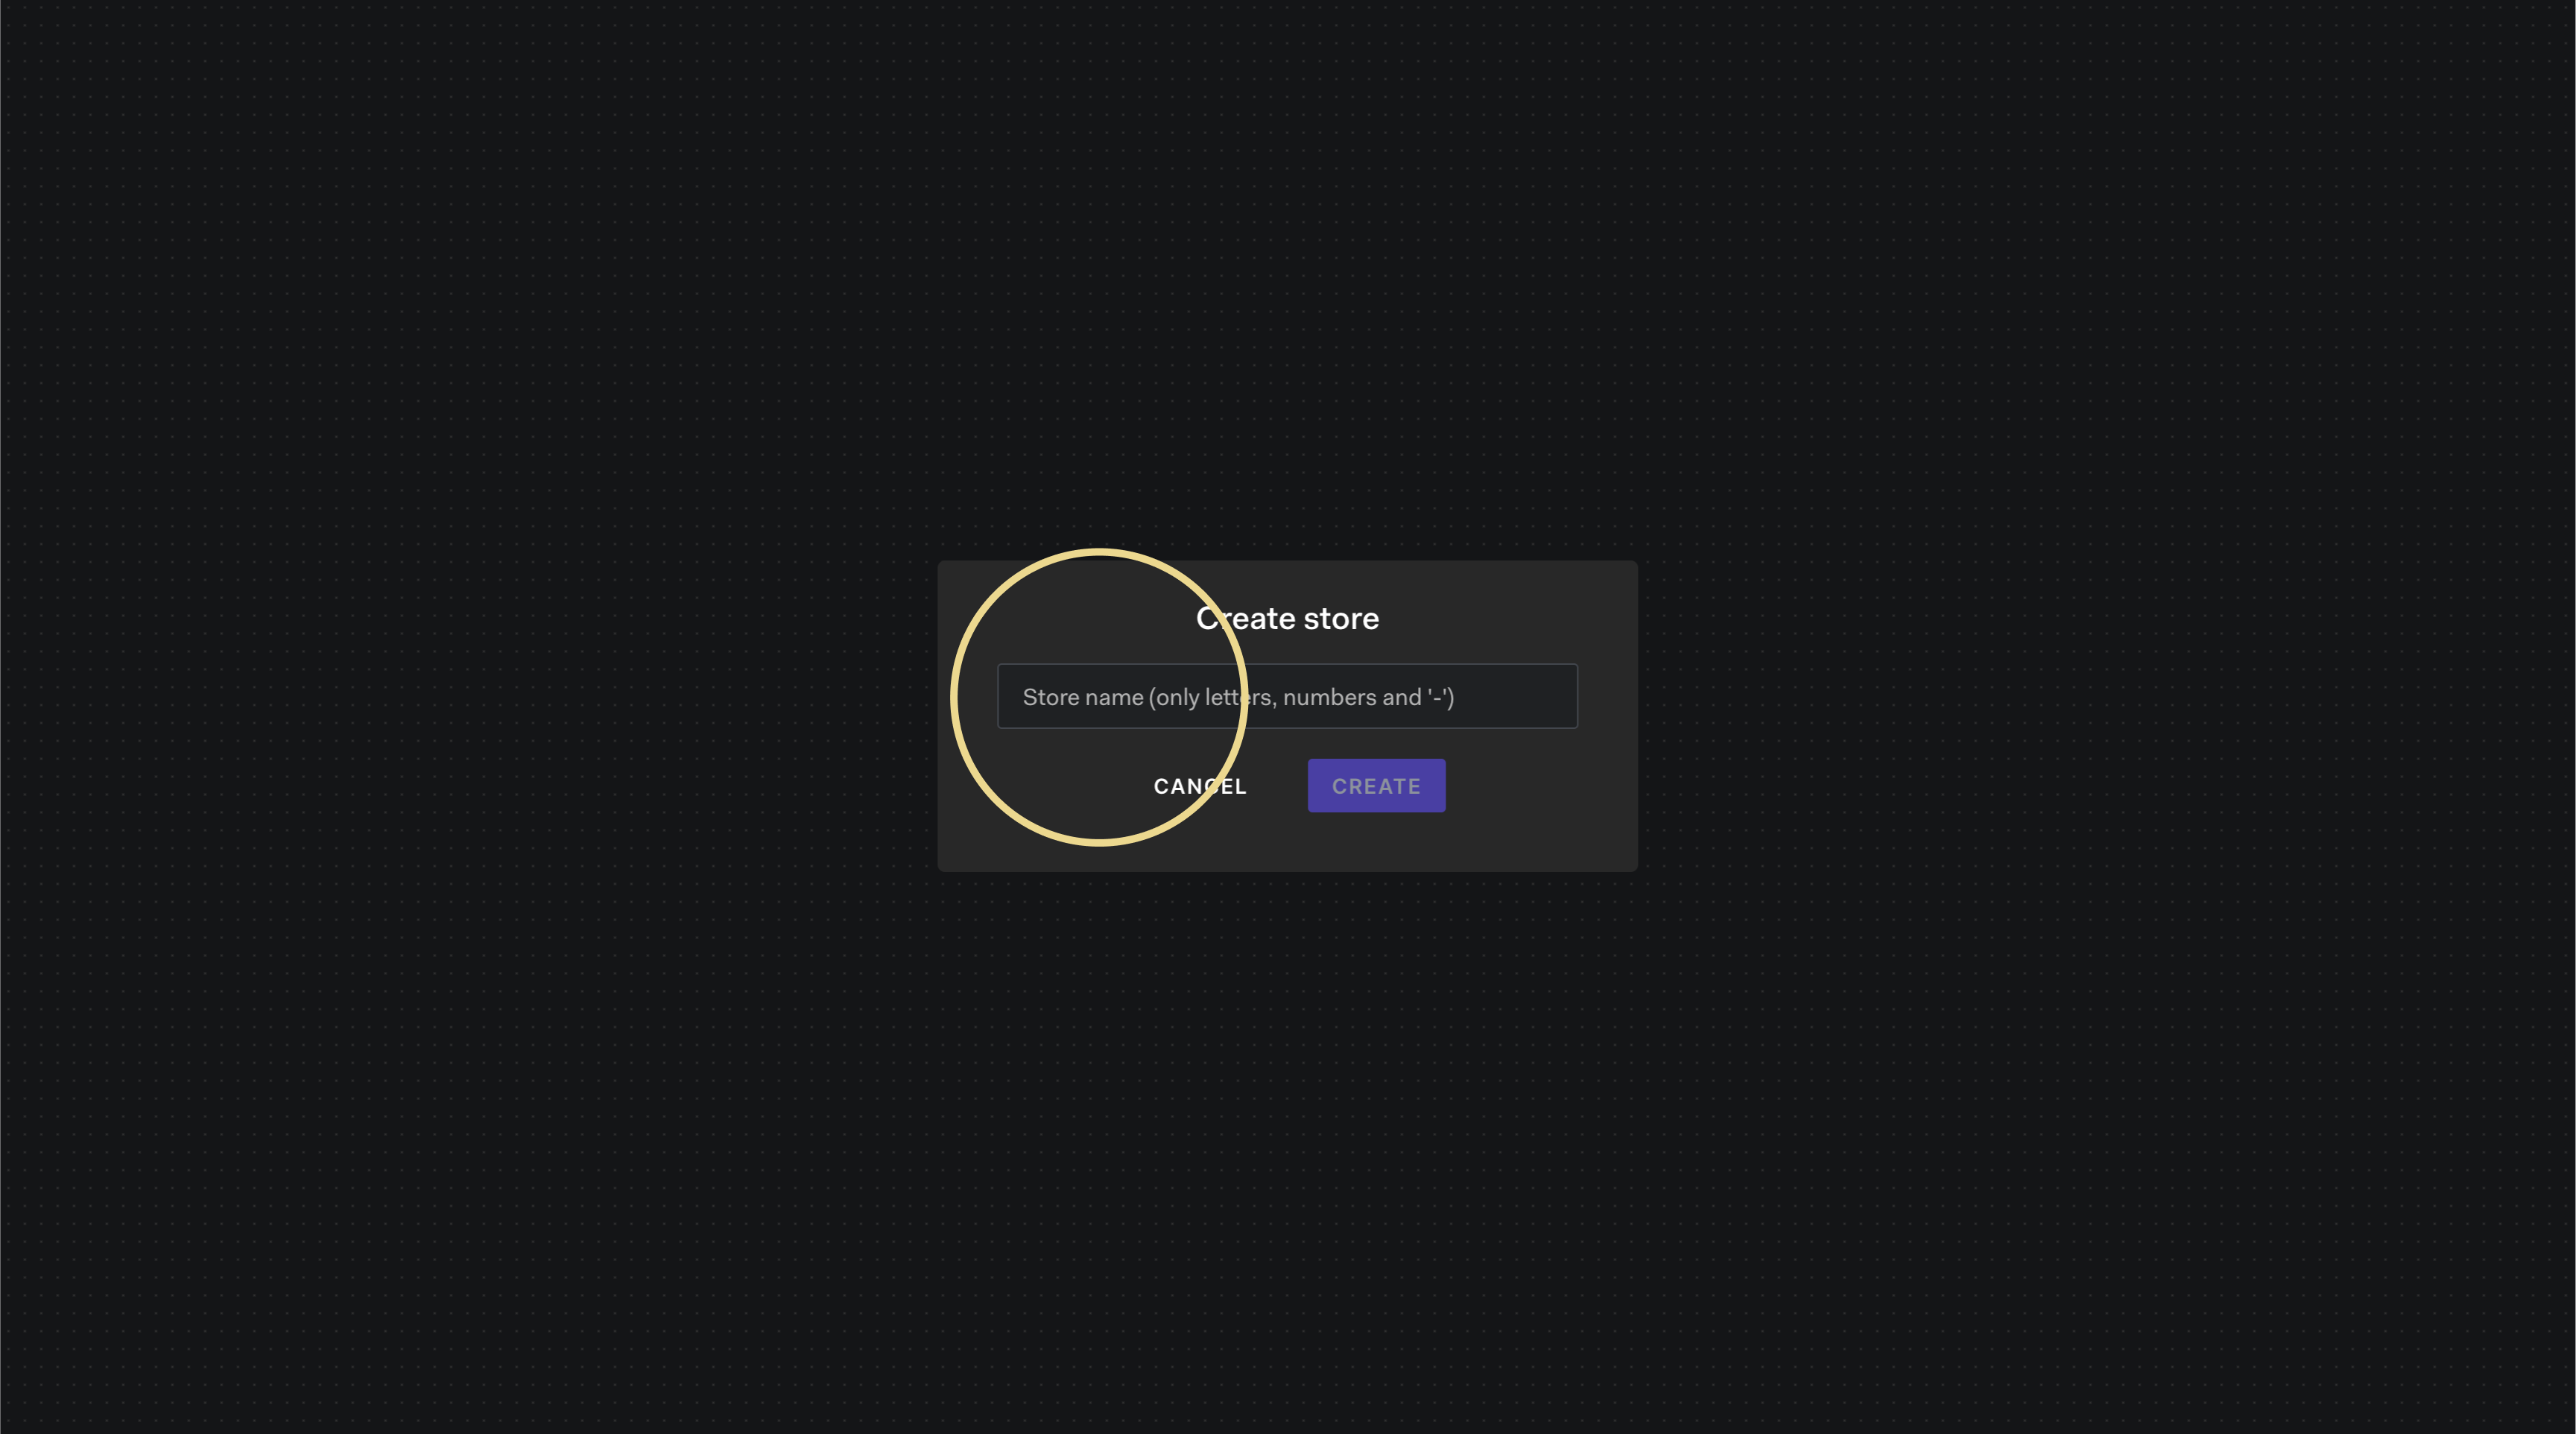
Type in store name in the text box. Note that the store name may only contain letters, numbers and '-'.
-
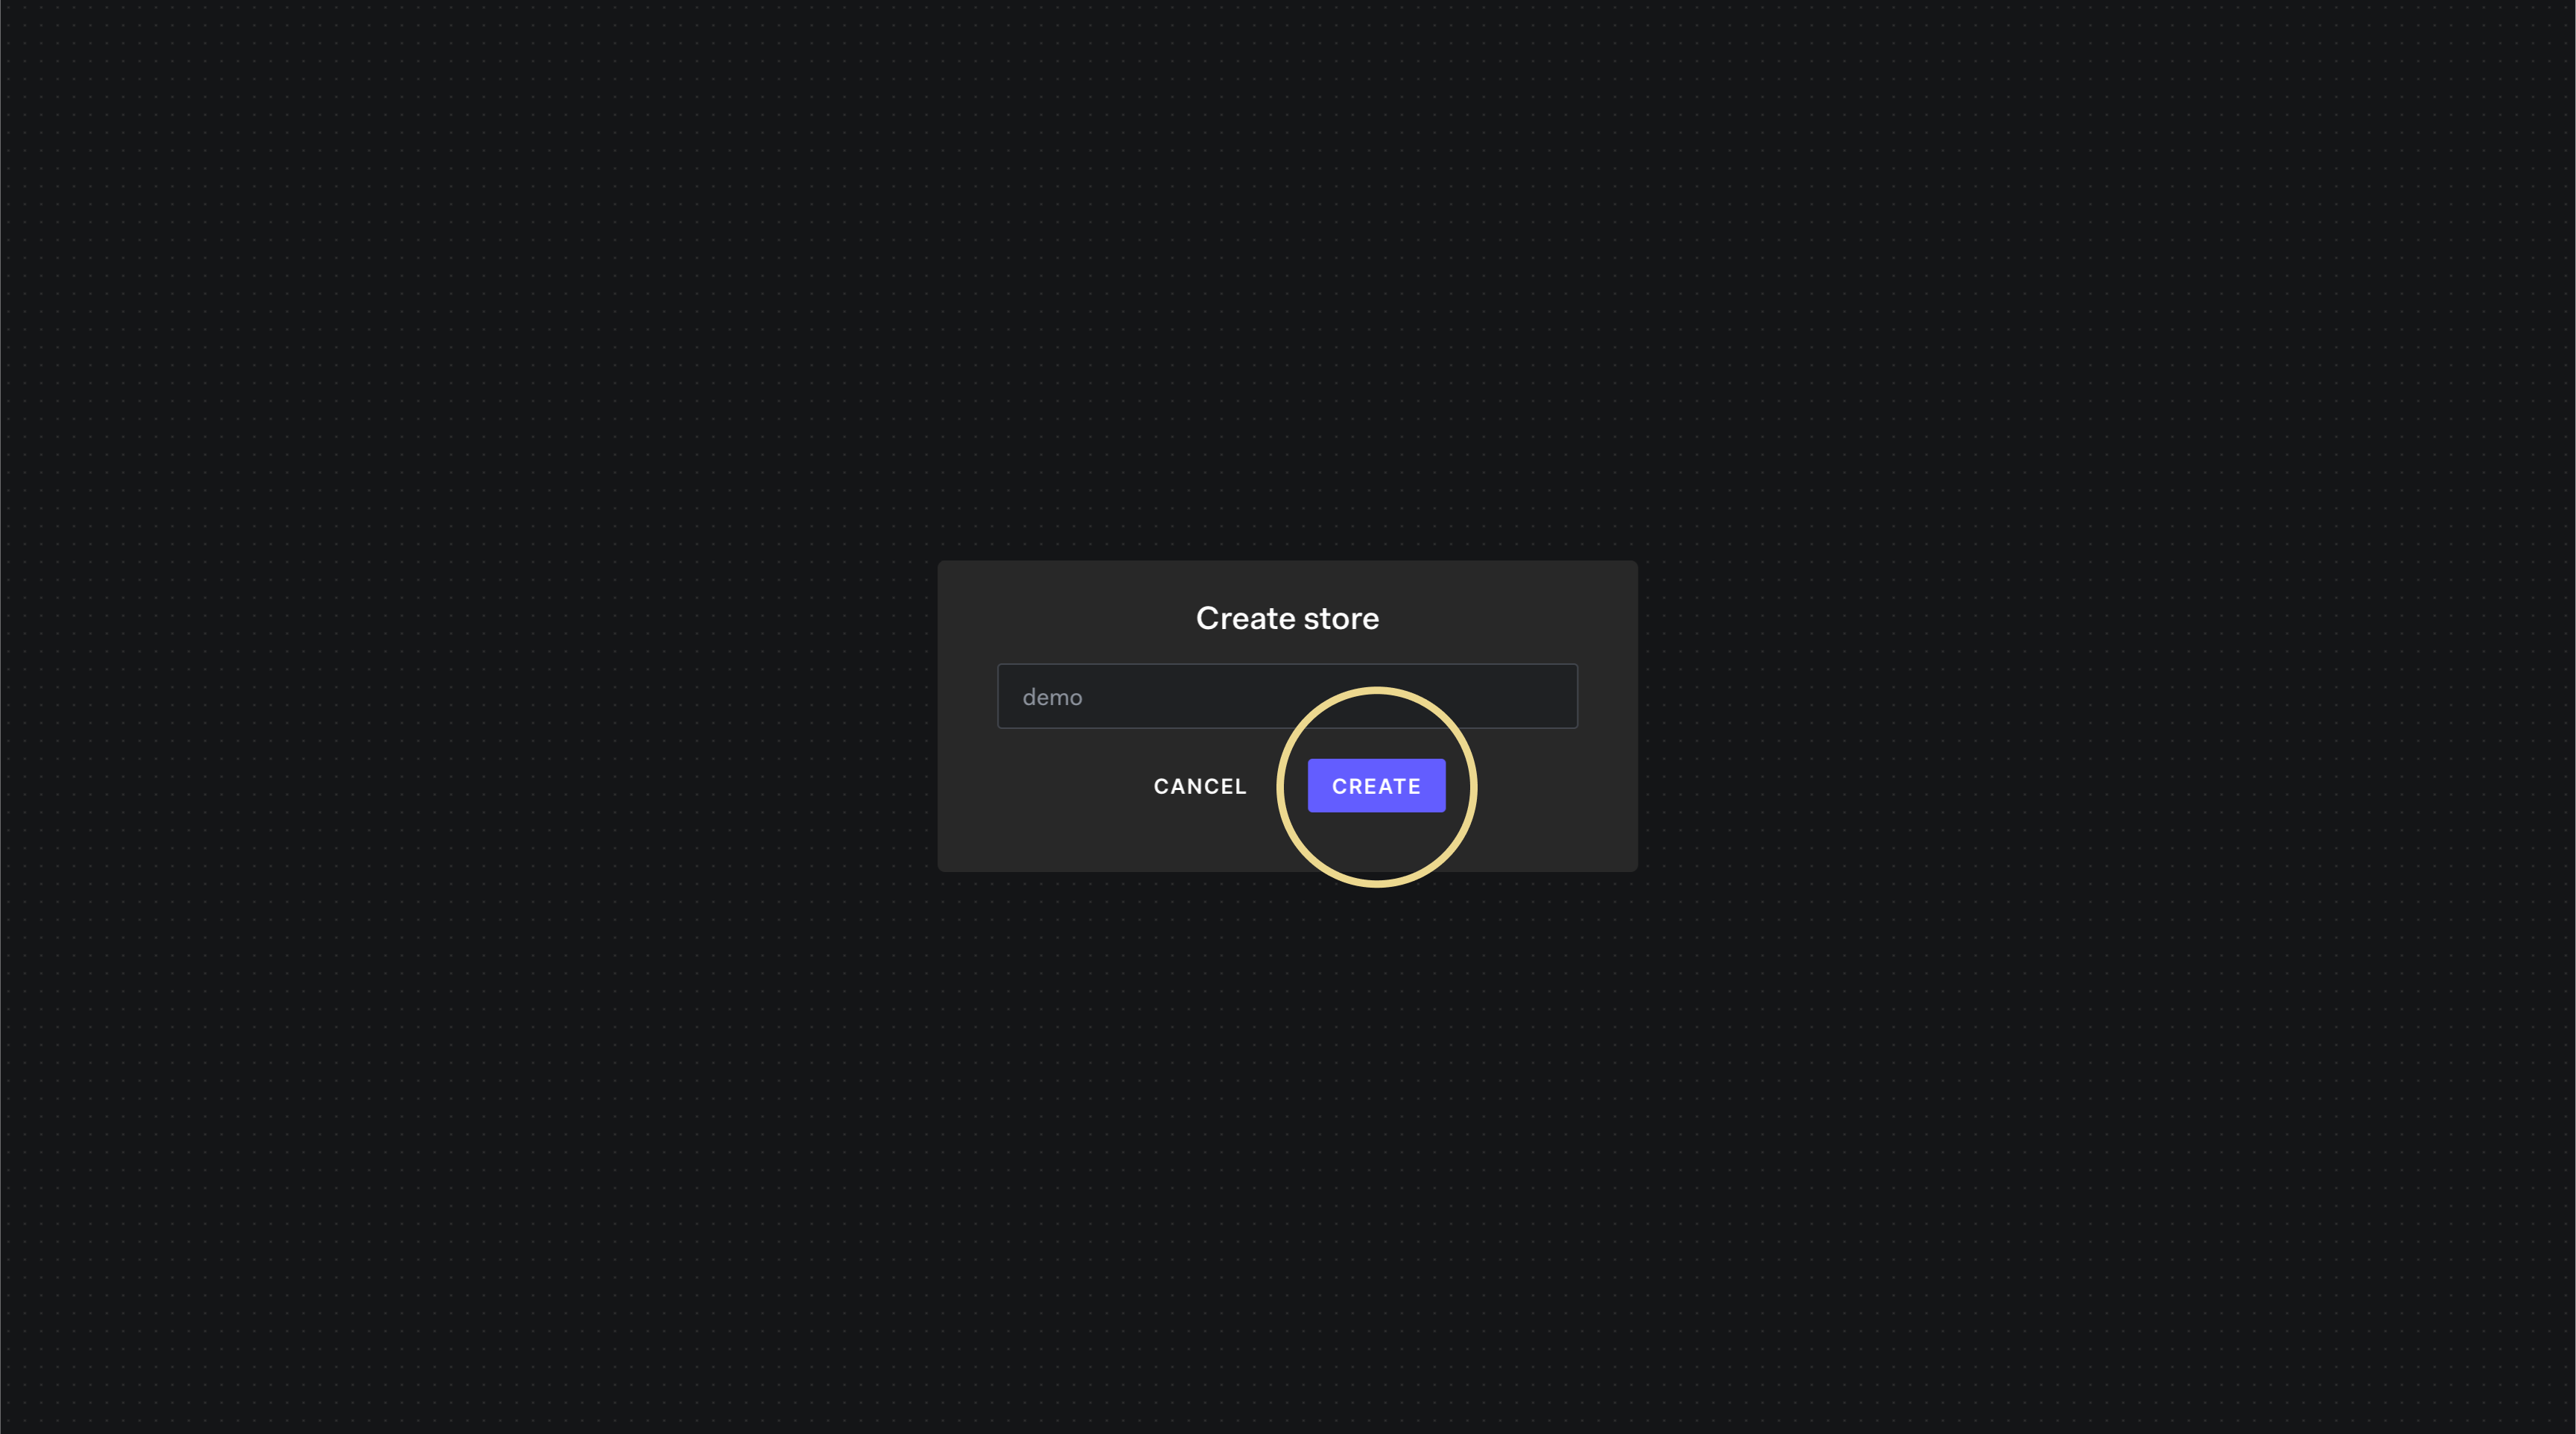
Click CREATE button.
Saving your model
-
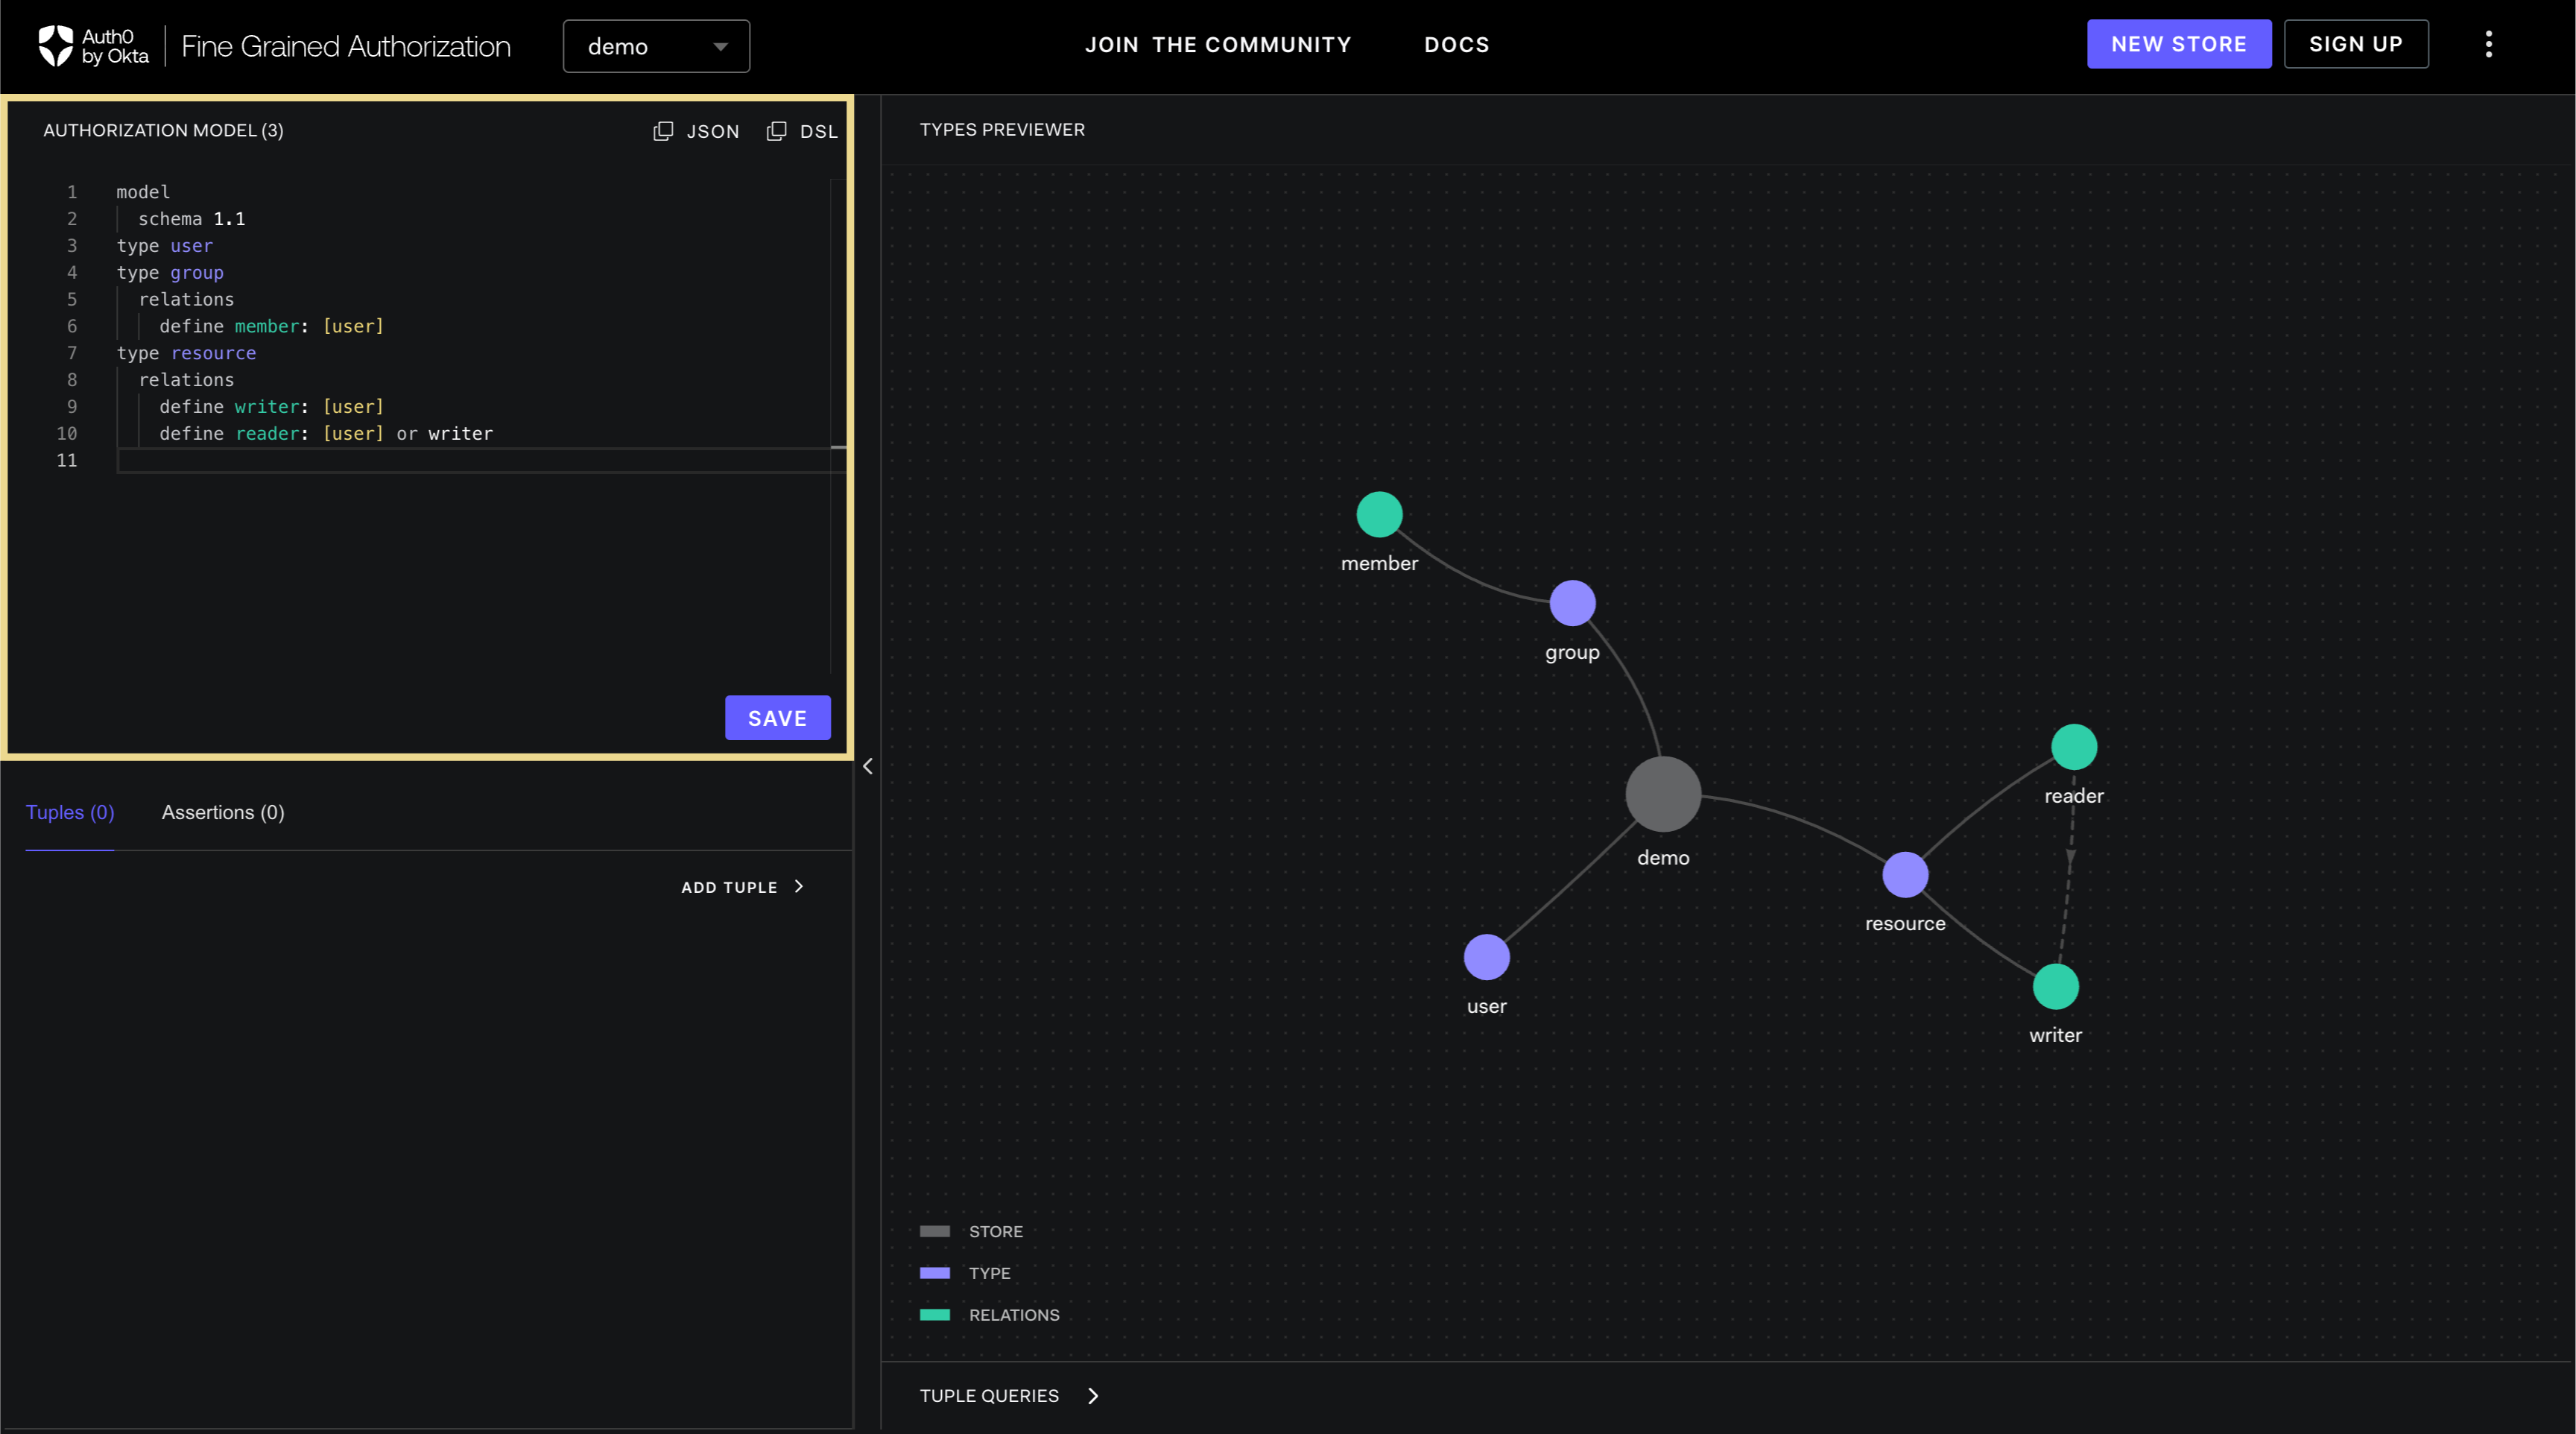
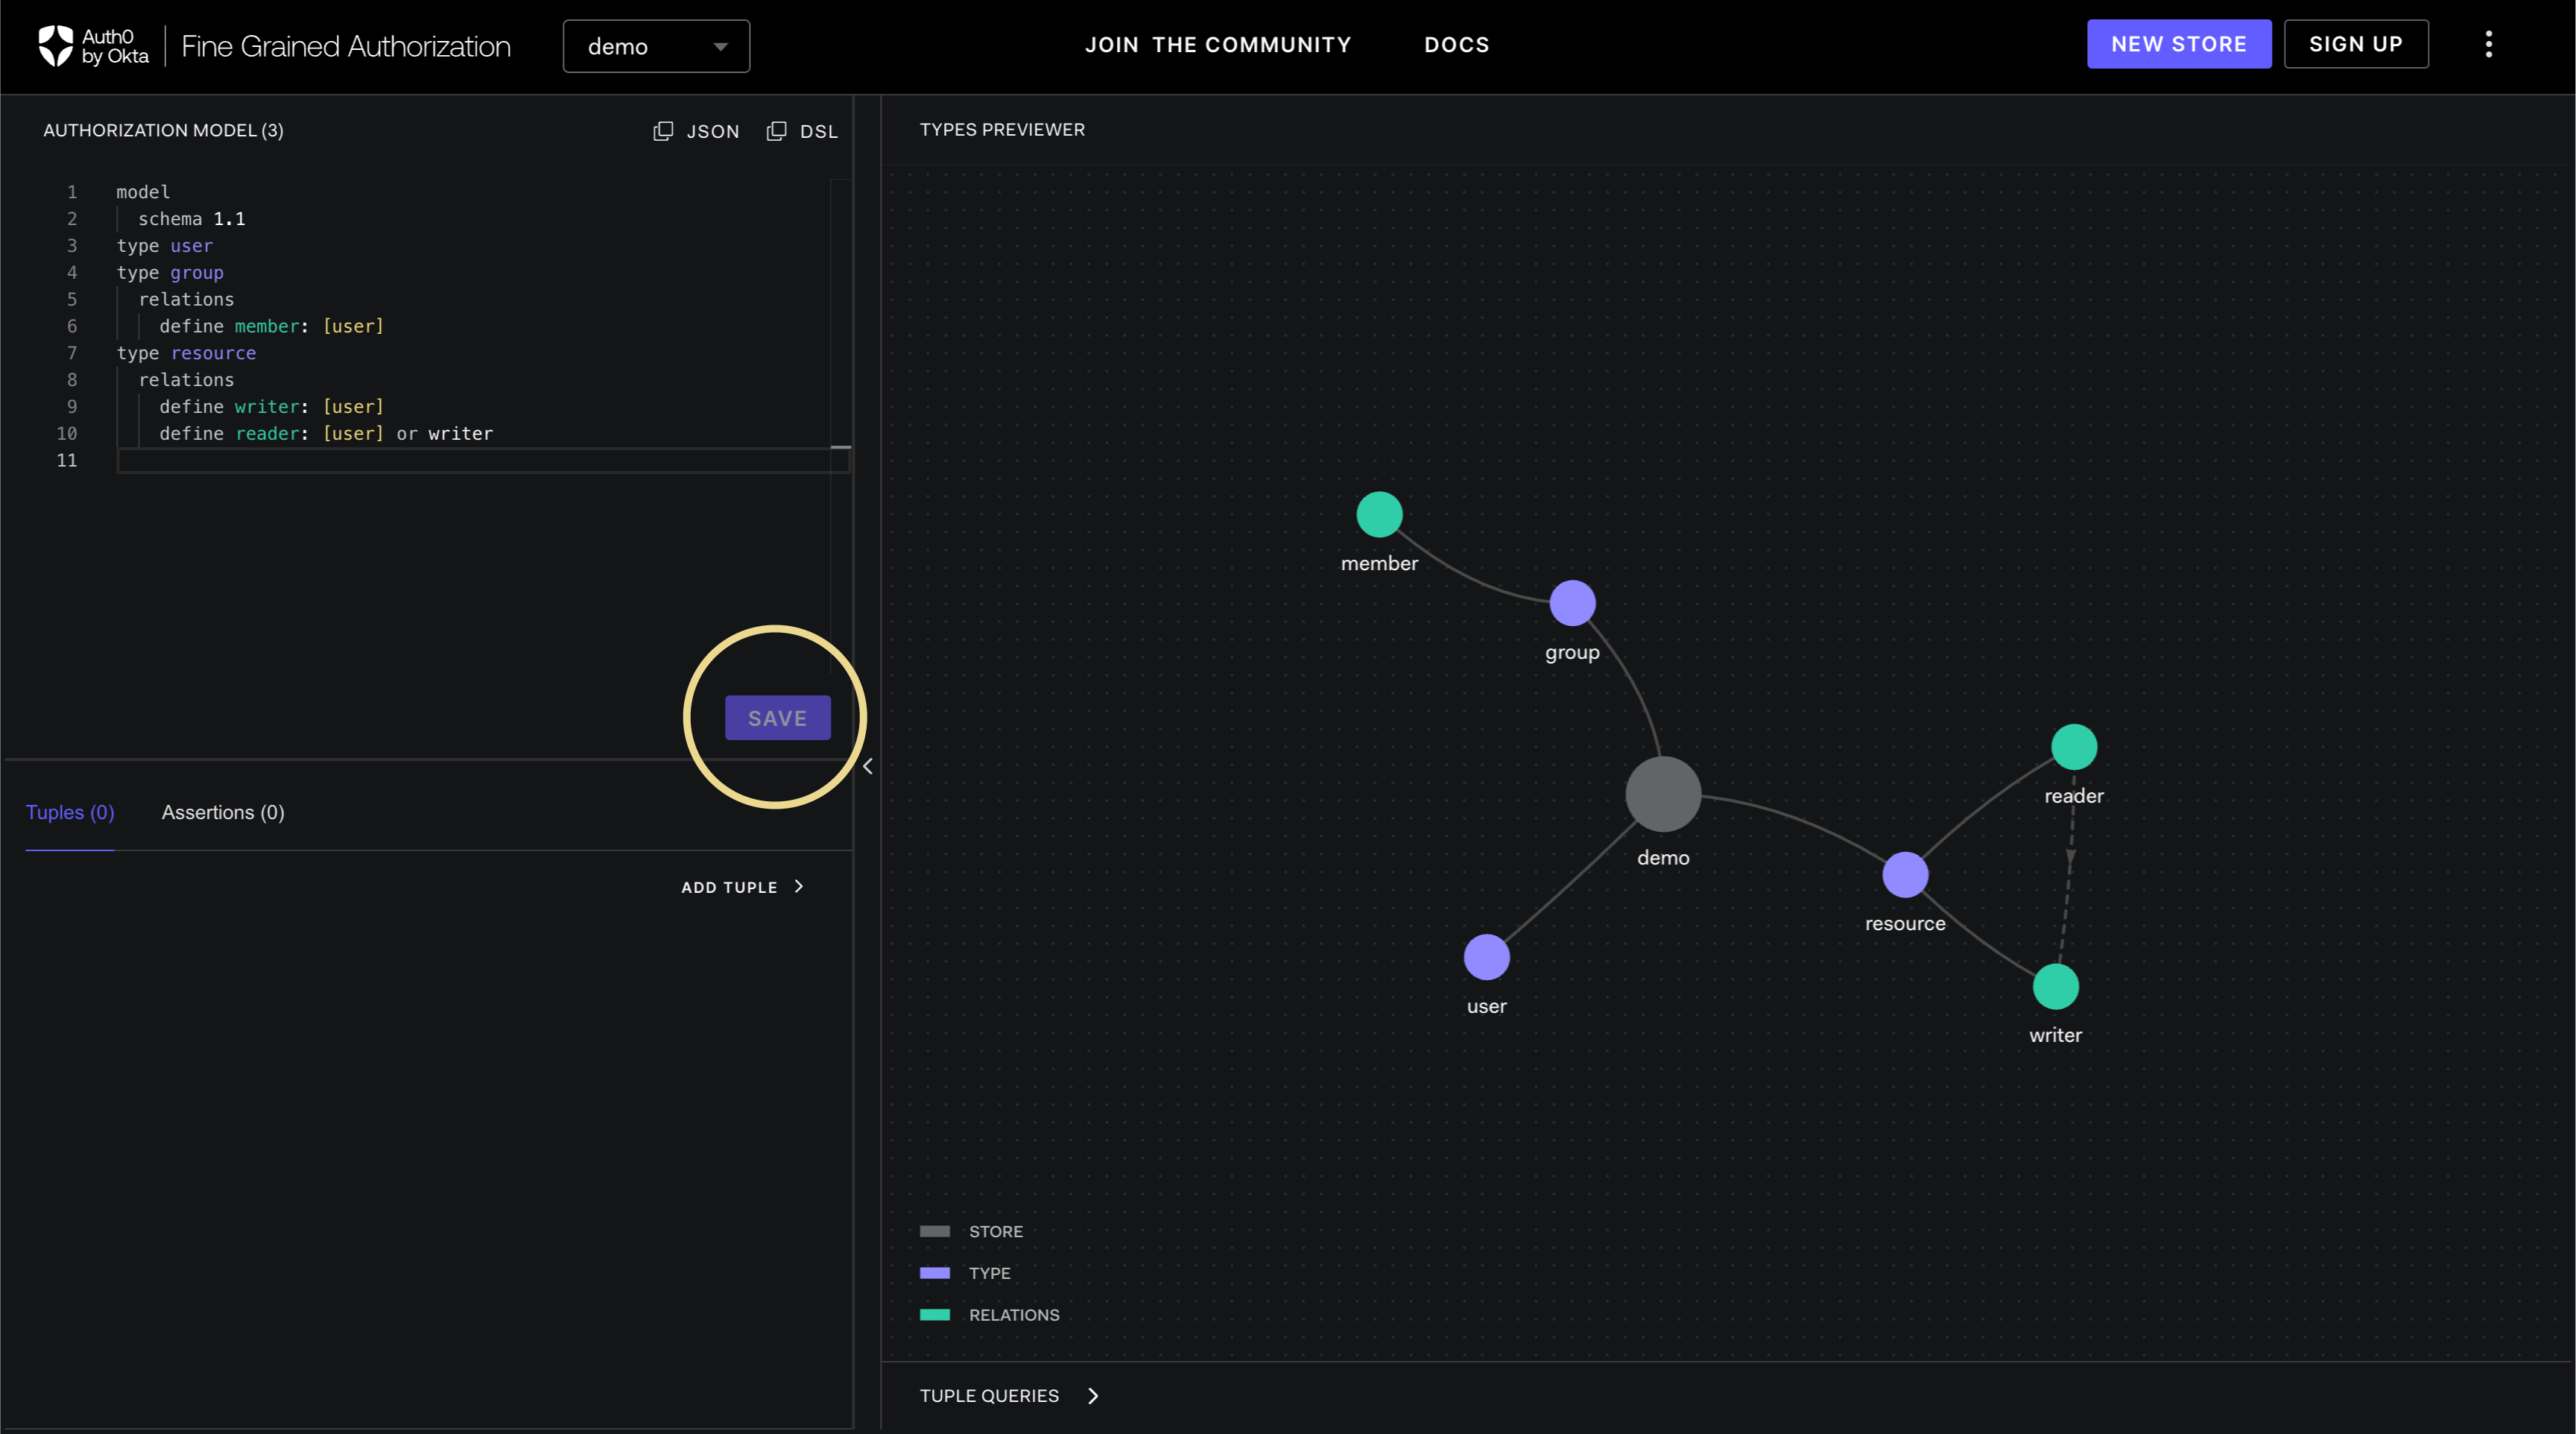
On your User Stores, you may make changes to the authorization model in the types panel located on the upper left part of the screen. Note that only the DSL syntax is supported.
-
After the changes are made, click SAVE.

-
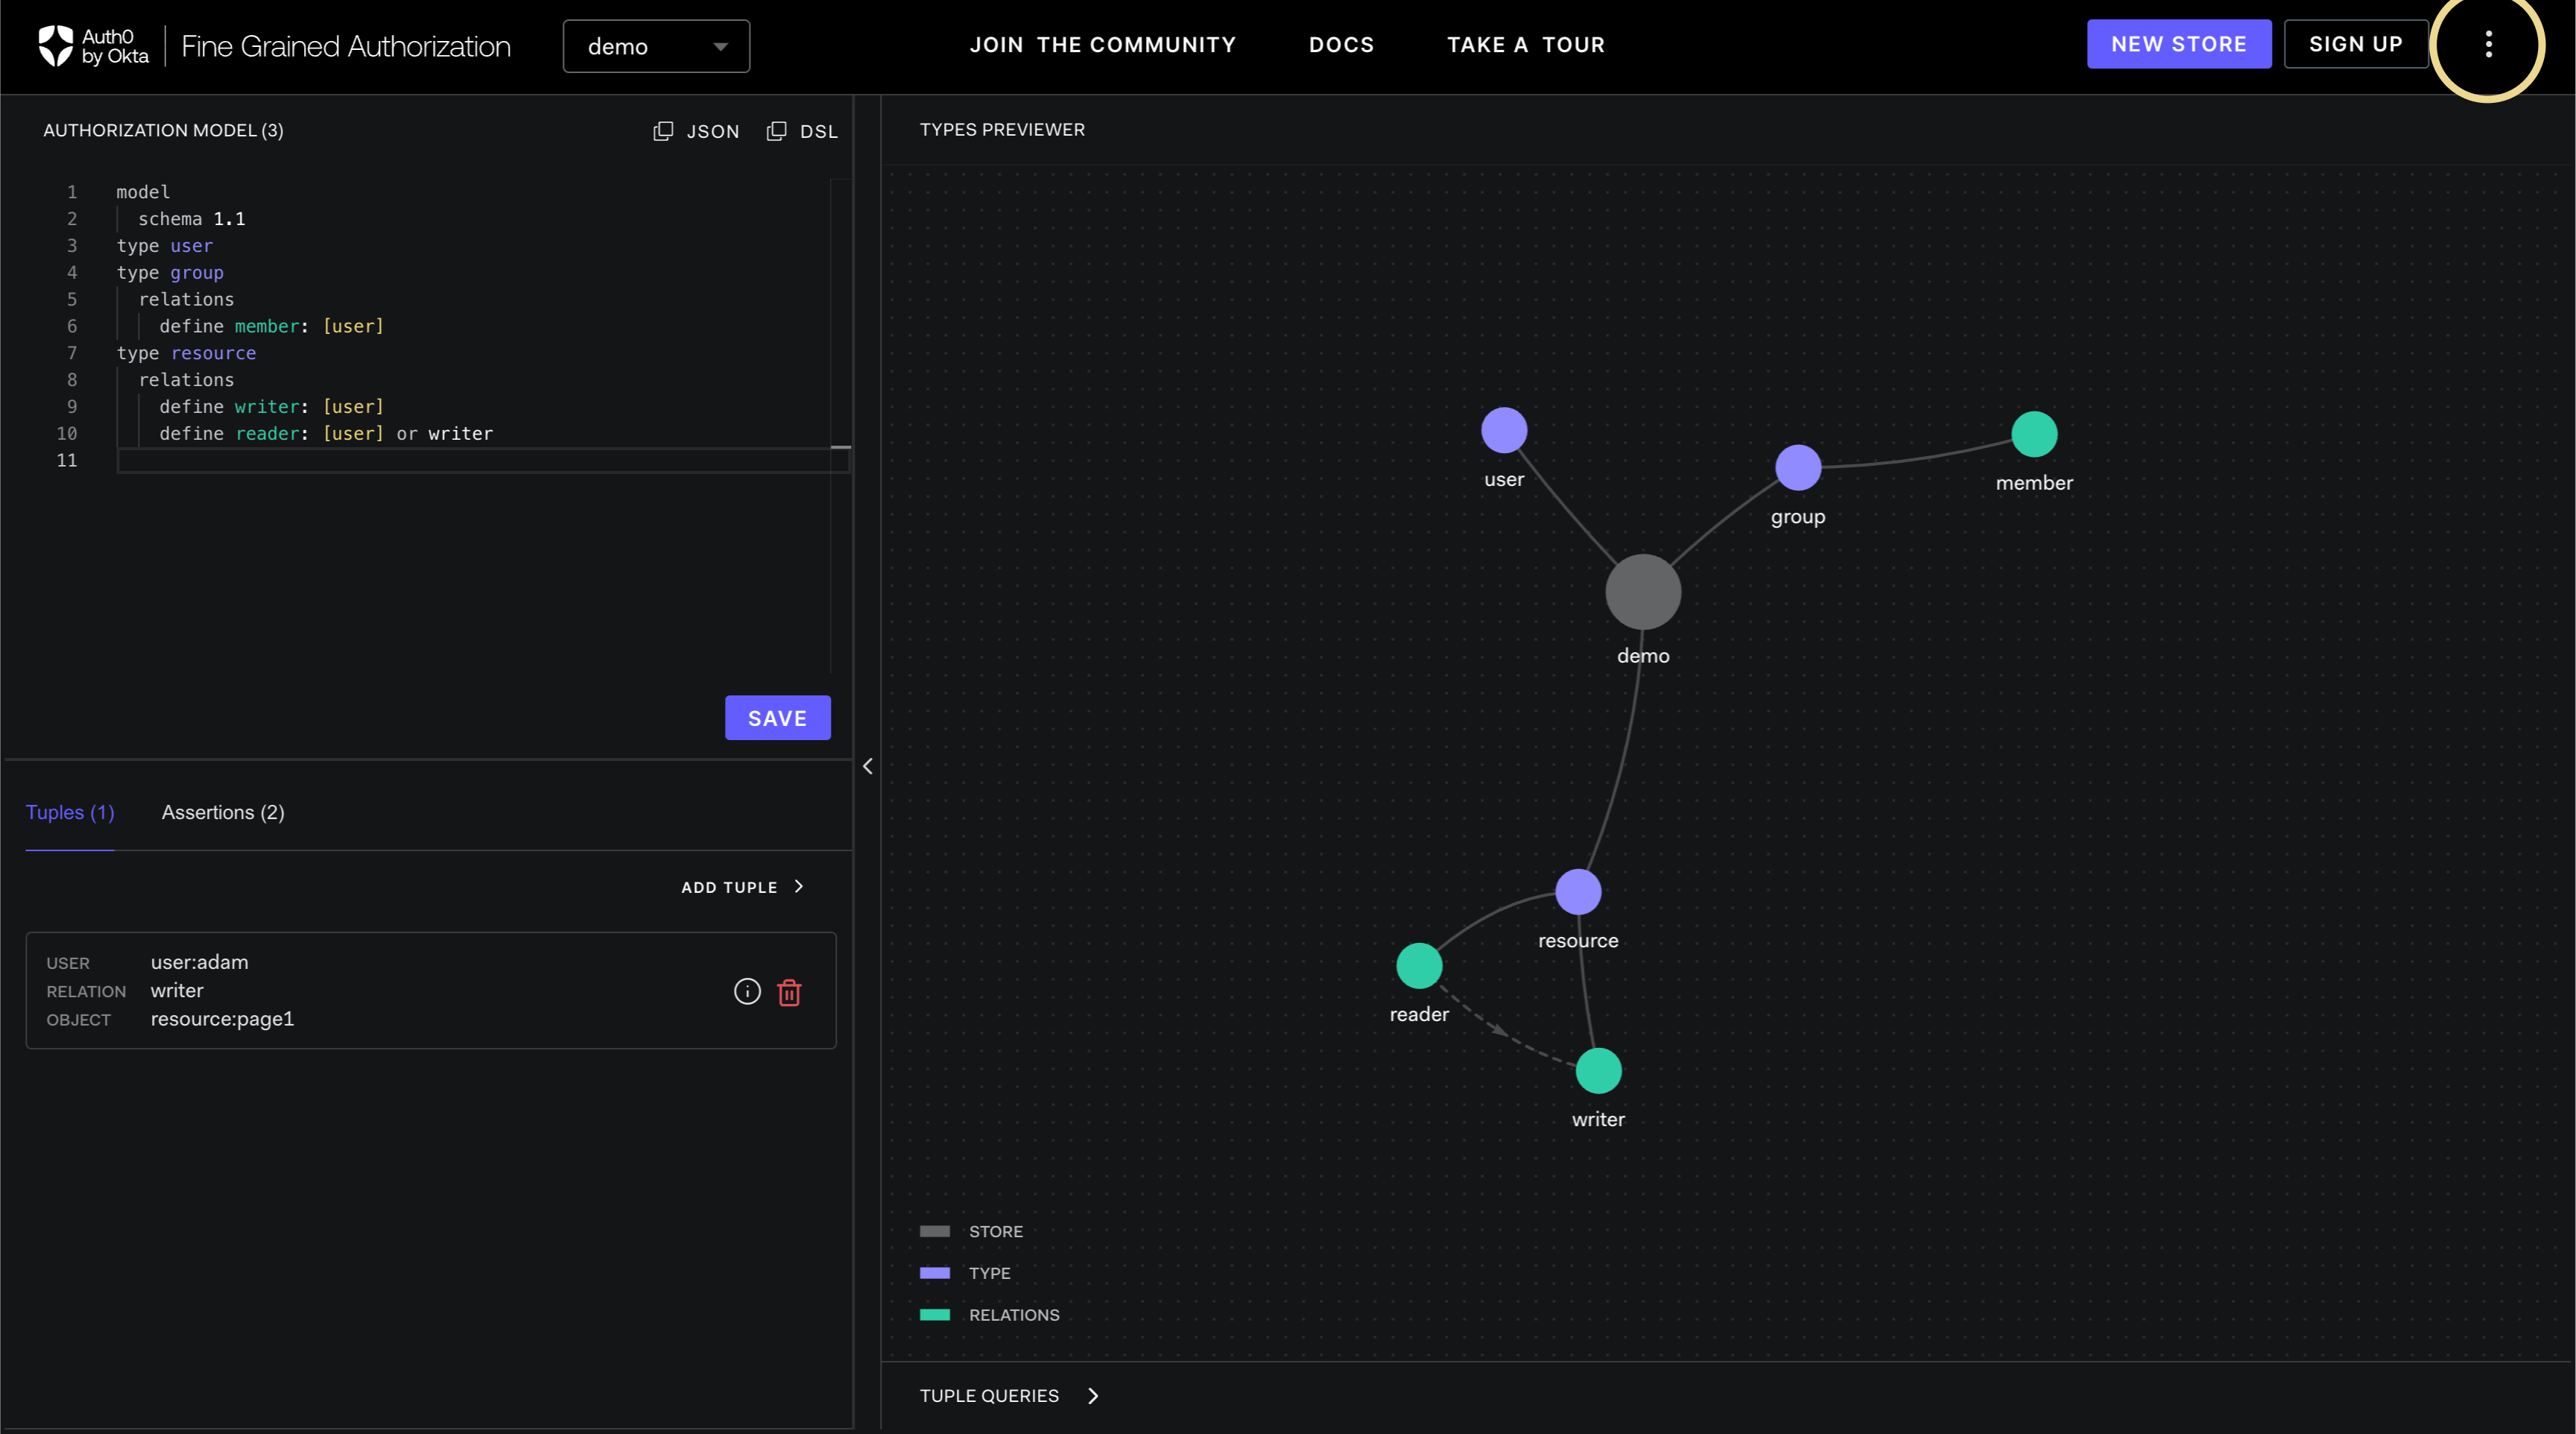
After the authorization model is saved, the Types Previewer will be updated with the new authorization model preview.
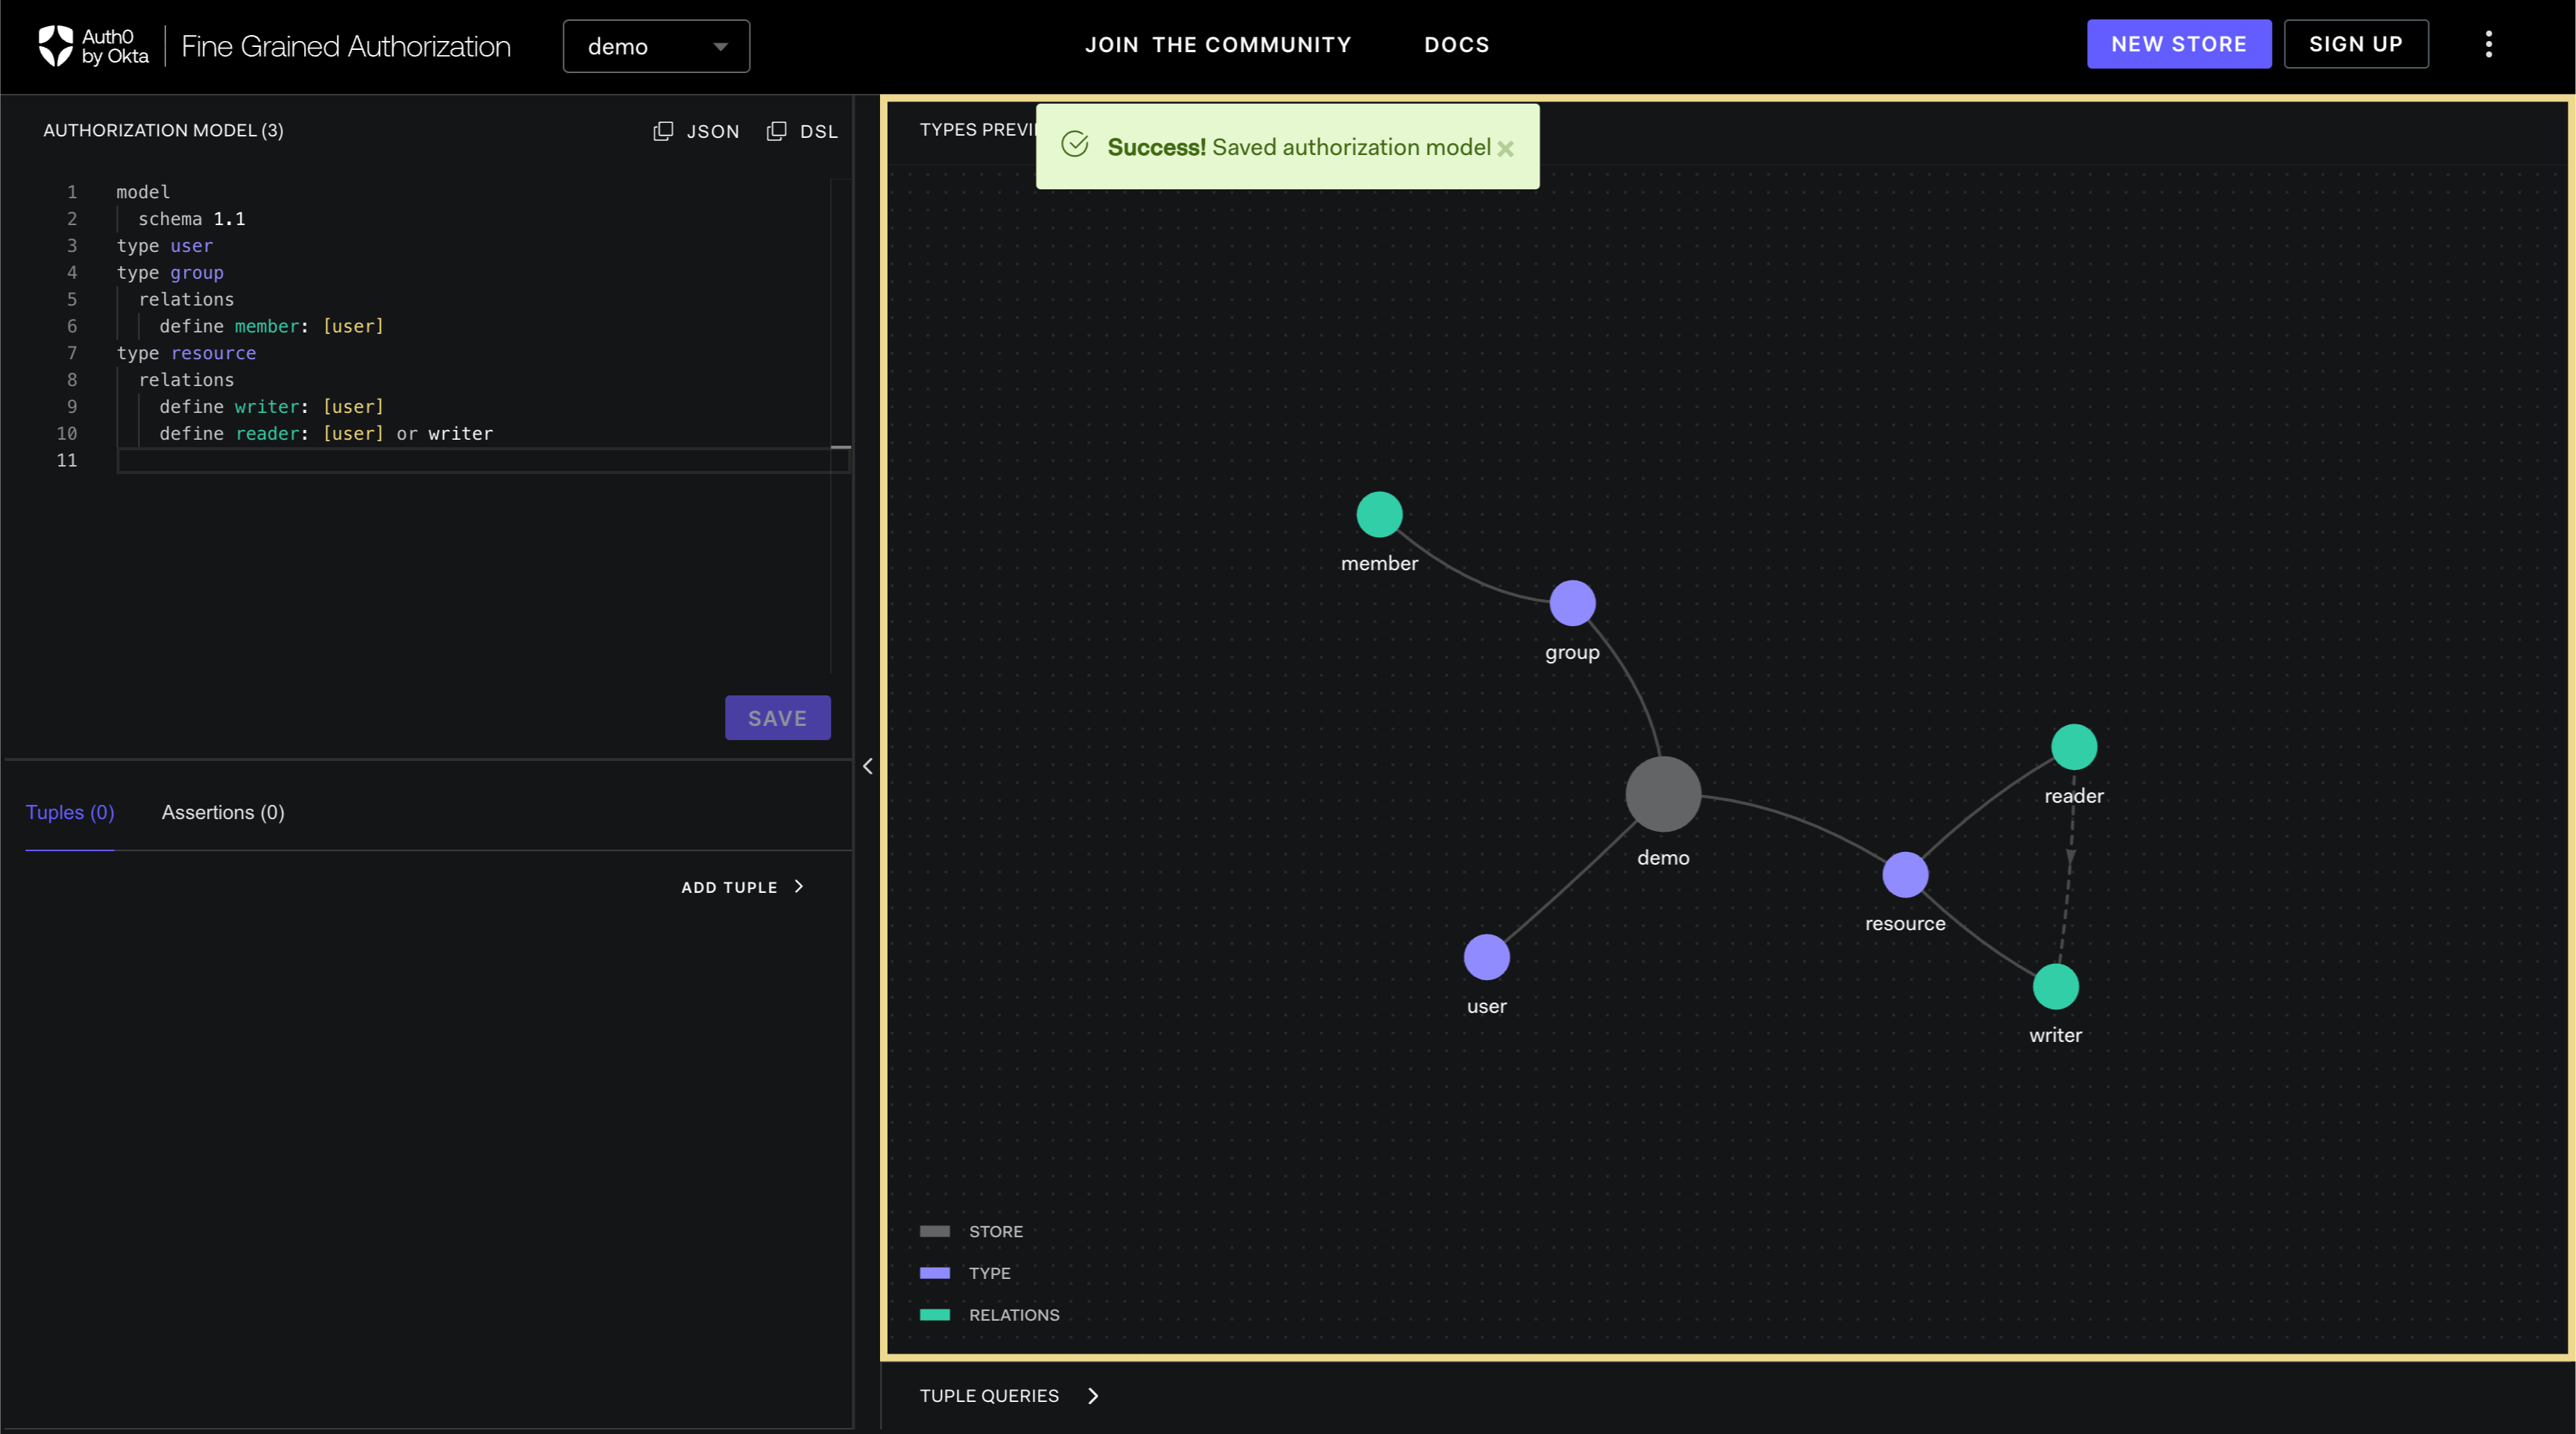
-
After the authorization model is saved, the SAVE button is no longer active.
 info
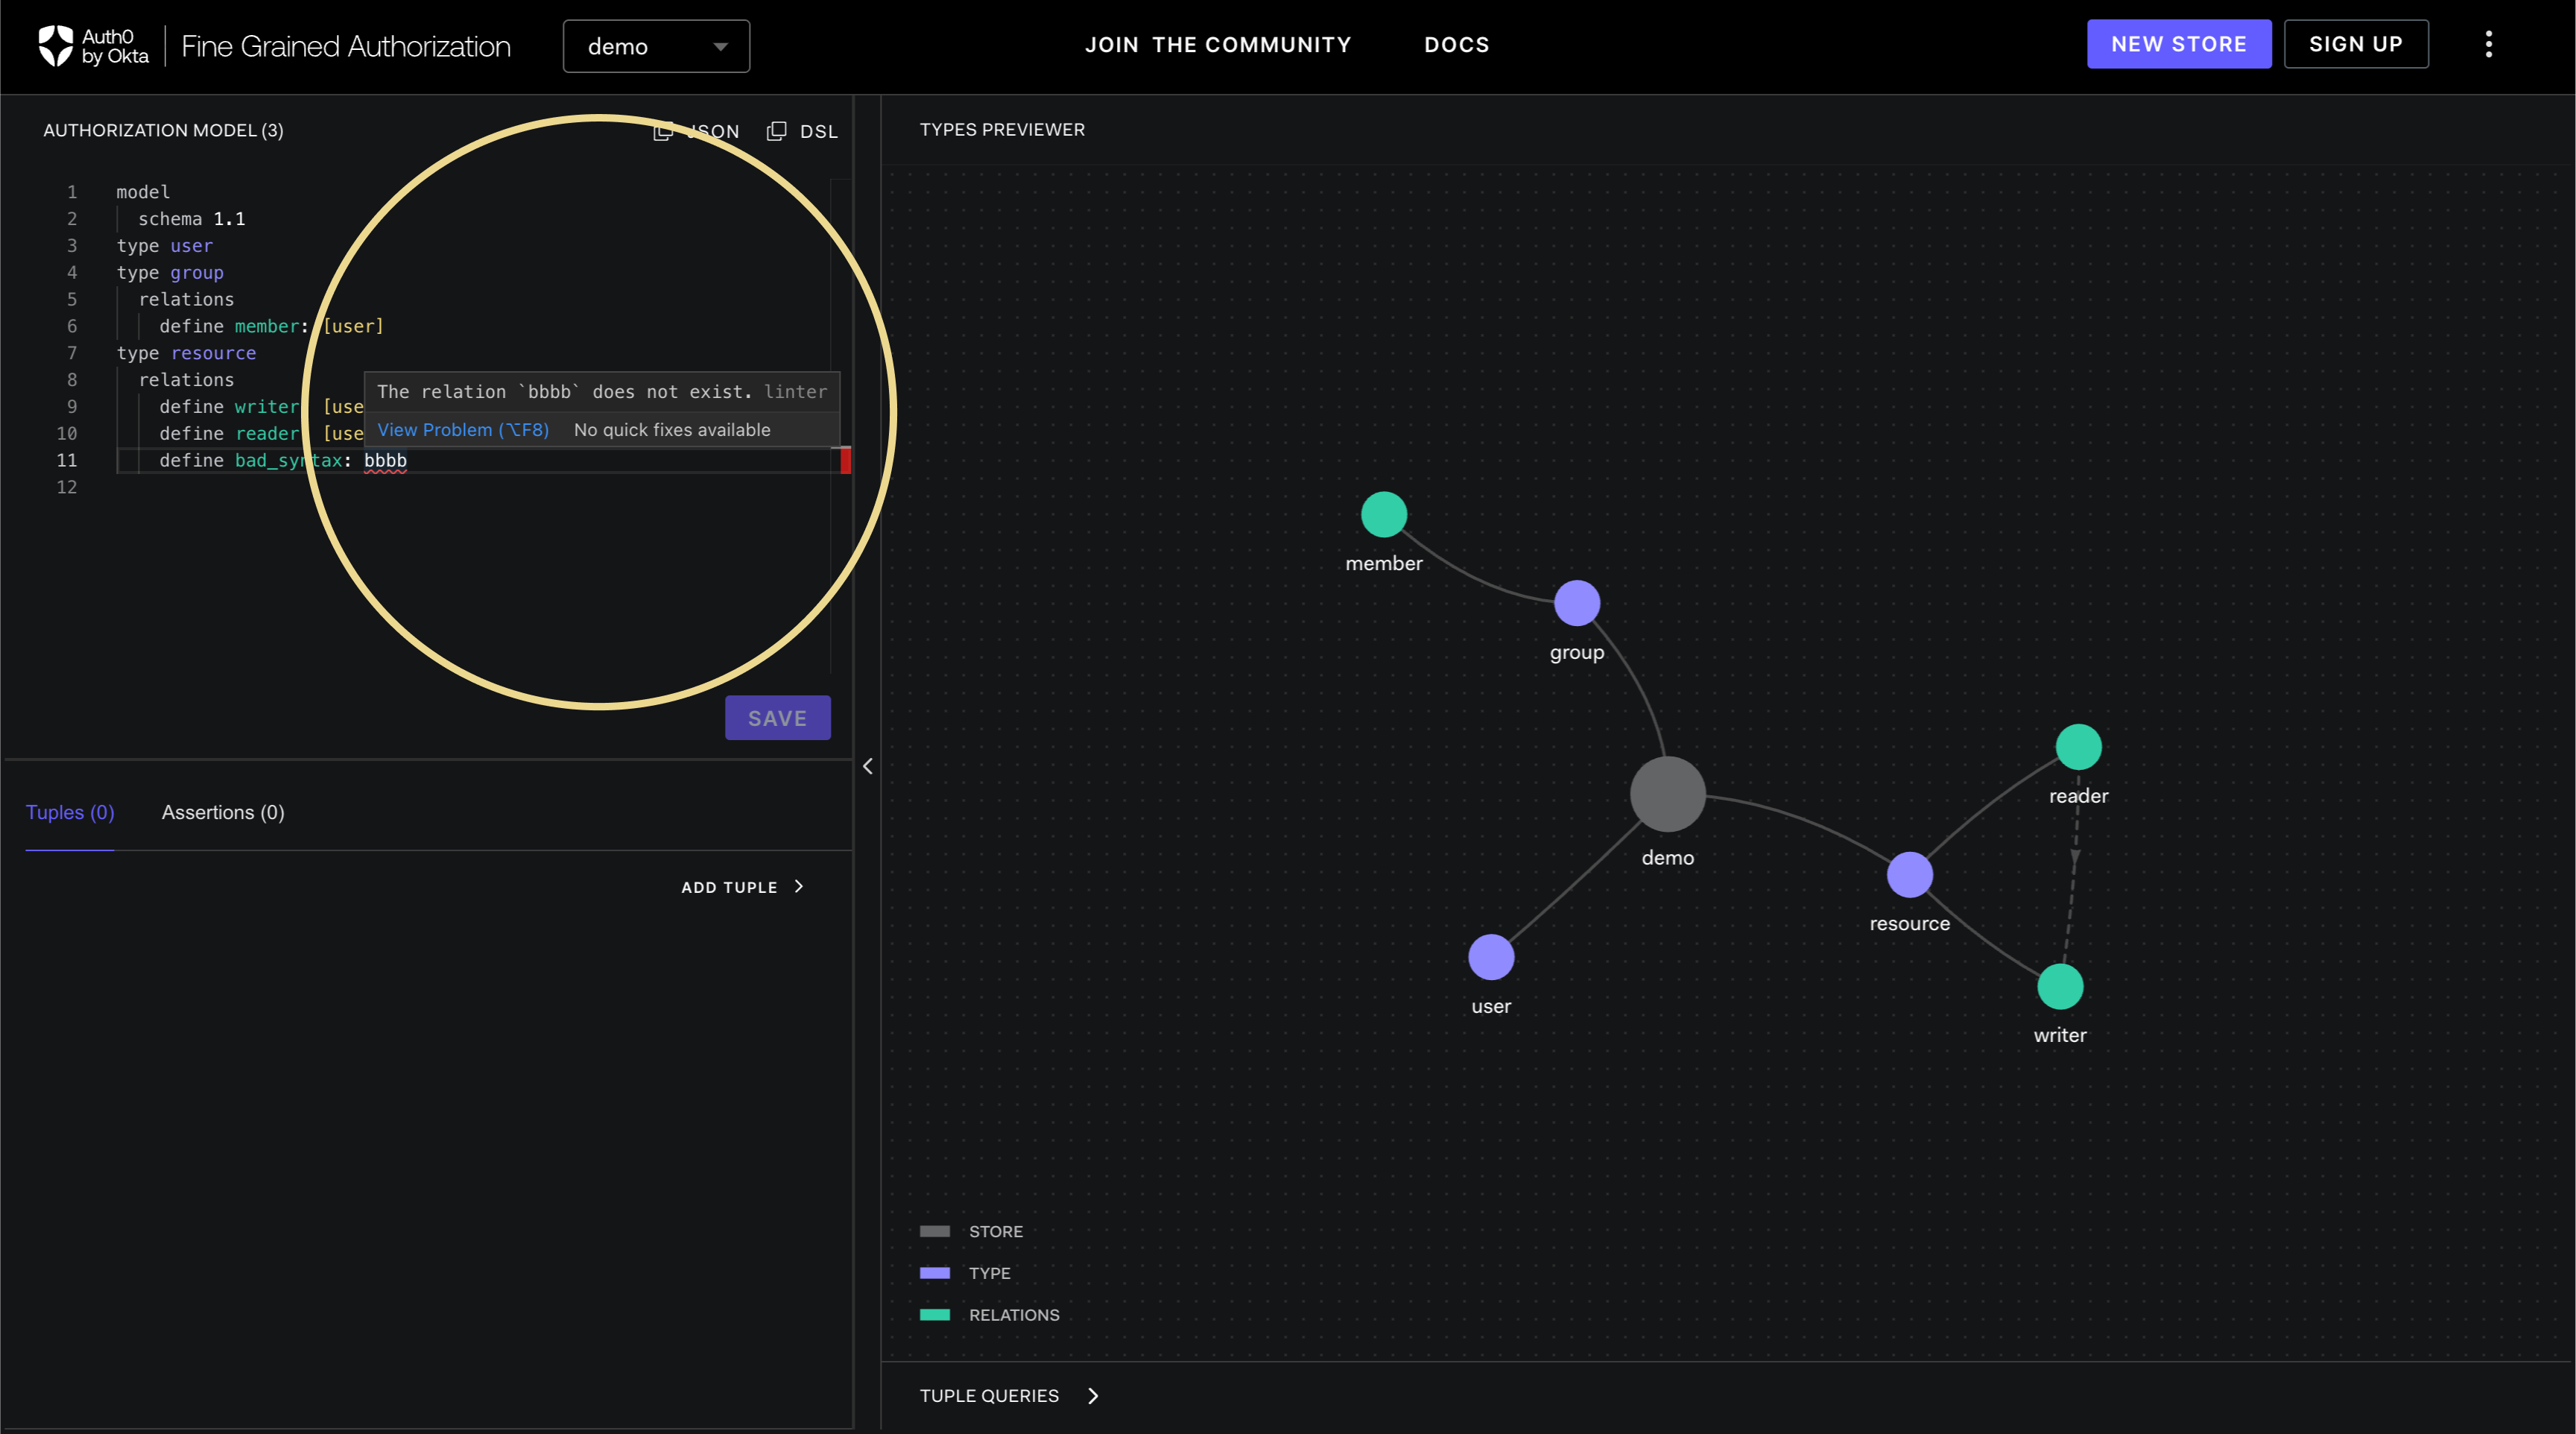
info- Playground will only save if there are no syntax errors.
infoSyntax errors will be highlighted in red. Hovering the mouse over the error will provide additional details.
Adding relationship tuples
-
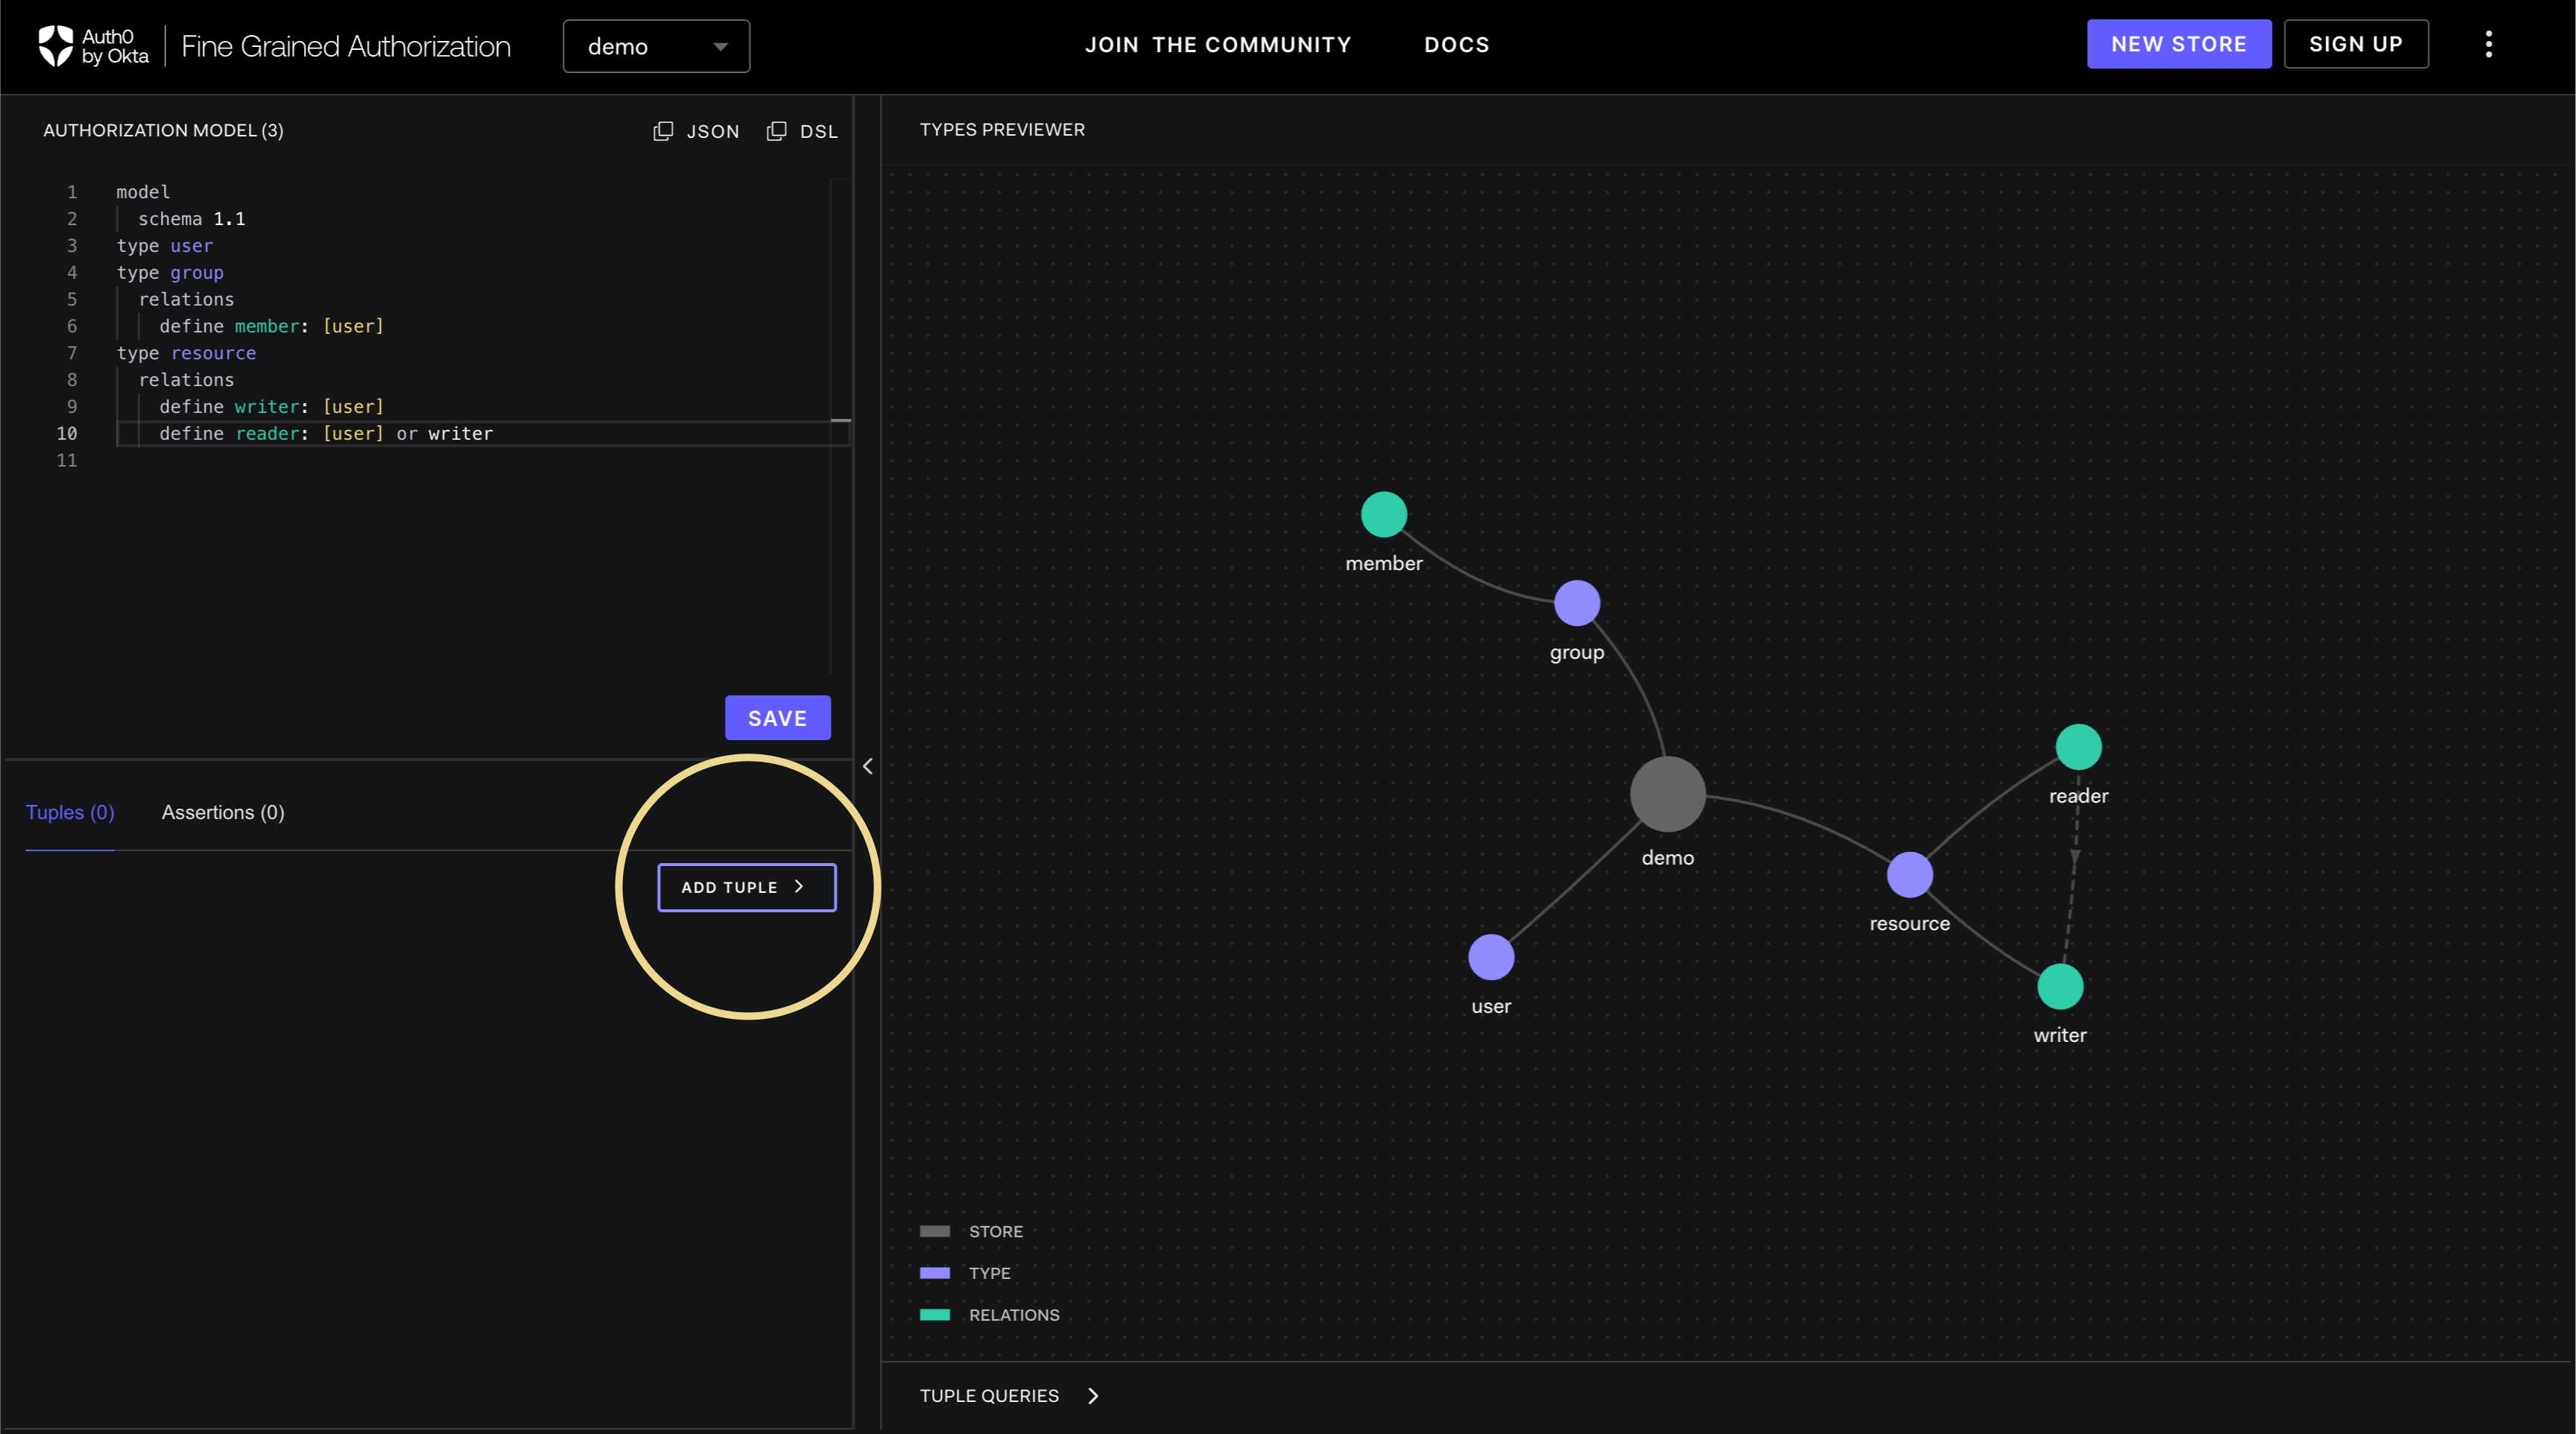
On your User Stores, you may add relationship tuples in the relationship tuples panel located on the lower left part of the screen.
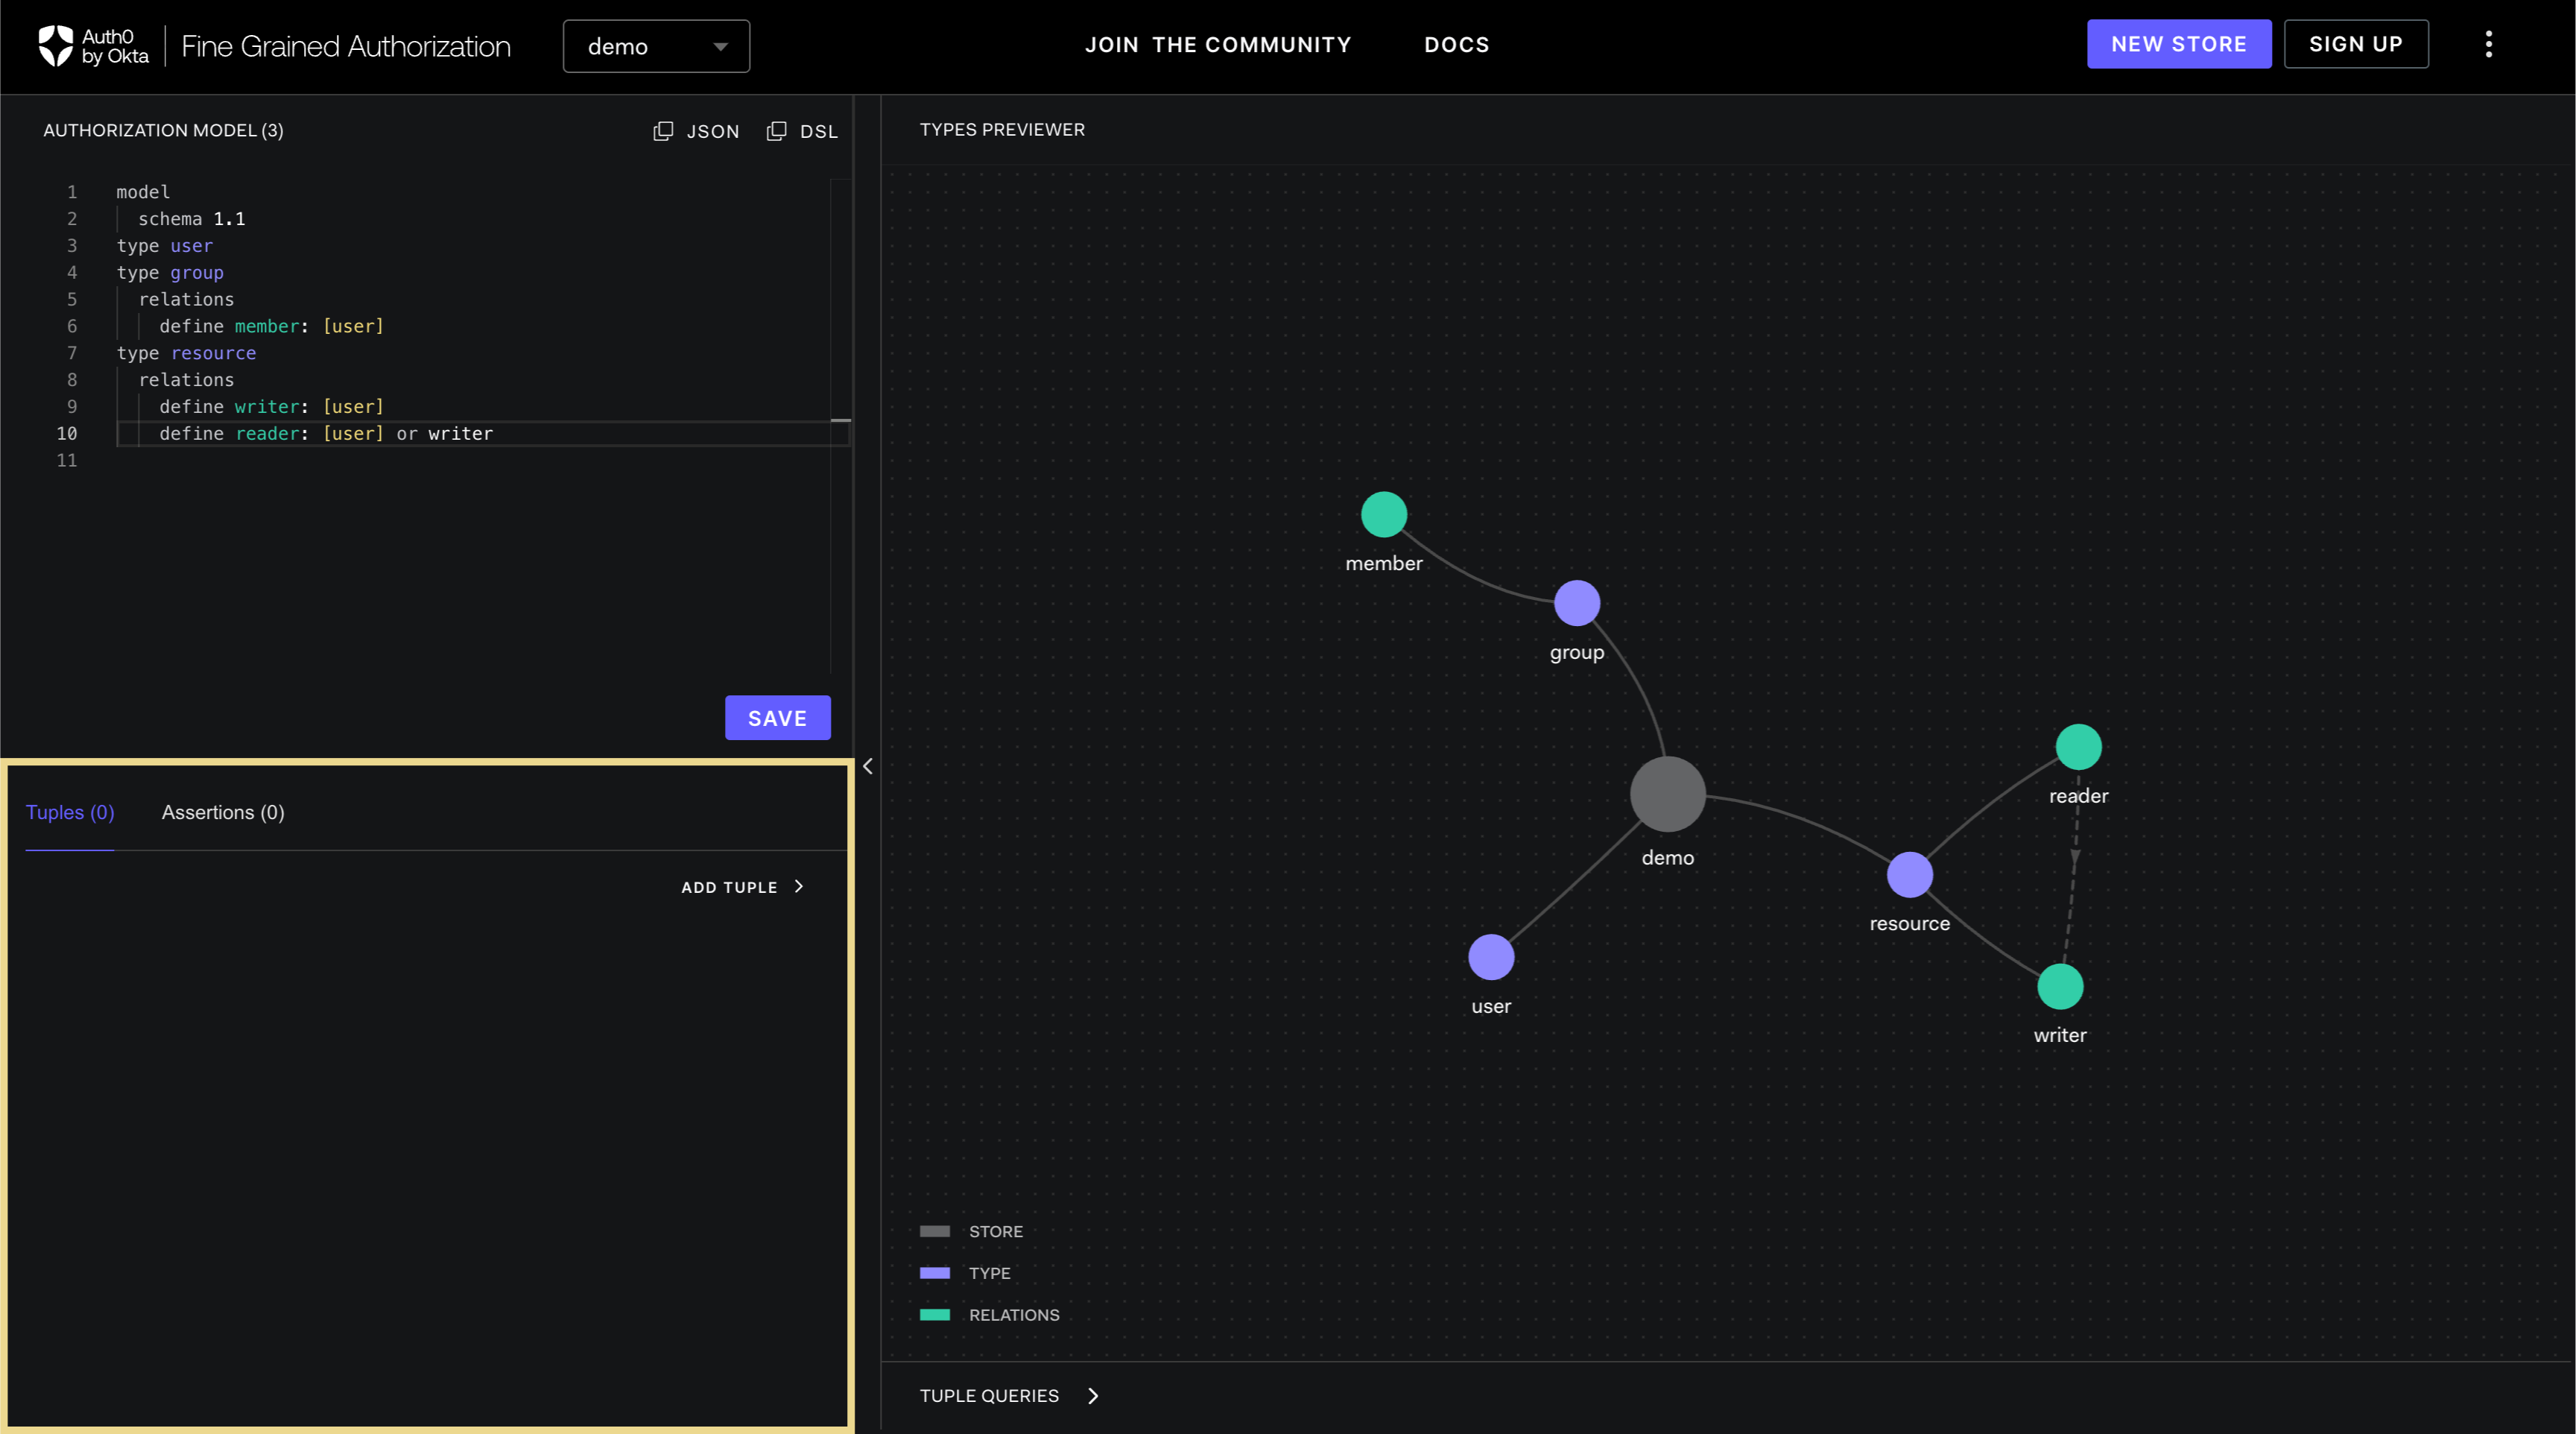
-
Click ADD TUPLE to add new relationship tuples.
-
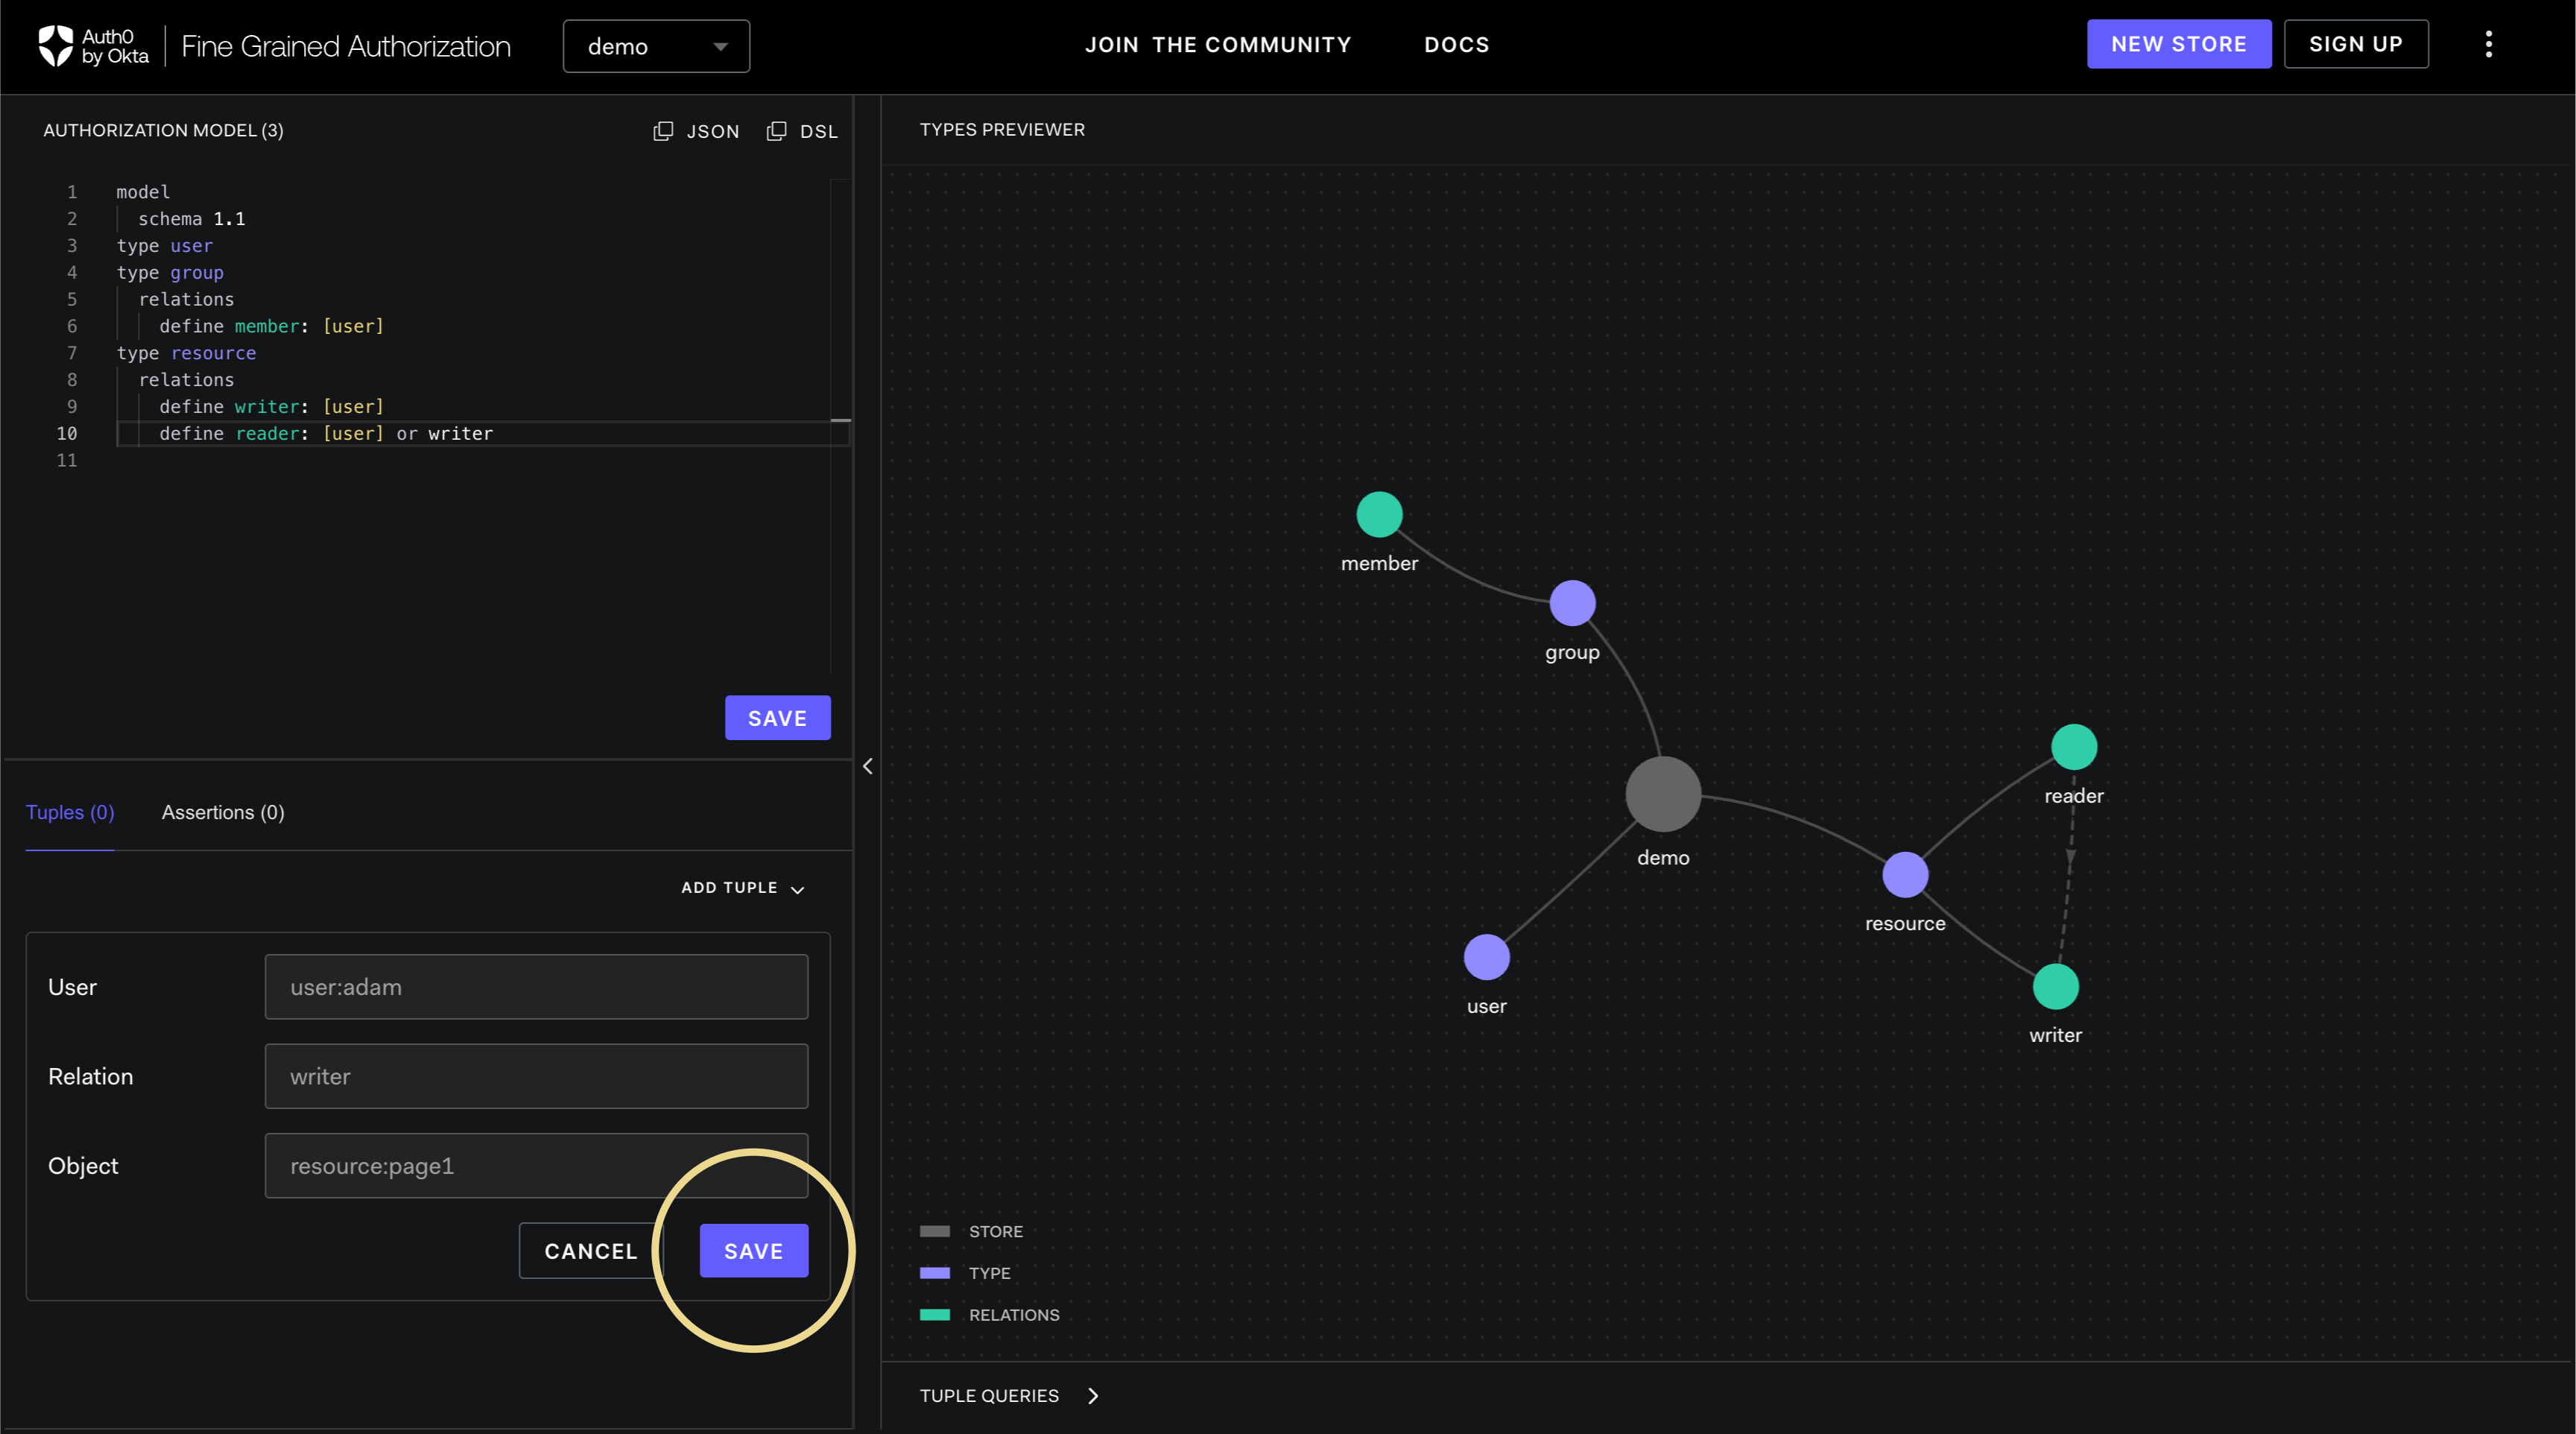
This will bring up the text boxes for User, Relation and Object. Type in the values desired.

-
Click SAVE button.
-
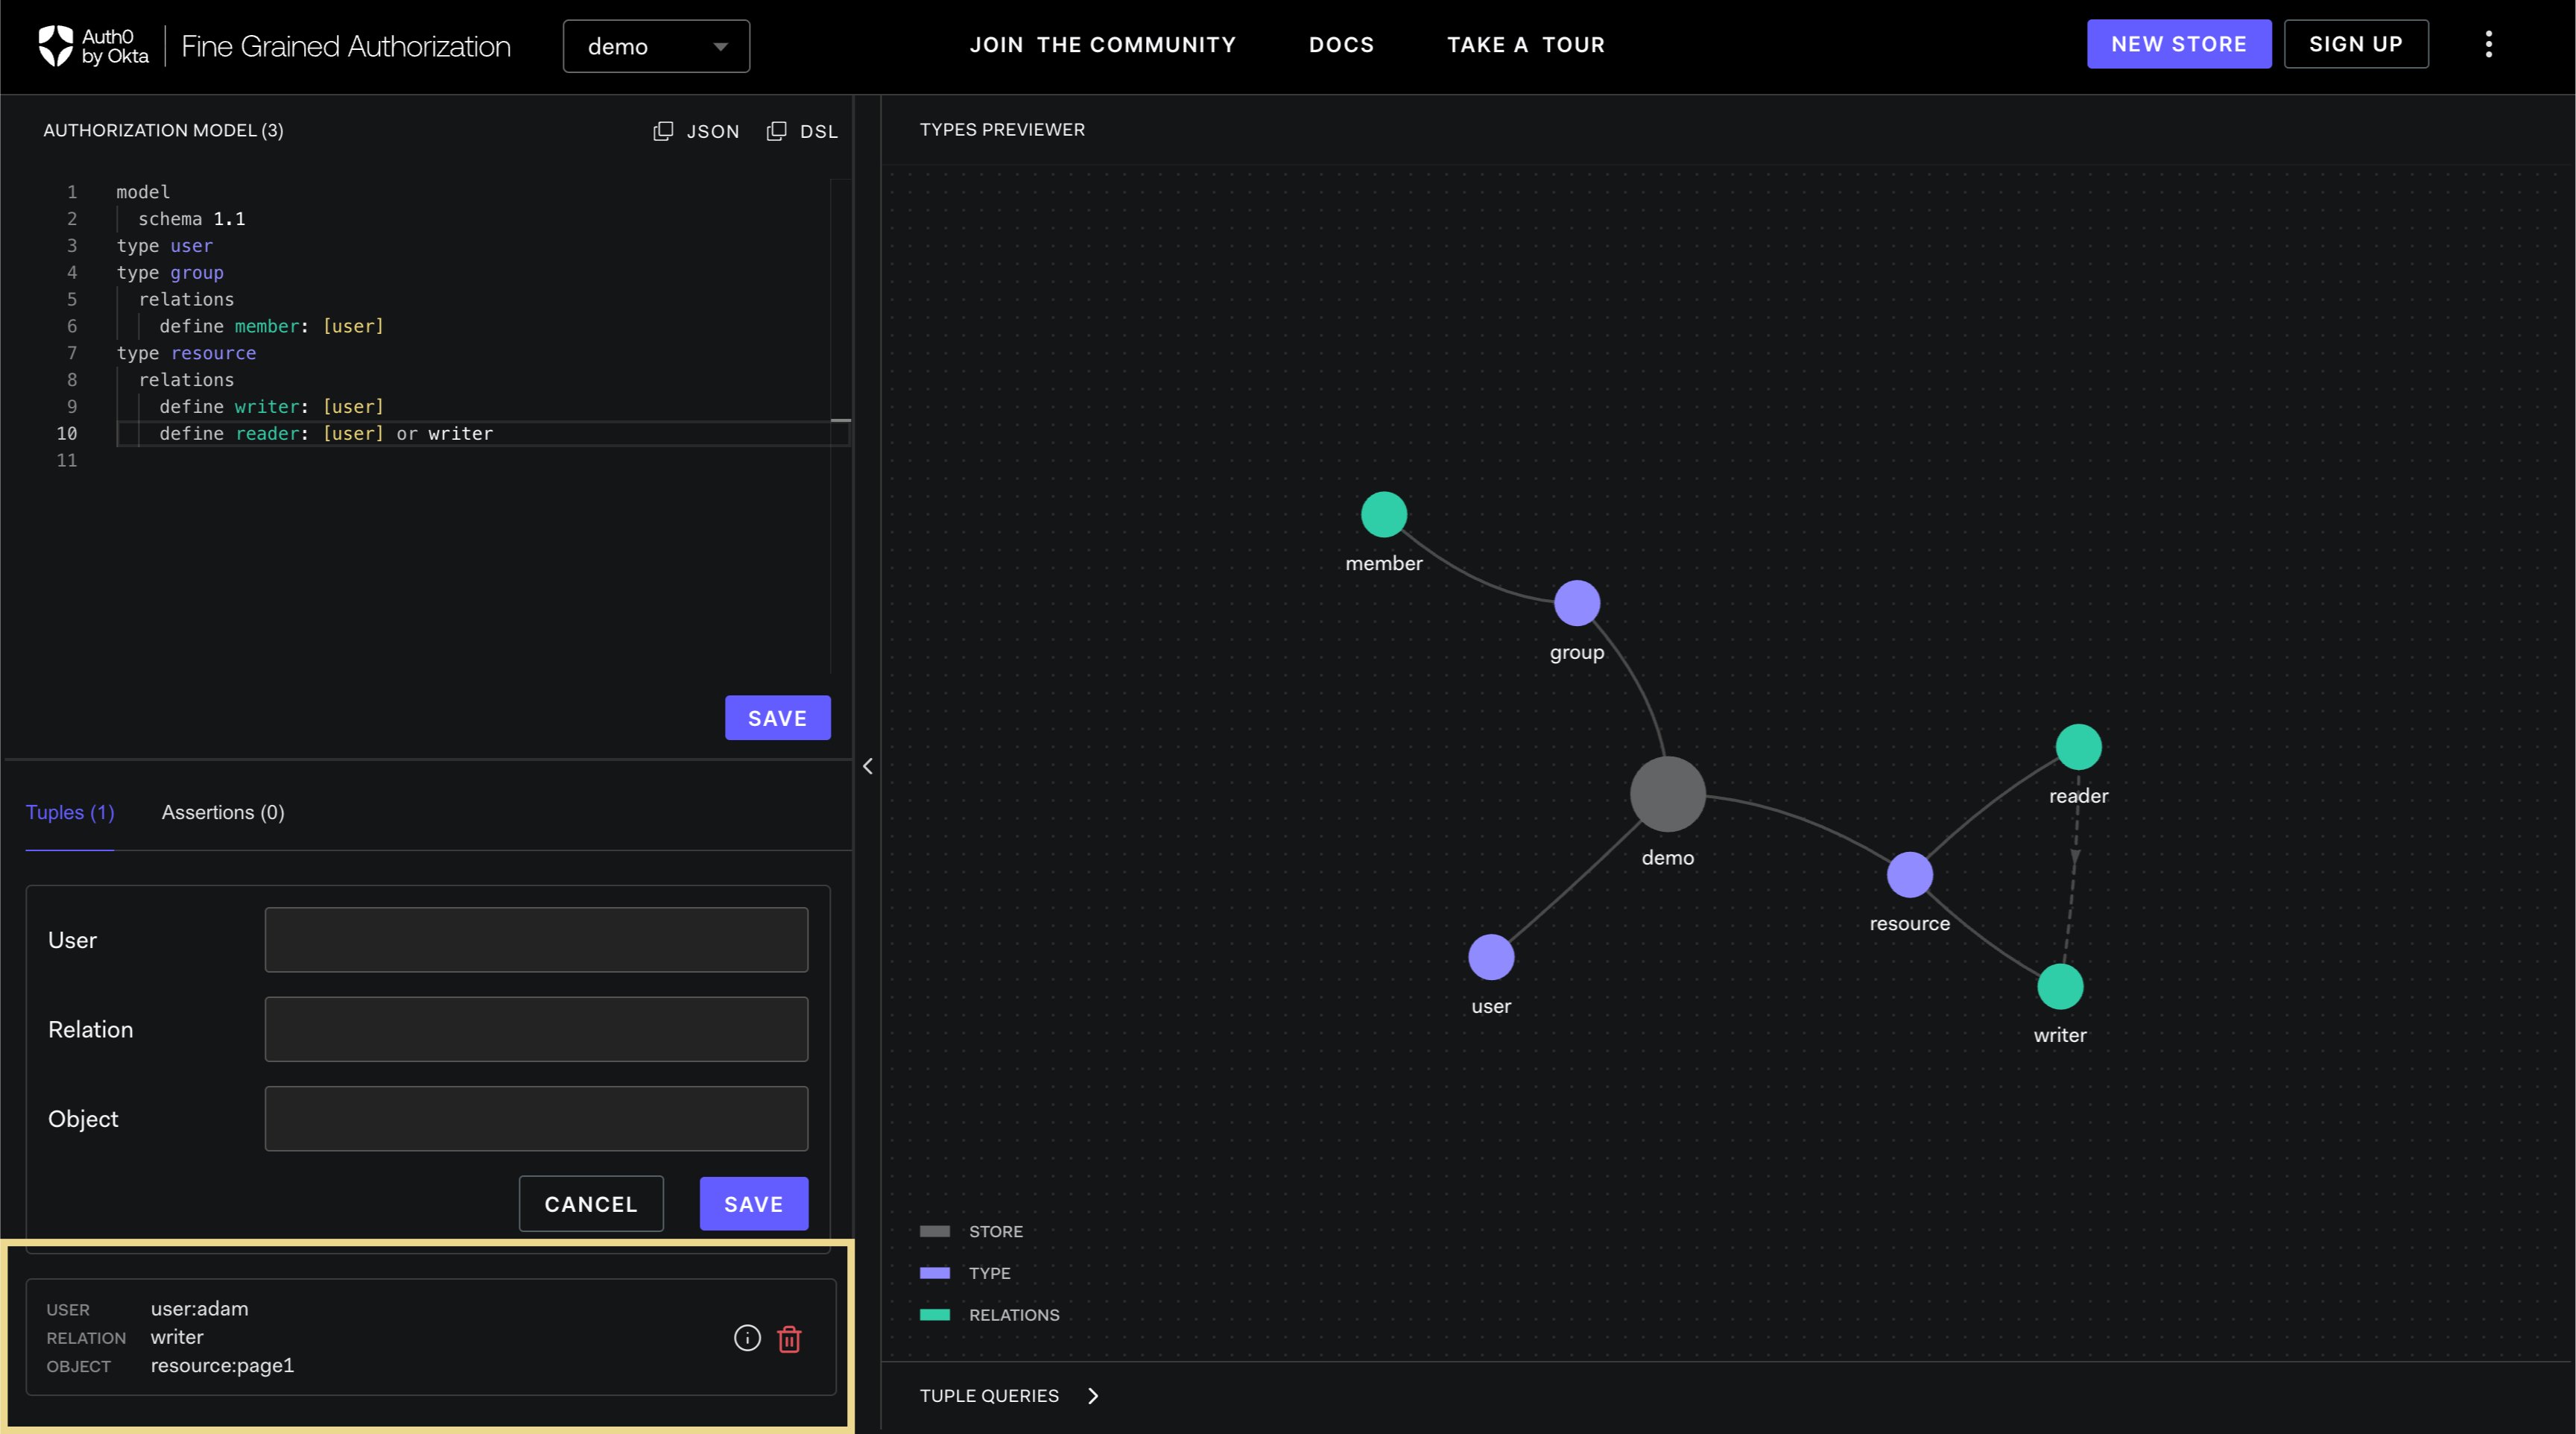
The added relationship tuples will be shown in the relationship tuples panel.
-
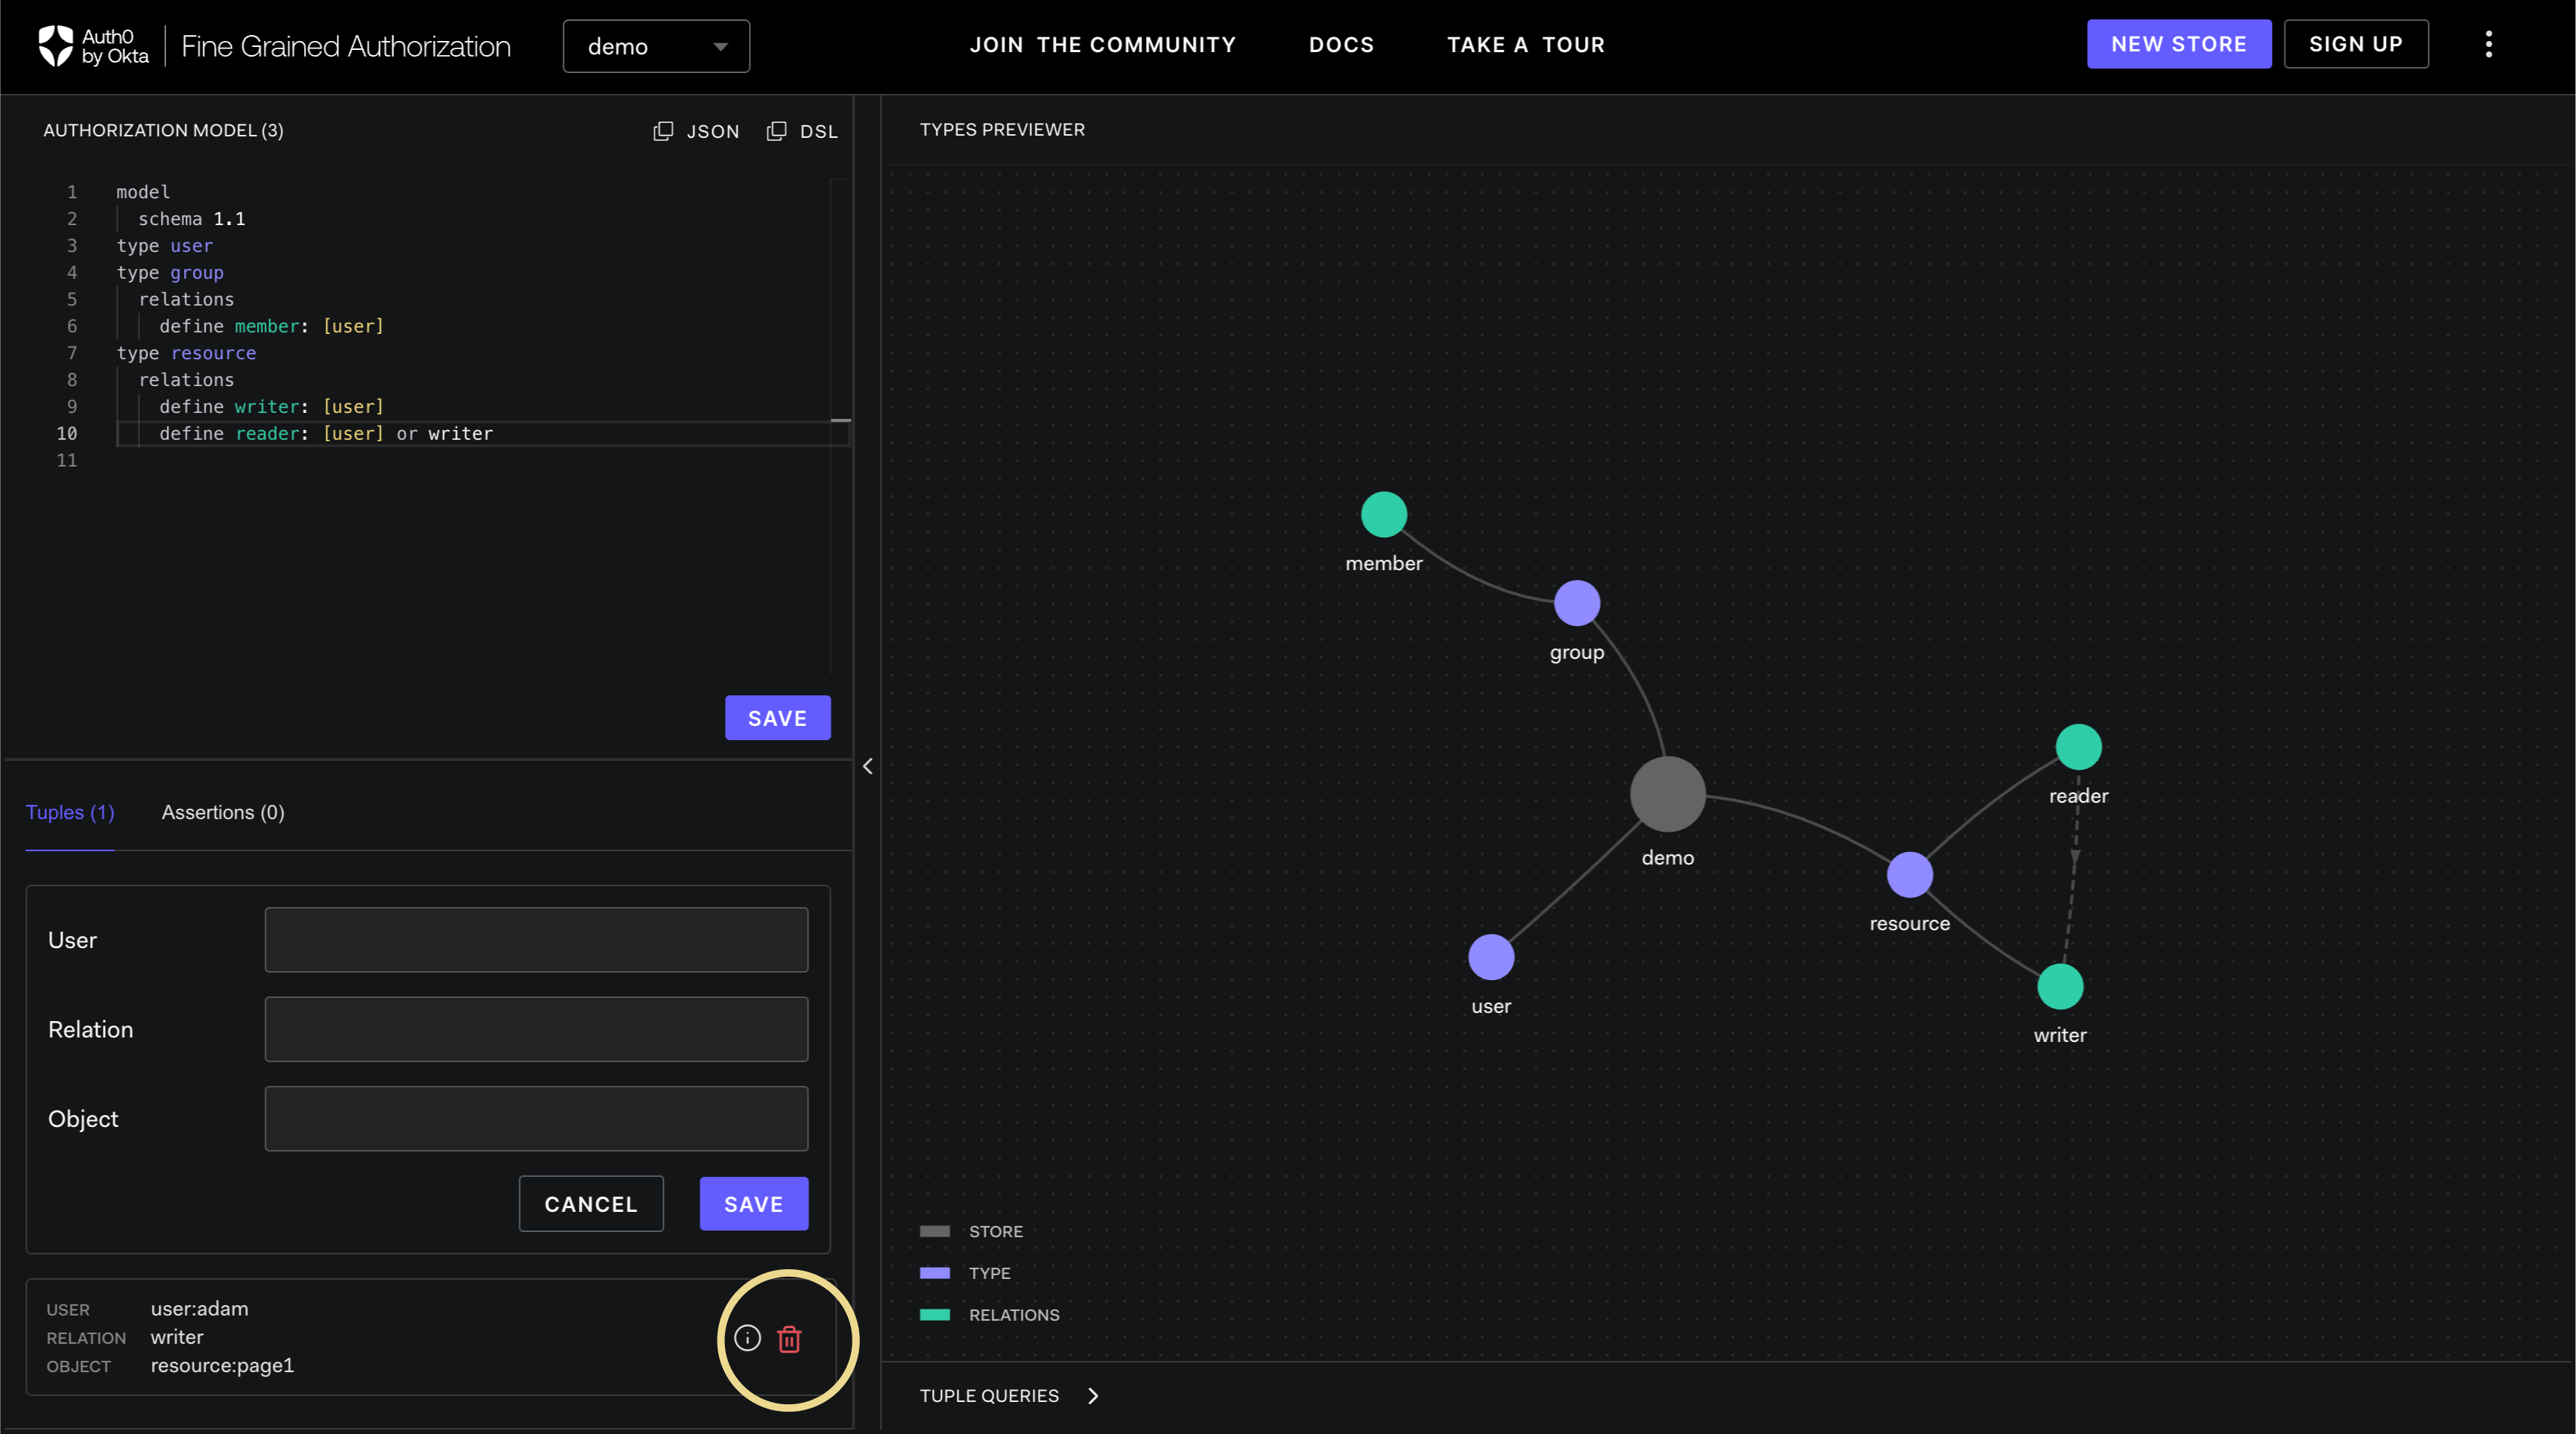
Relationship tuples may be removed by clicking the garbage bin button.
 info
infoRelationship tuples may not be added if the corresponding authentication model has not yet been saved/updated. This can be verified by having an active SAVE button in the types panel.
Adding assertions
-
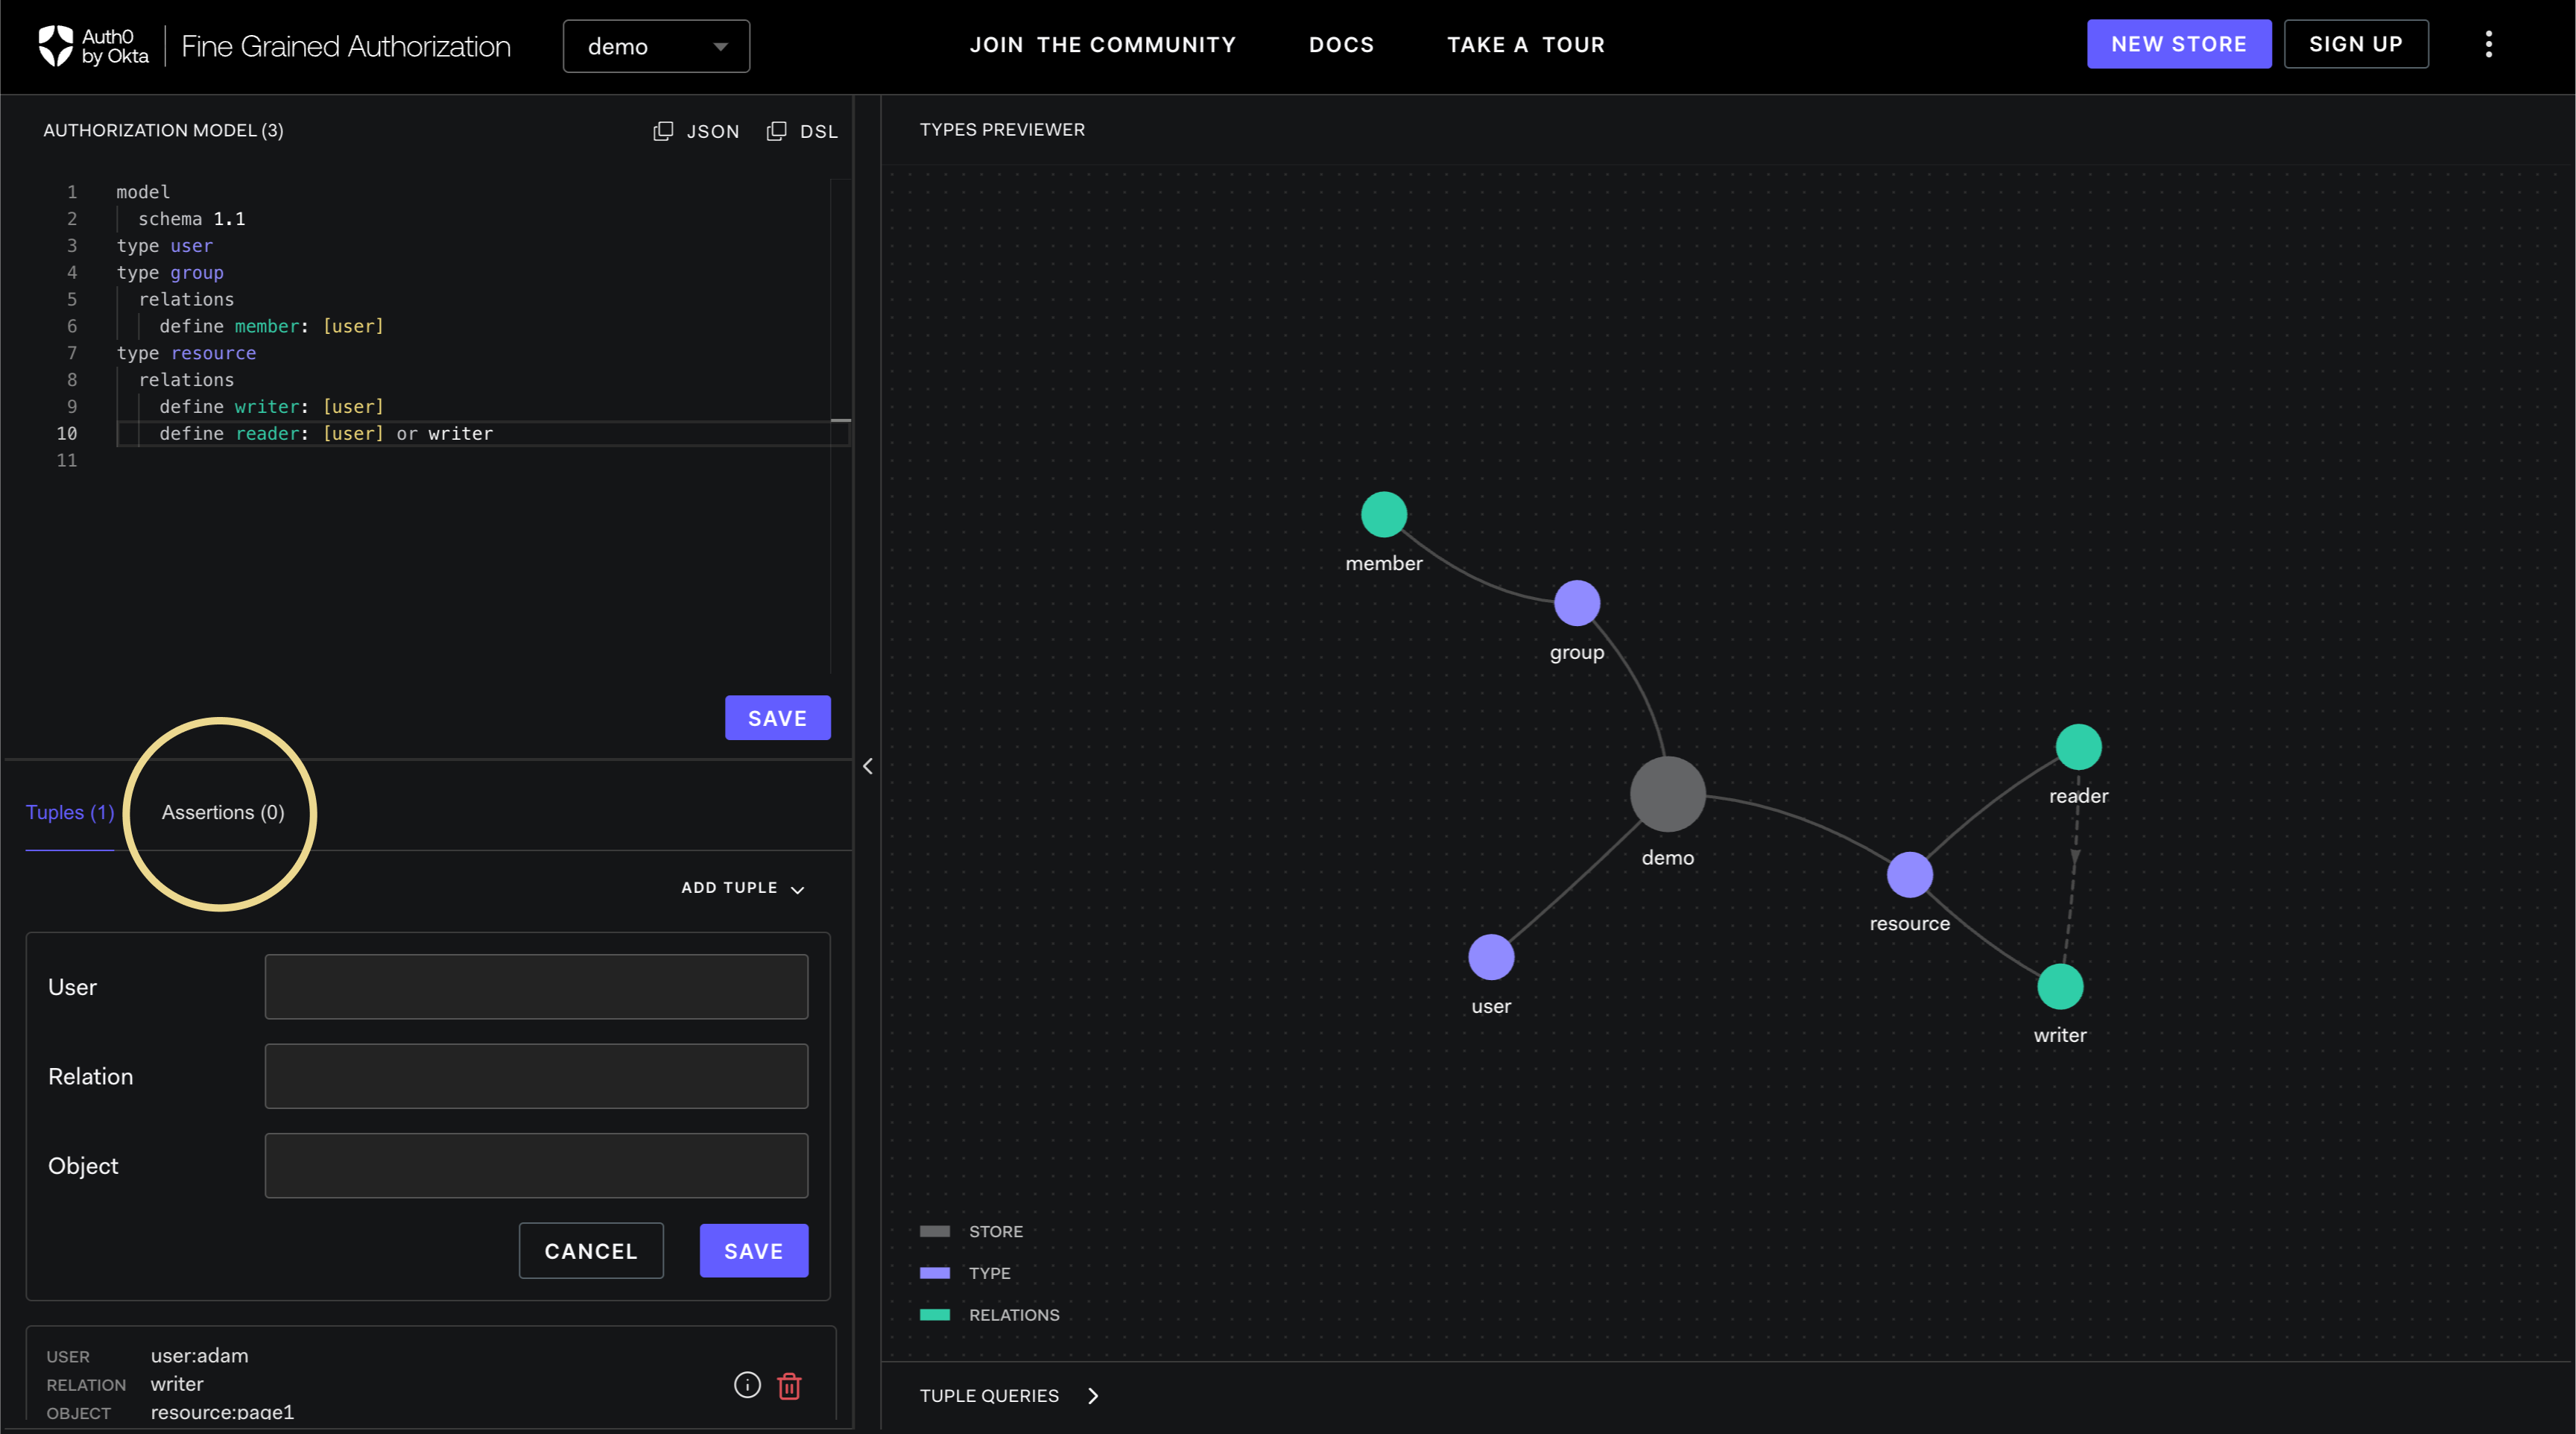
On your User Stores, you may run assertions to test authorization models and relationship tuples. To add new assertions, click Assertions tab in the relationship tuples panel located on the lower left part of the screen.
-
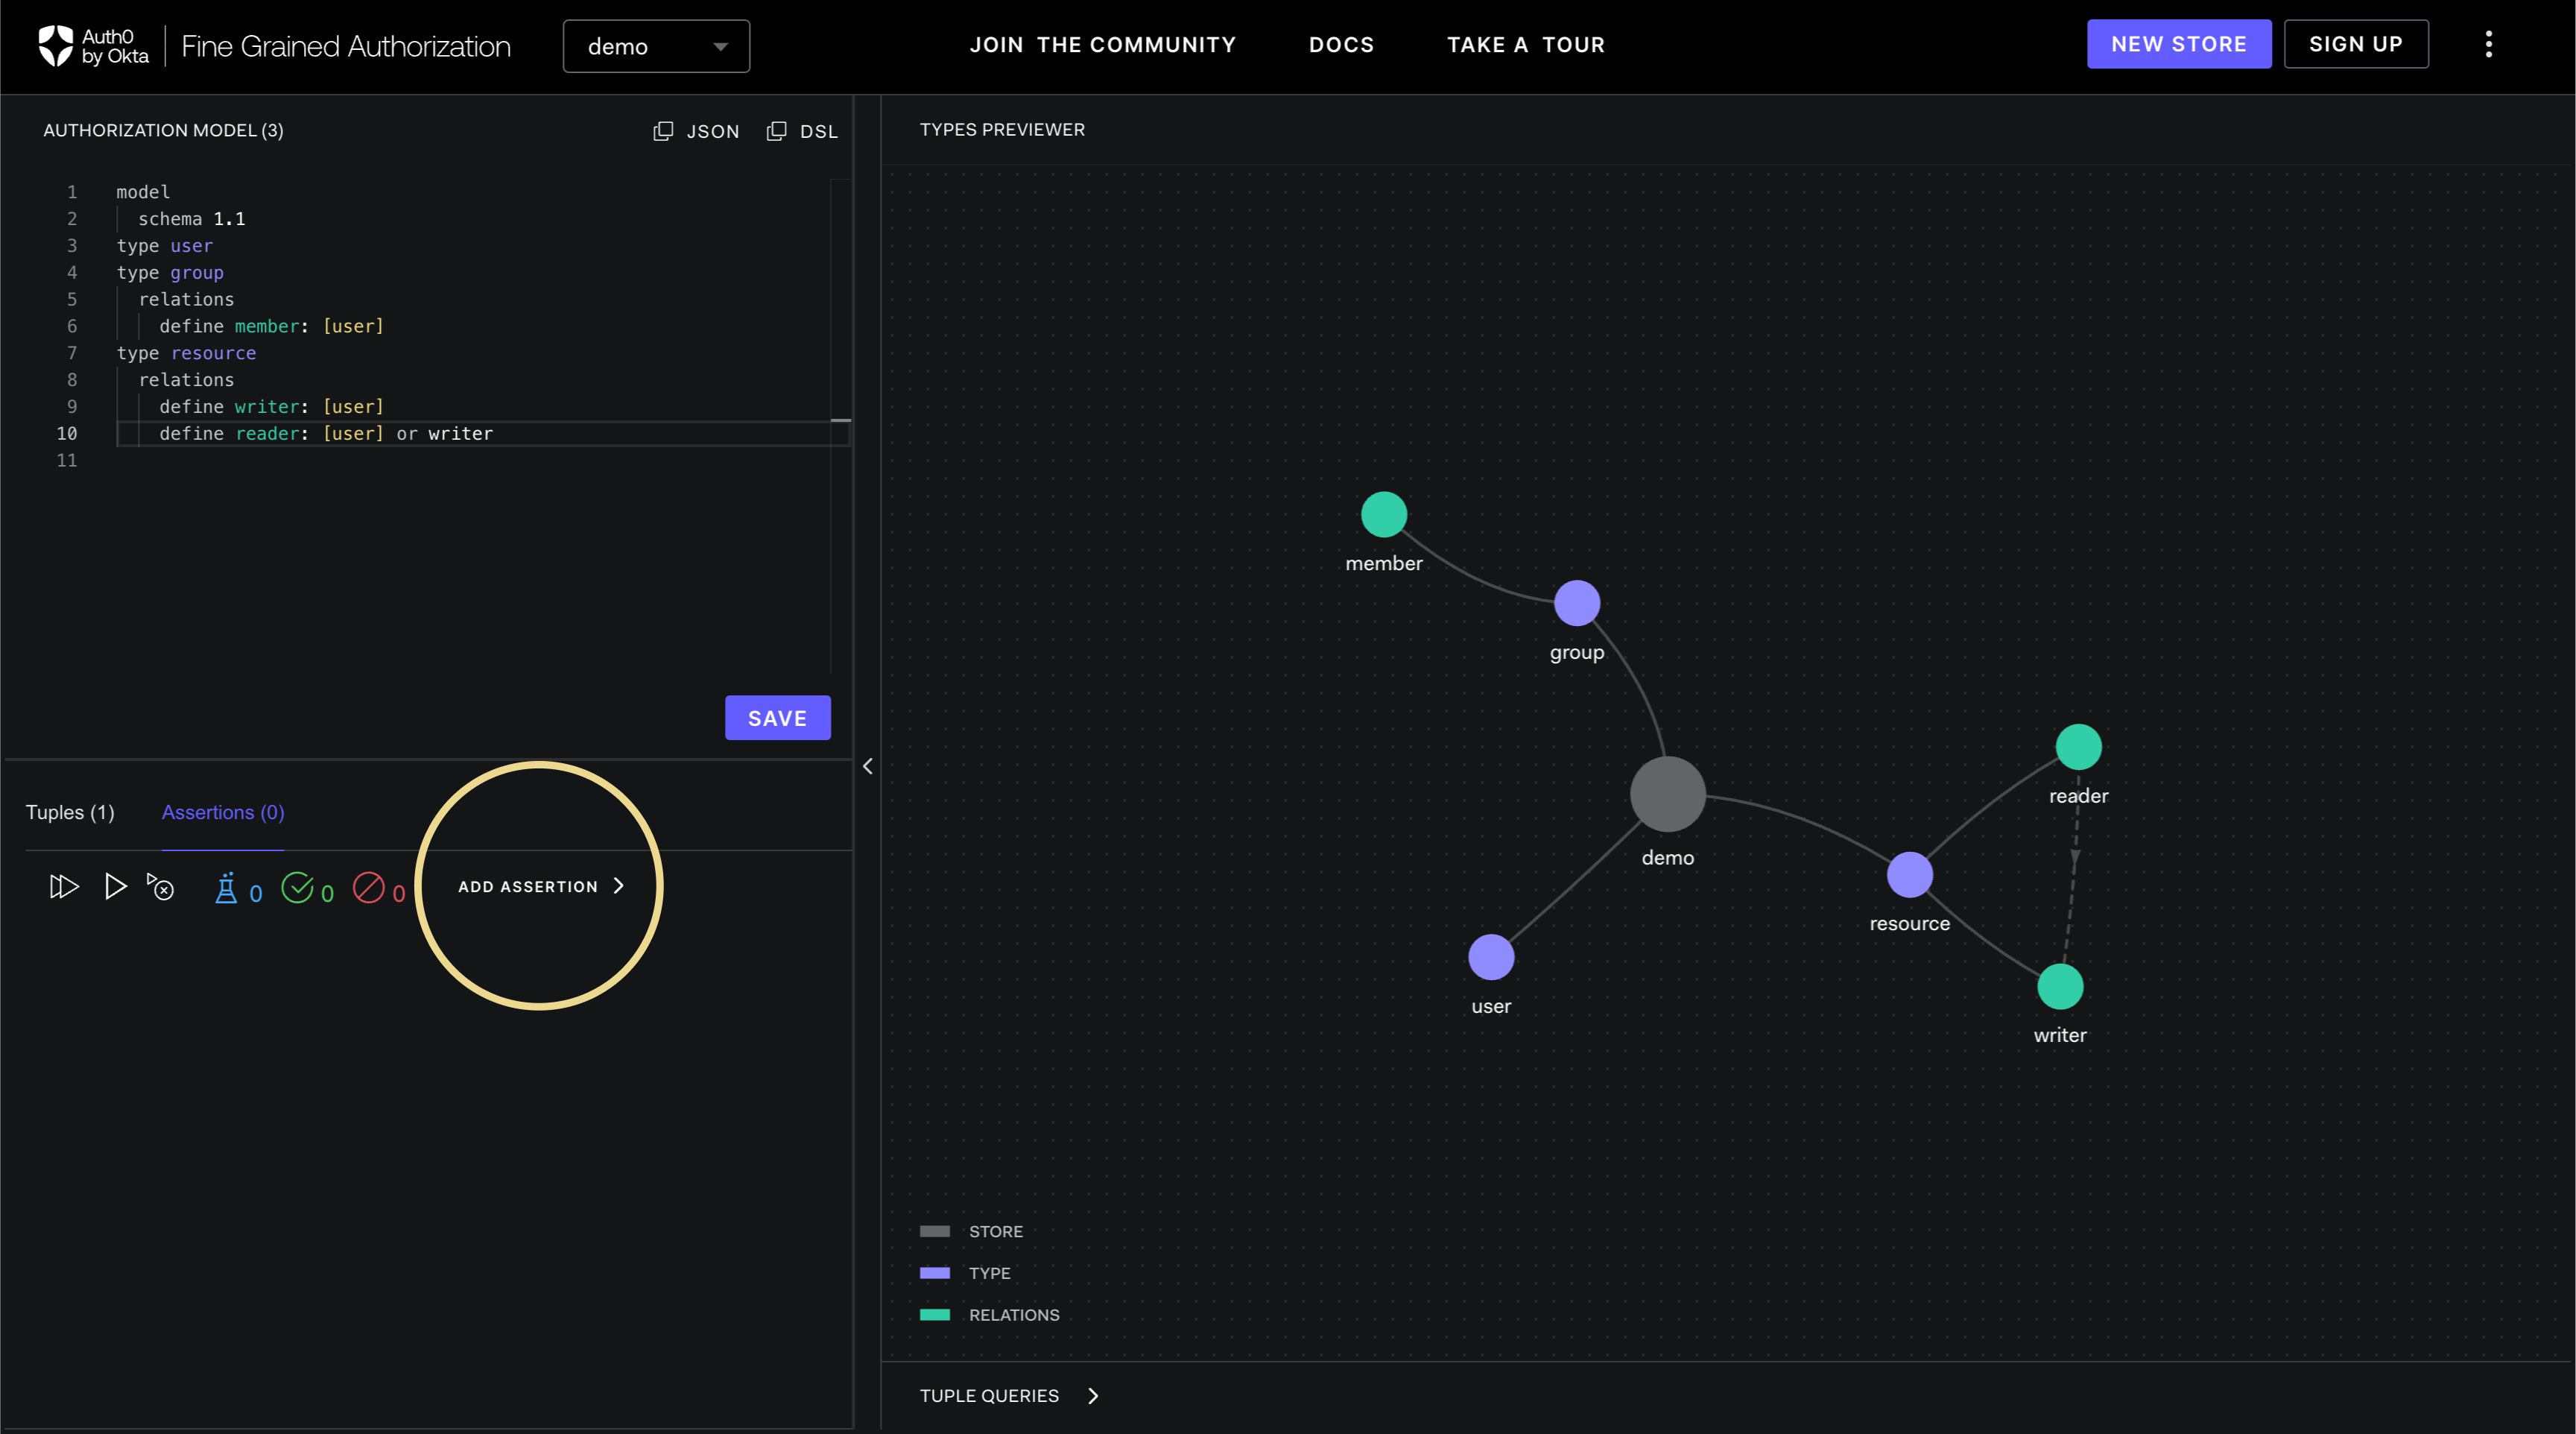
After Assertions tab is selected, click ADD ASSERTION to add new assertions.
-
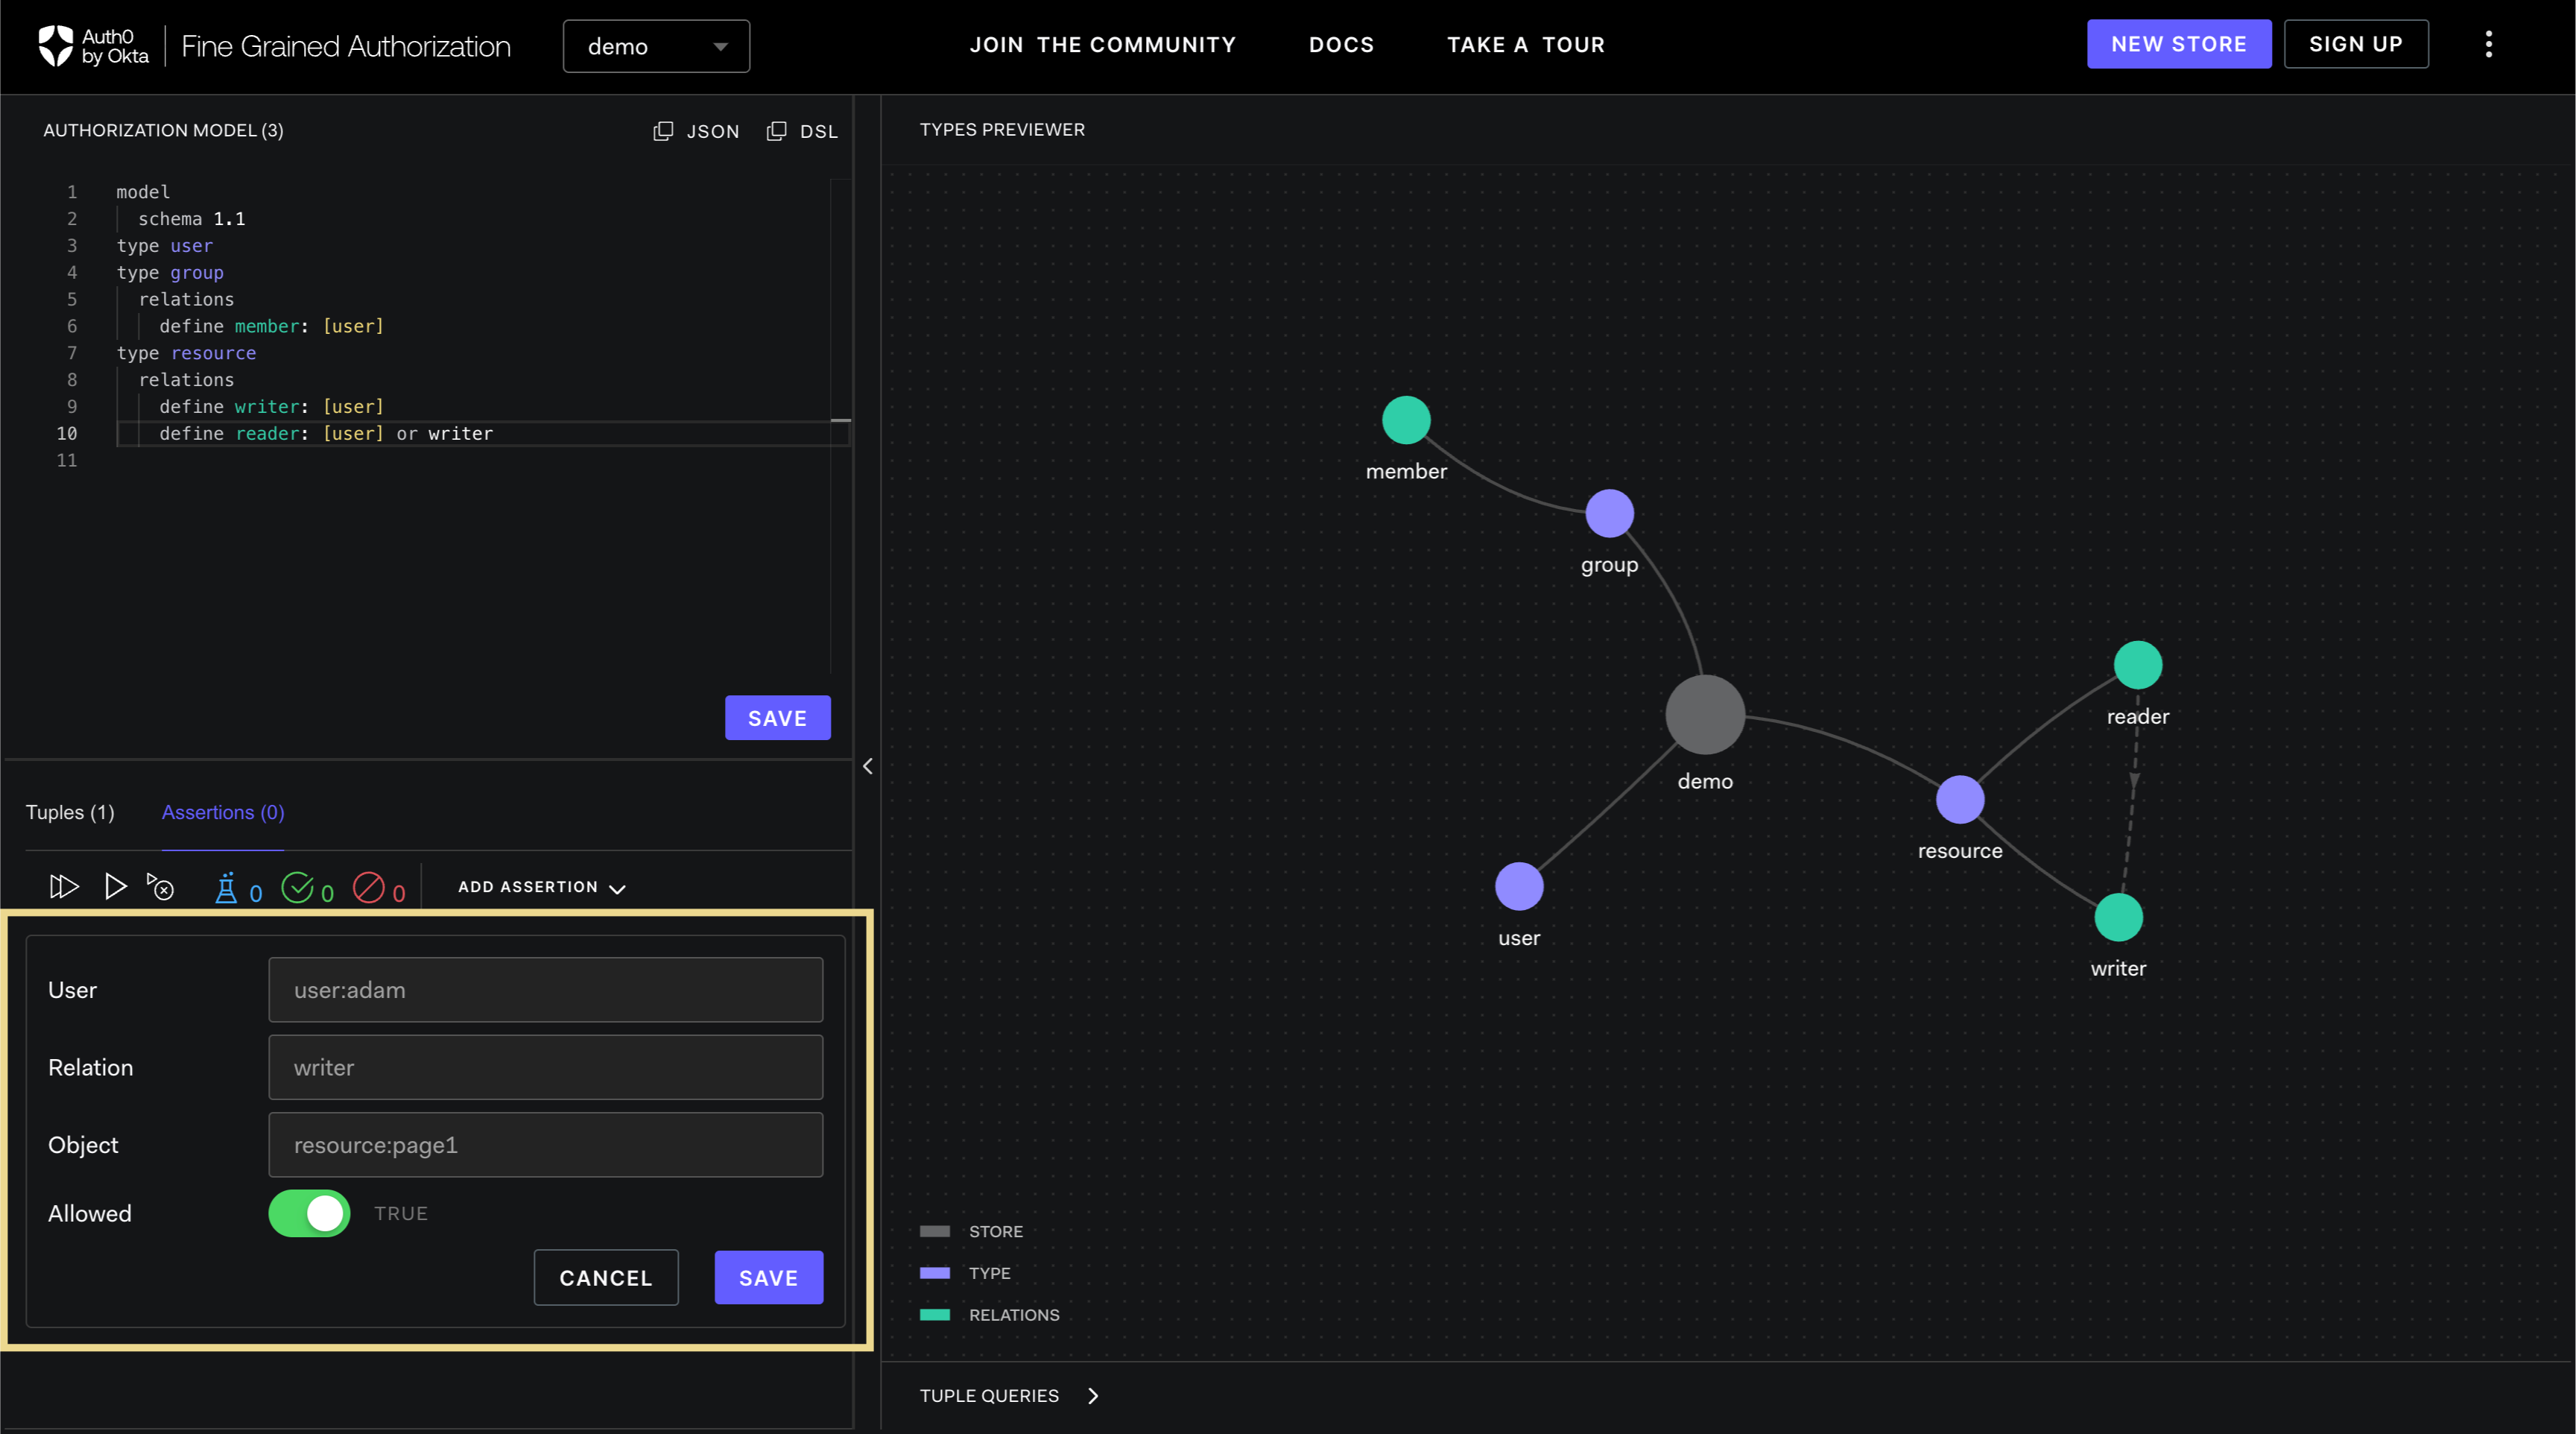
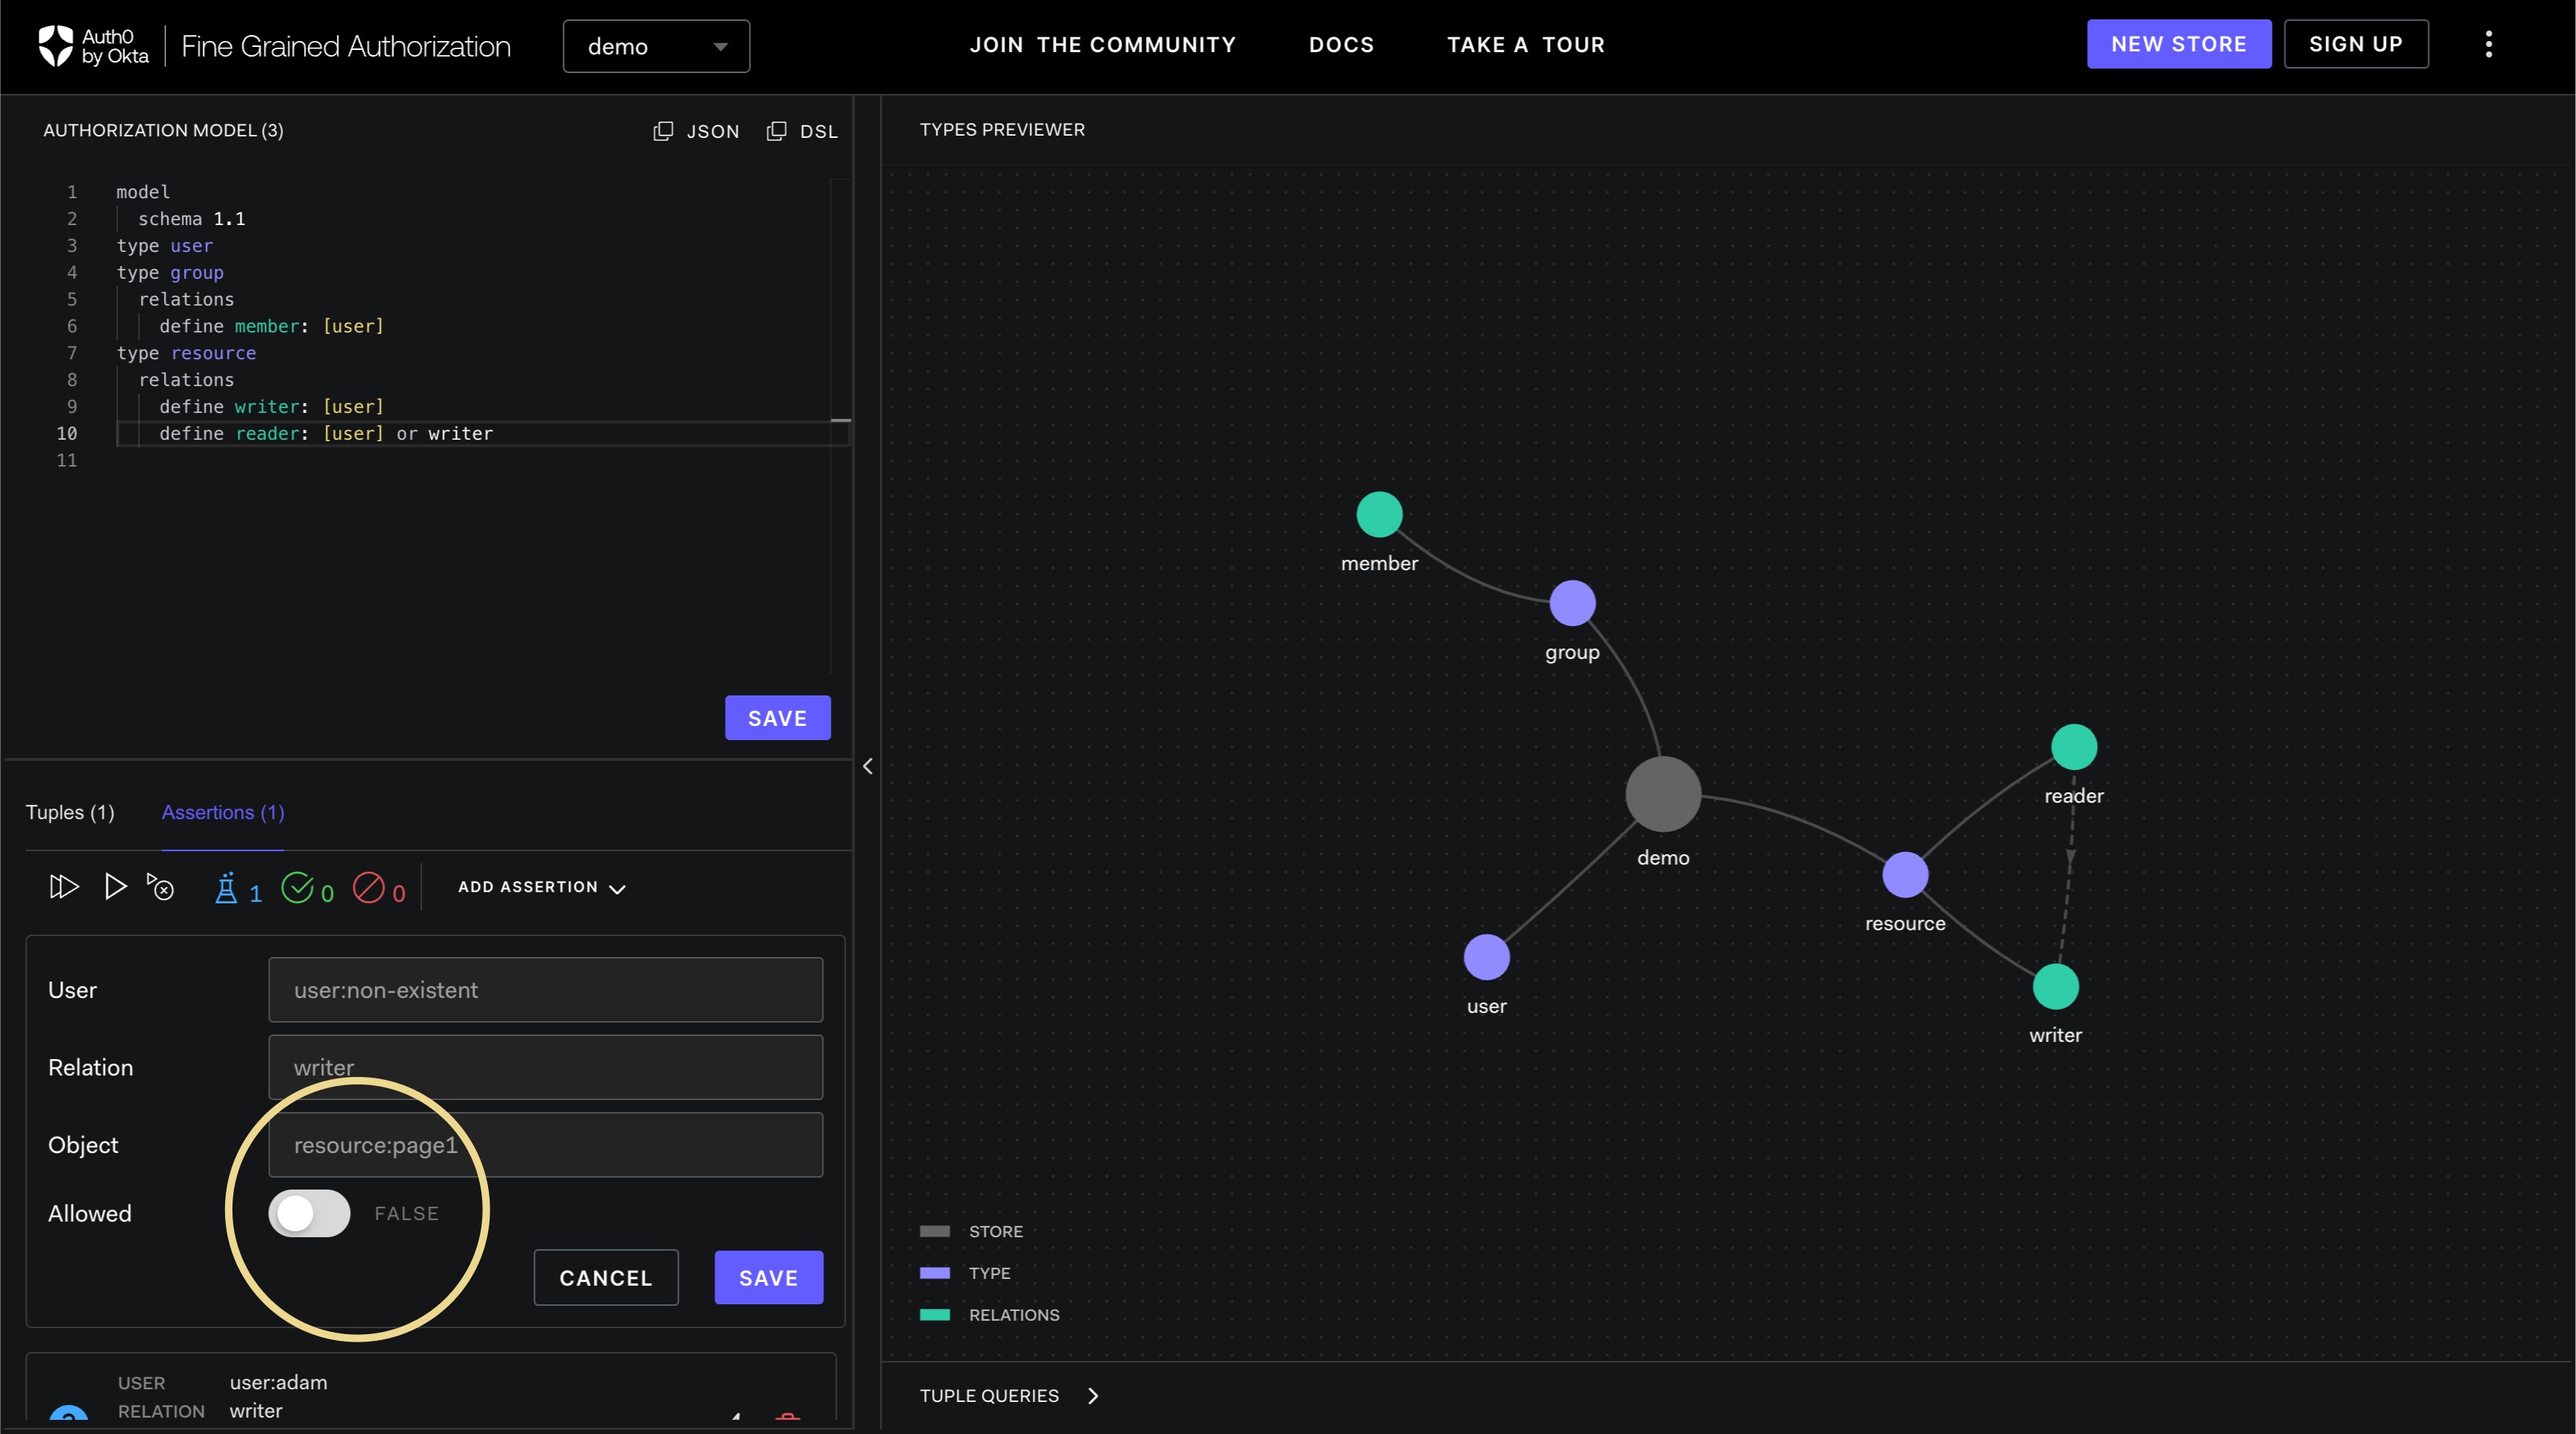
This will bring up the text for User, Relation and Object. Type in the values desired. The Allowed selection is TRUE if you want to assert the relationship exists. Otherwise, Allowed selection is FALSE if you want to assert the relationship does not exist.
-
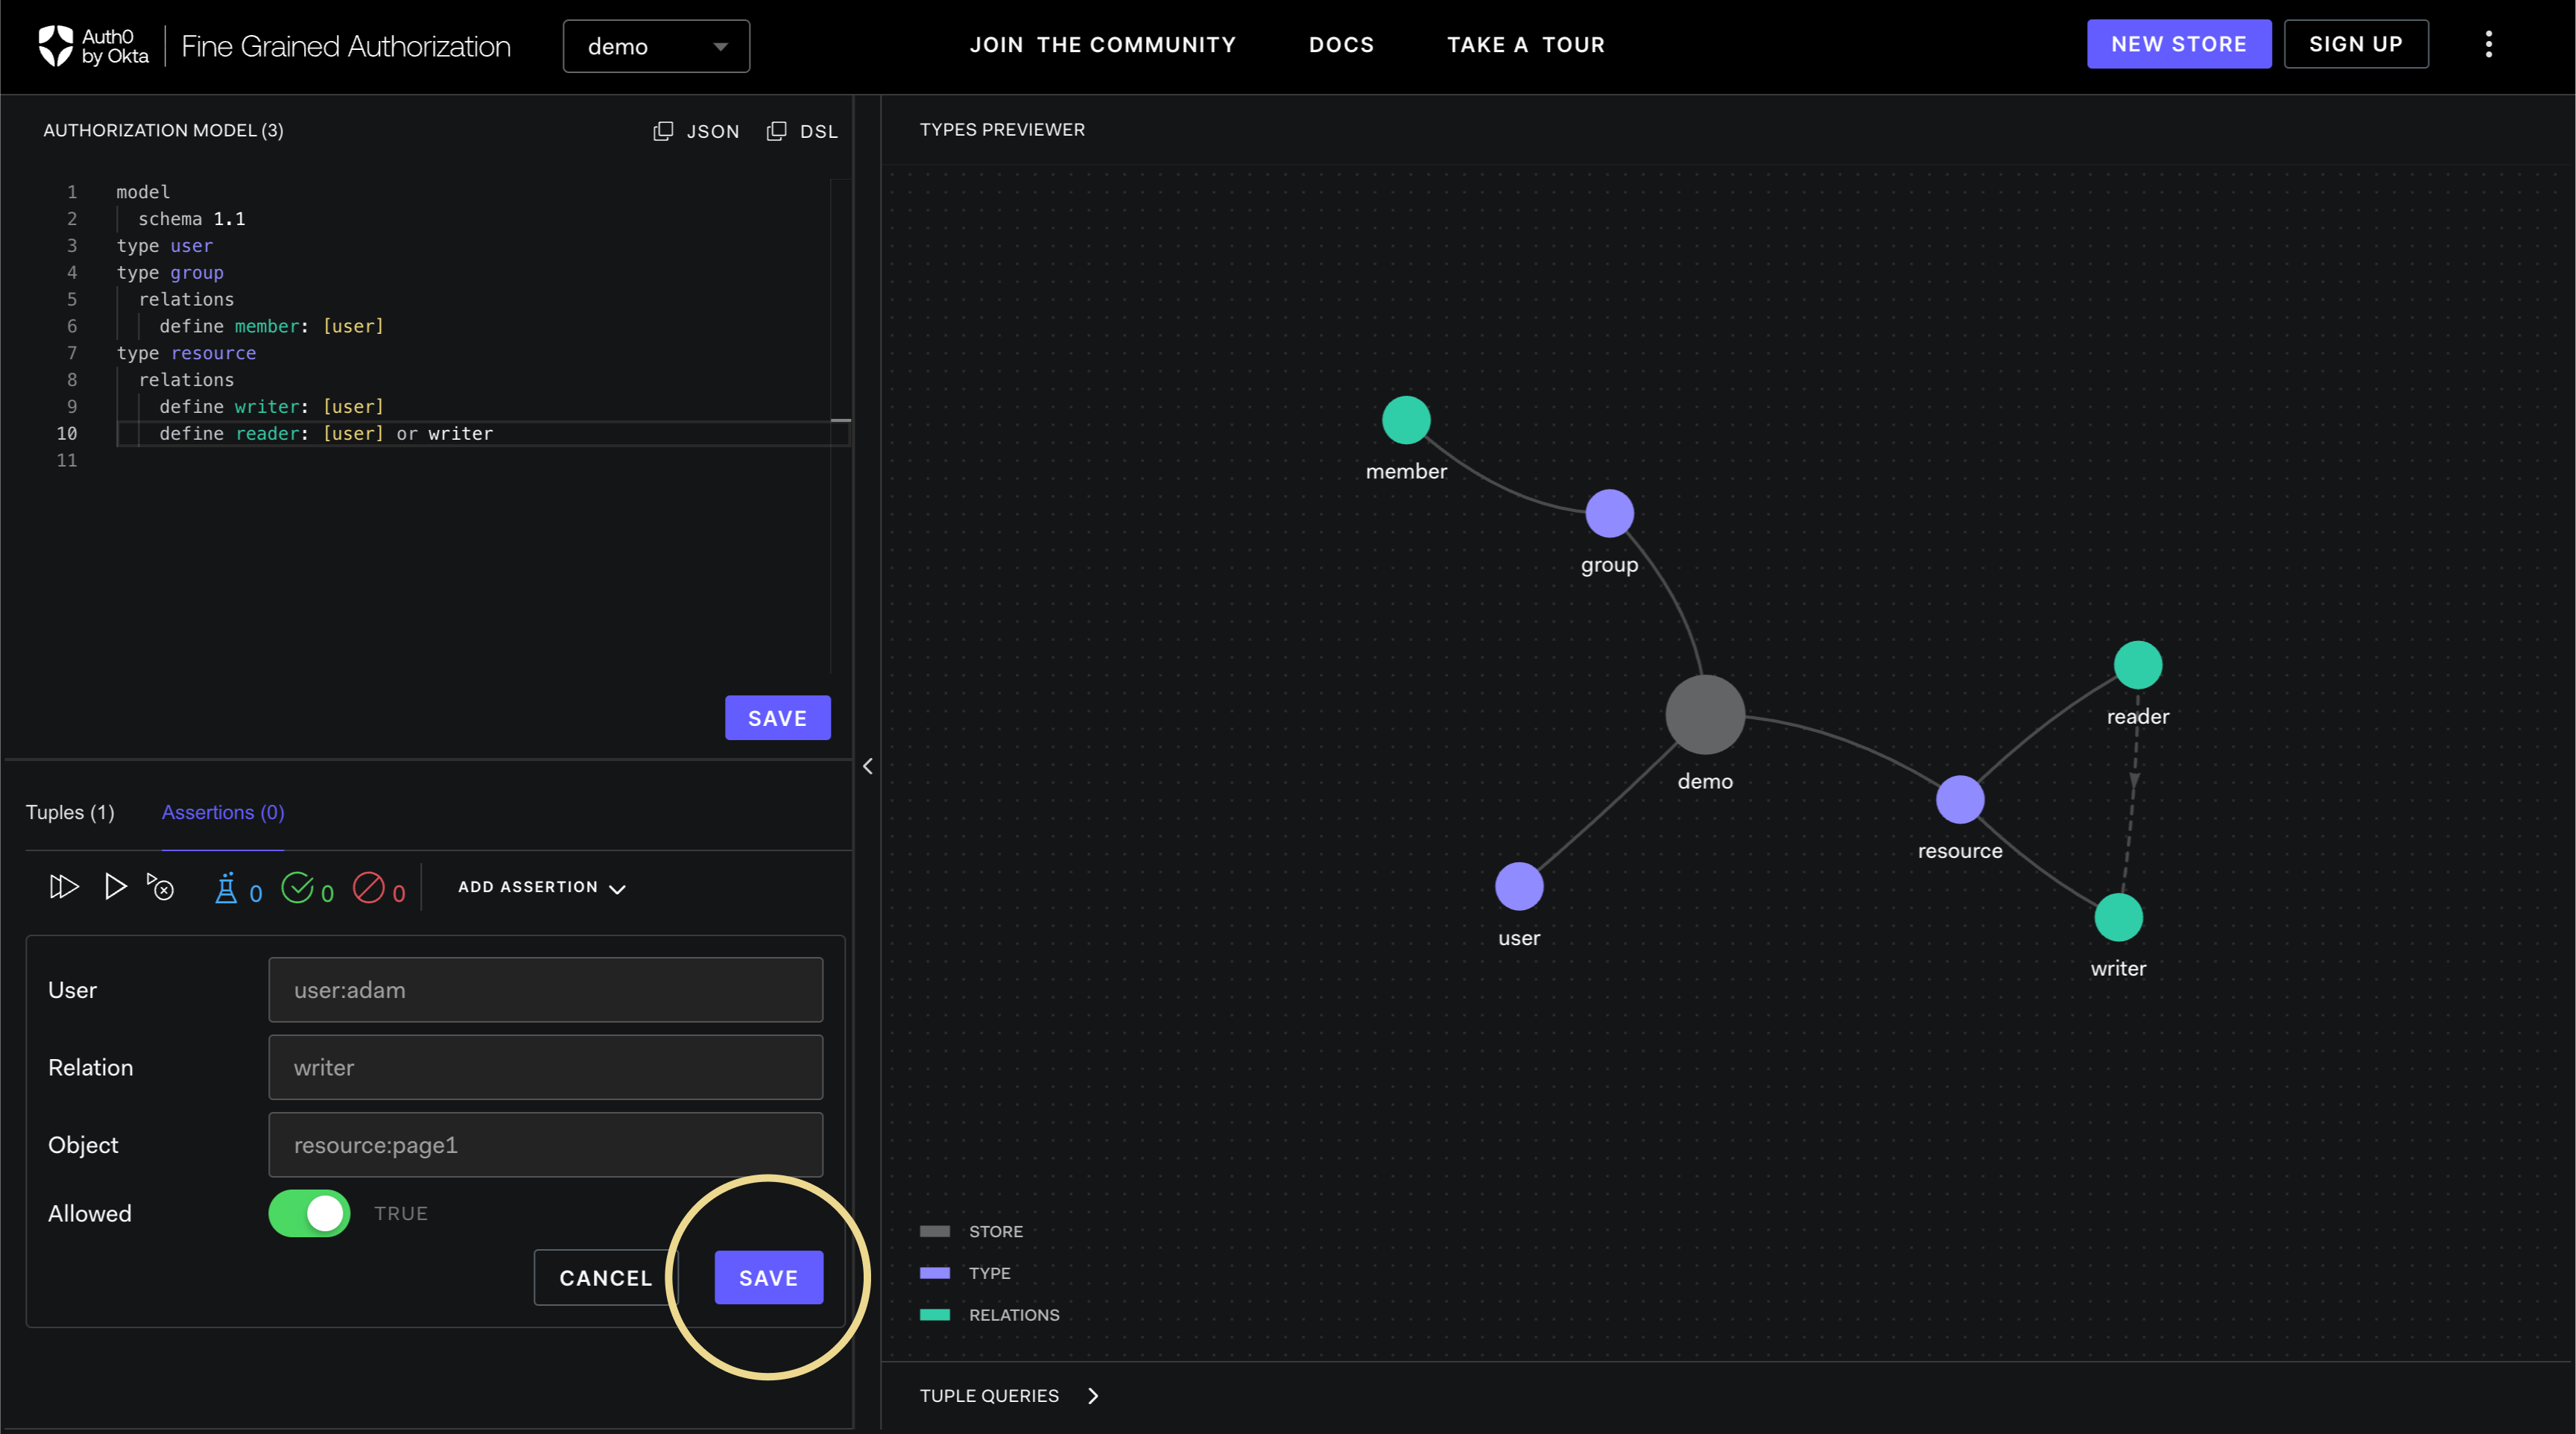
Click SAVE button to add the assertion.
-
Assert for non-existing relationship by selected Allowed to be FALSE.
-
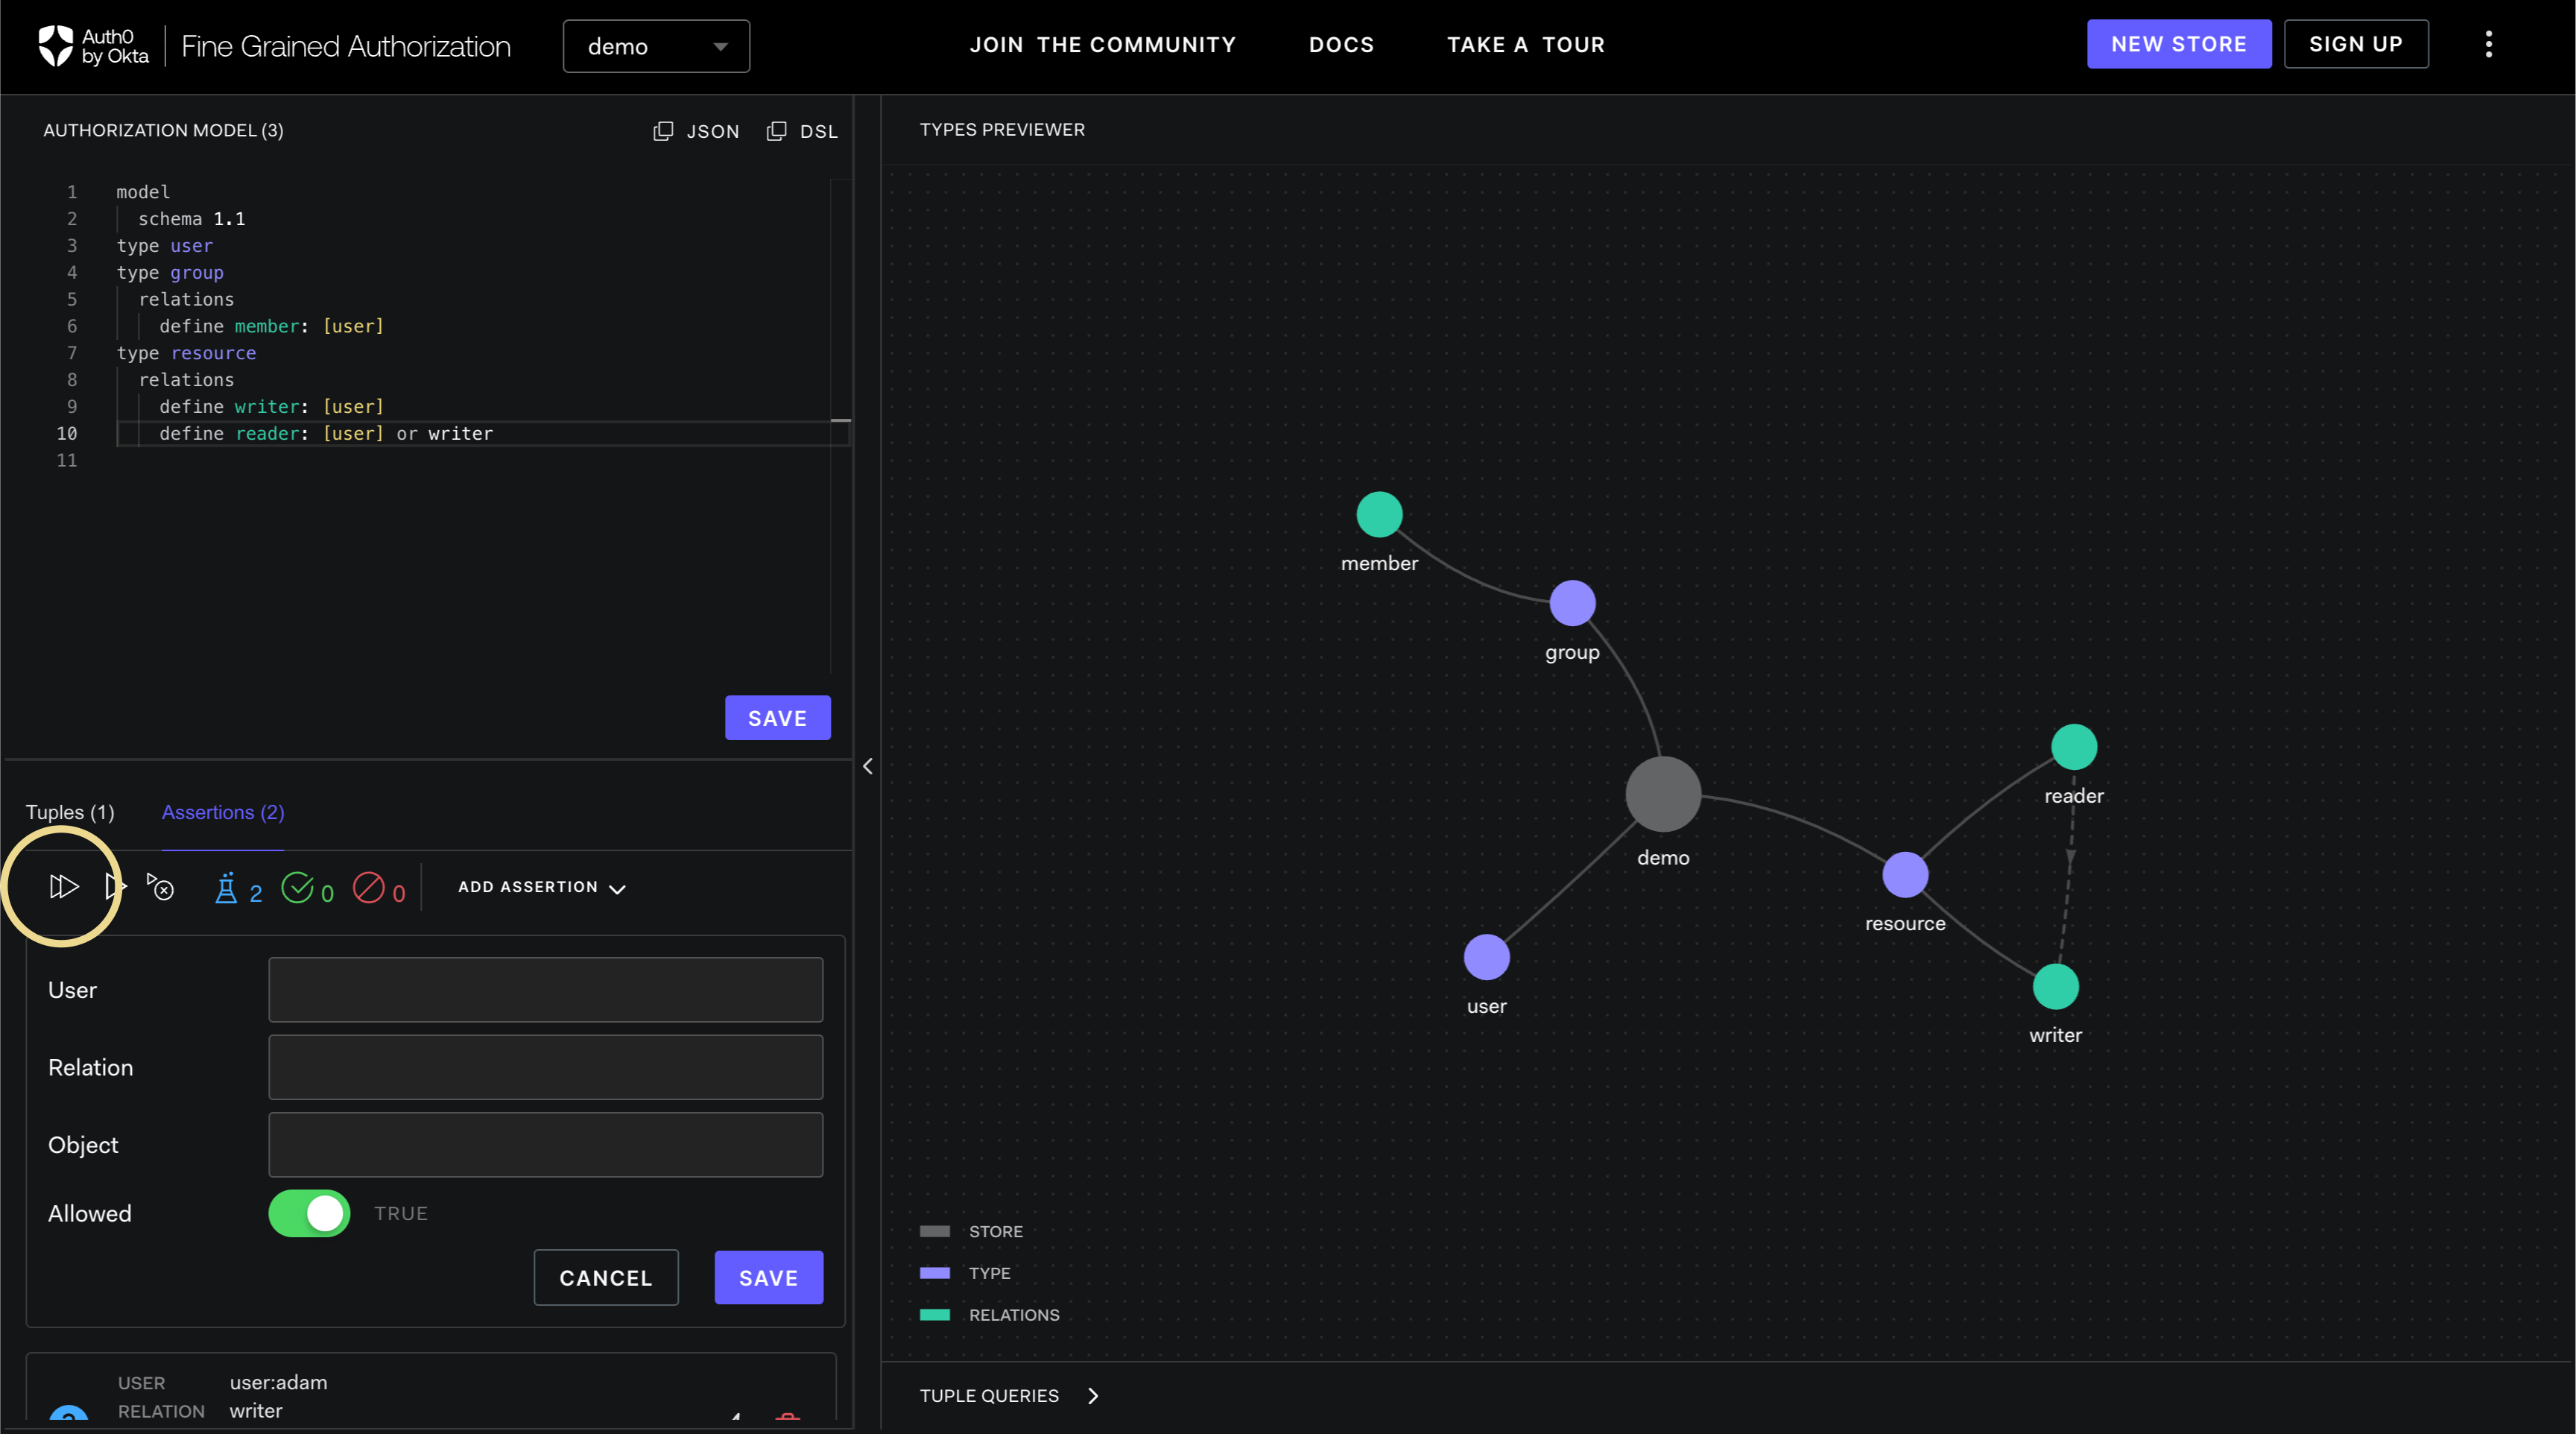
To run all tests, click the Run all tests button.
-
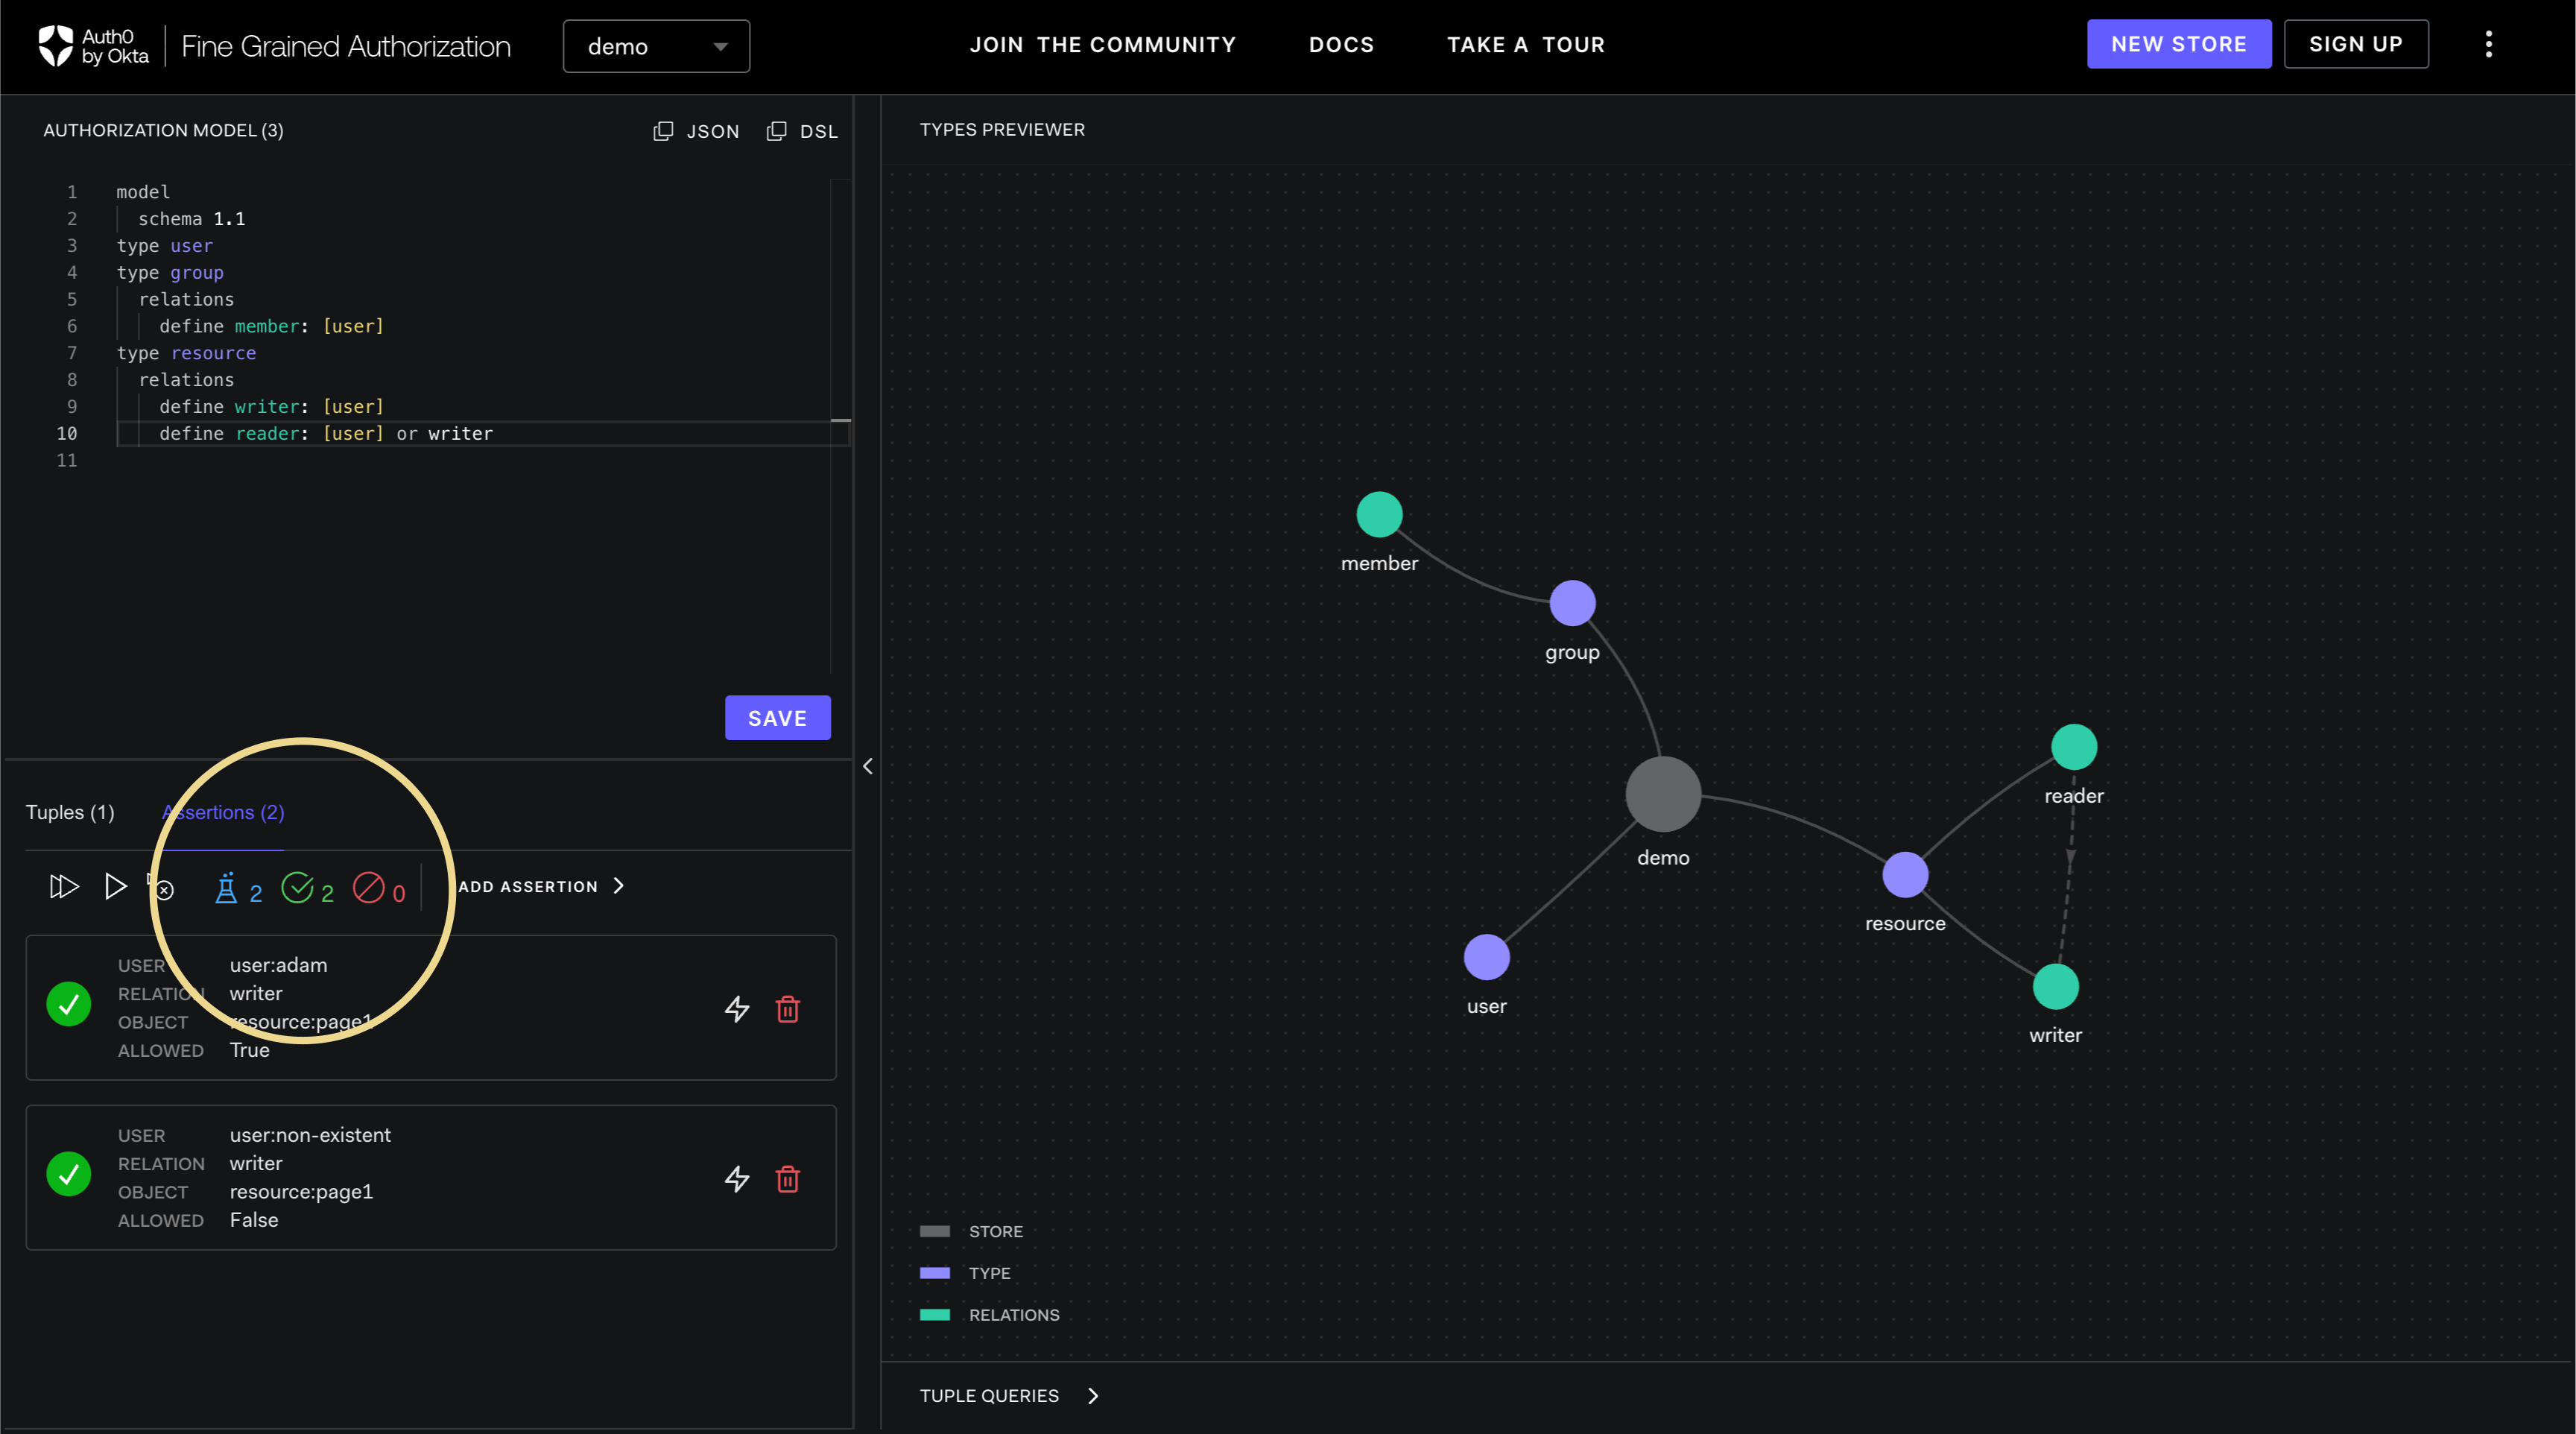
The assertion test results are indicated in the assertion panels. The blue experiment box shows the number of tests. The green check box indicates the number of passing assertions. The red slash box indicates the number of failed assertions.
Running queries
-
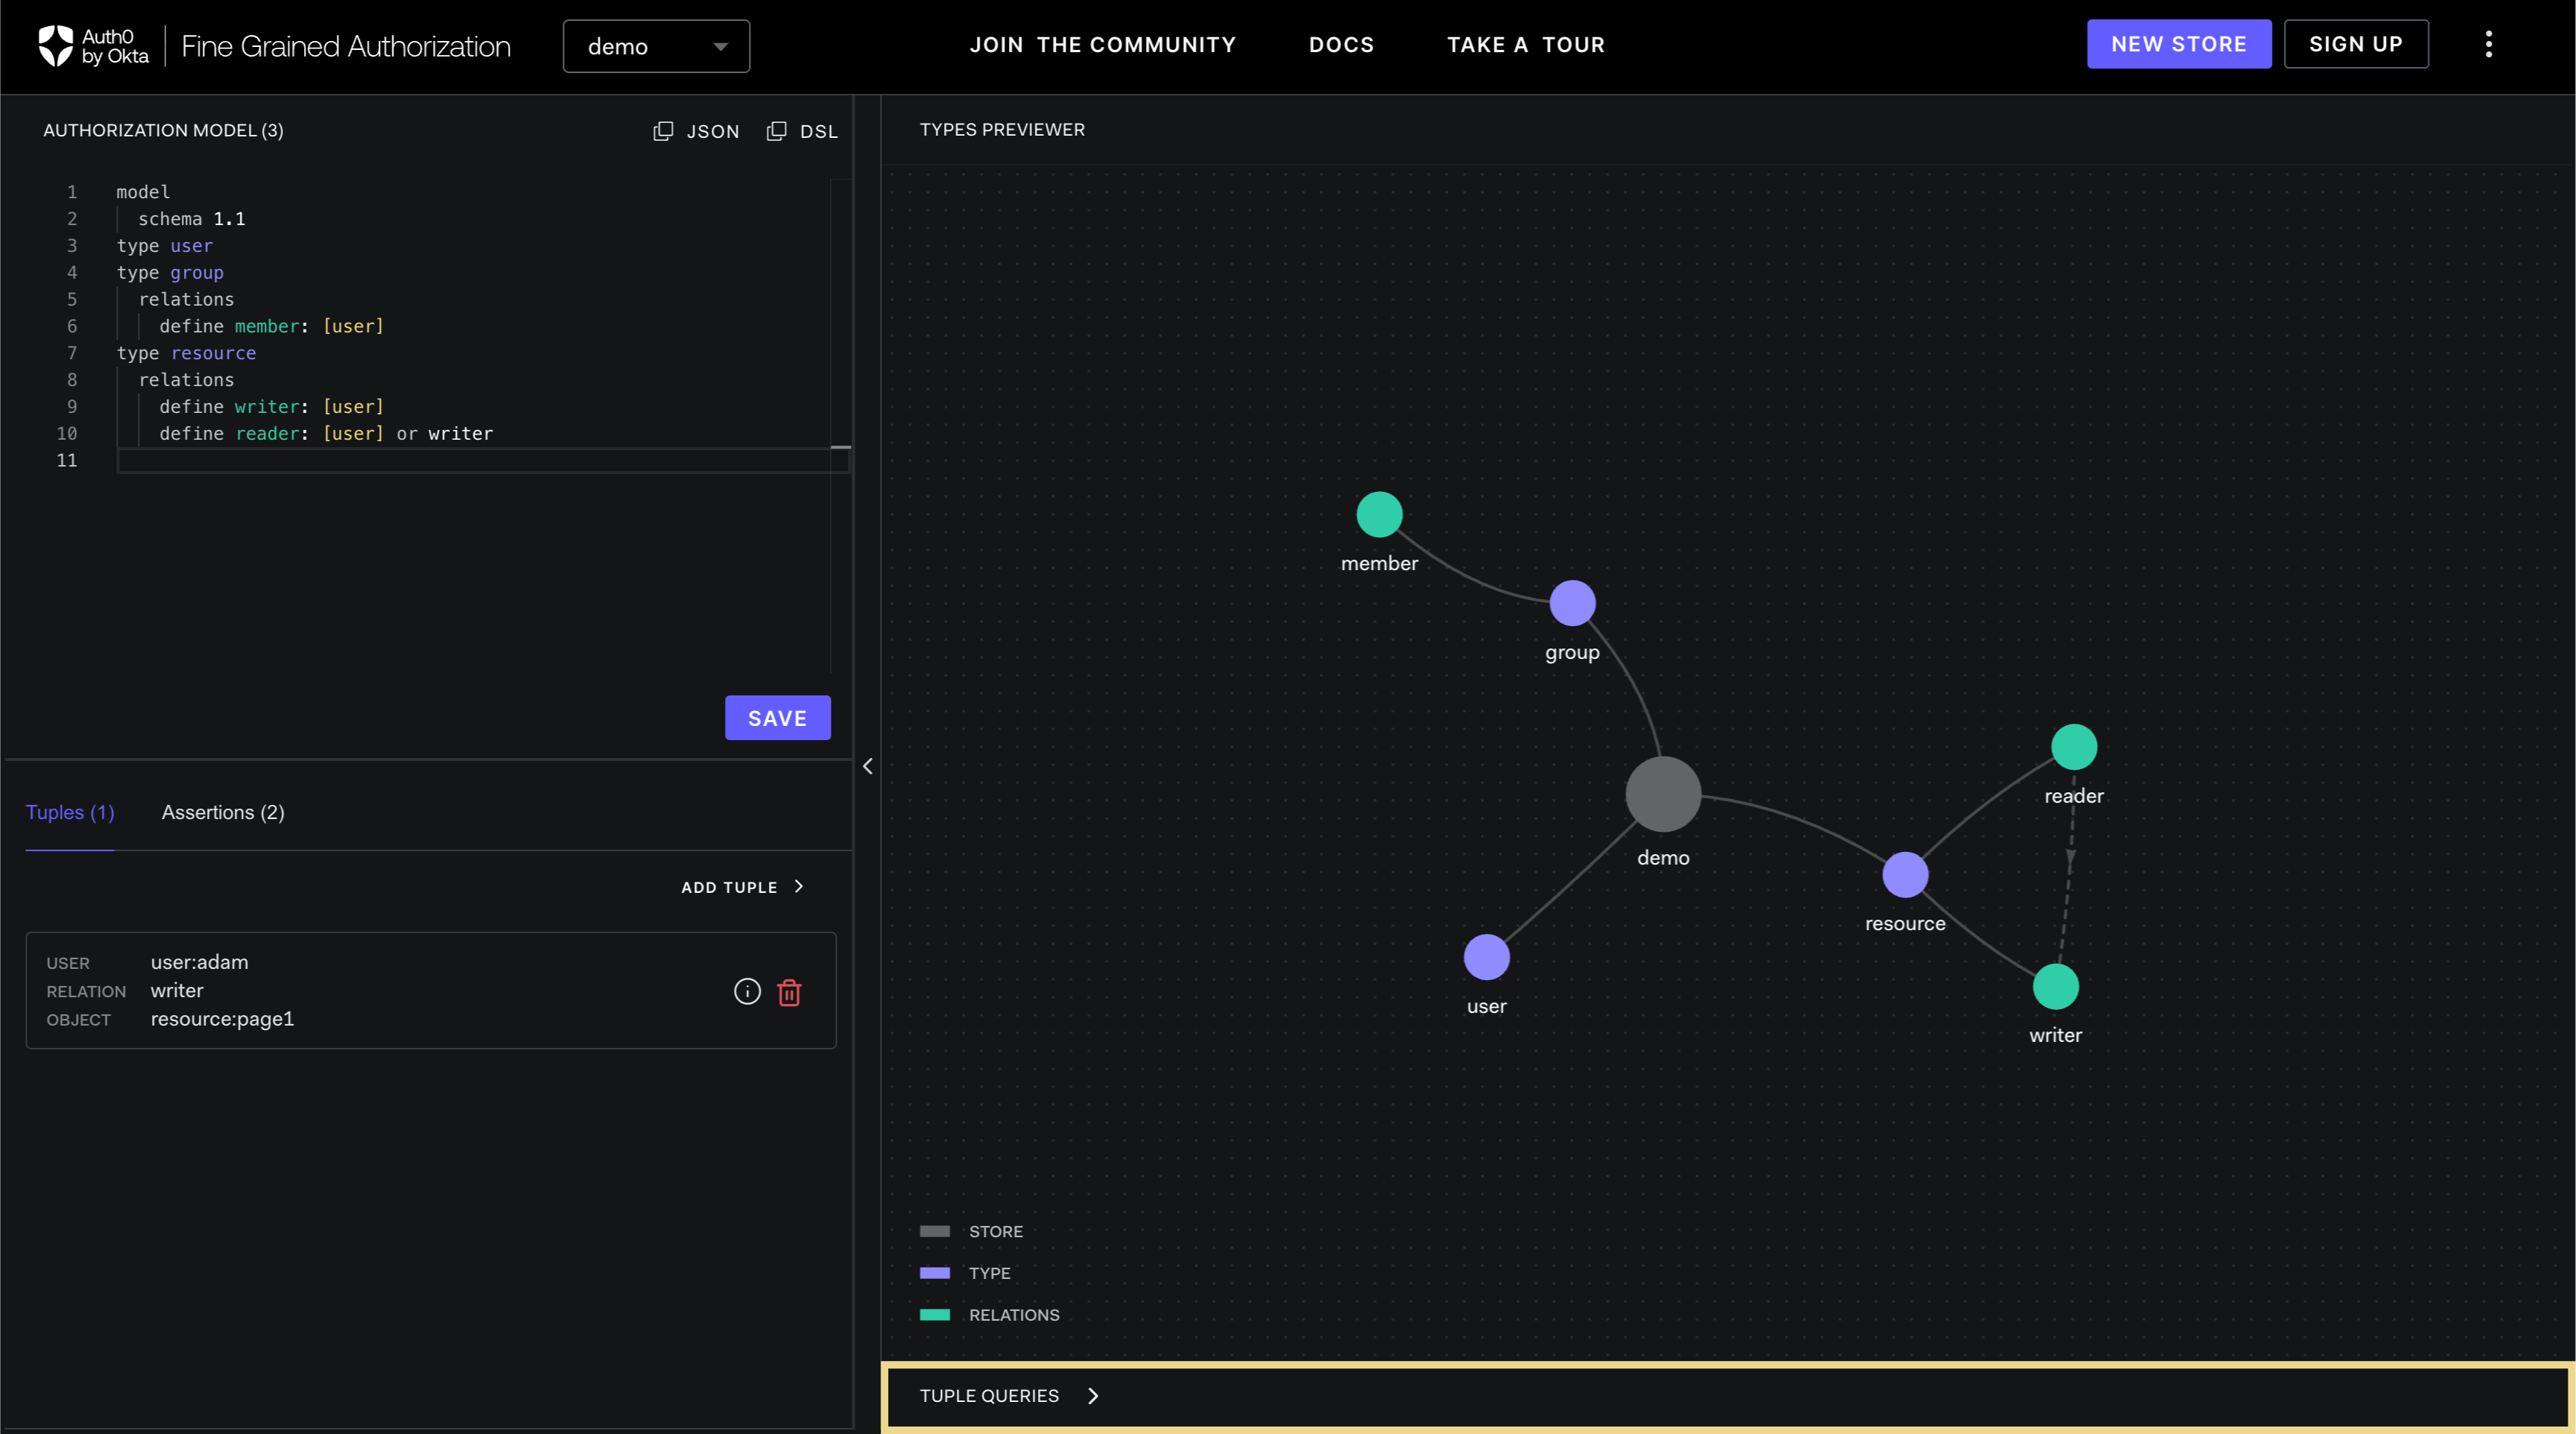
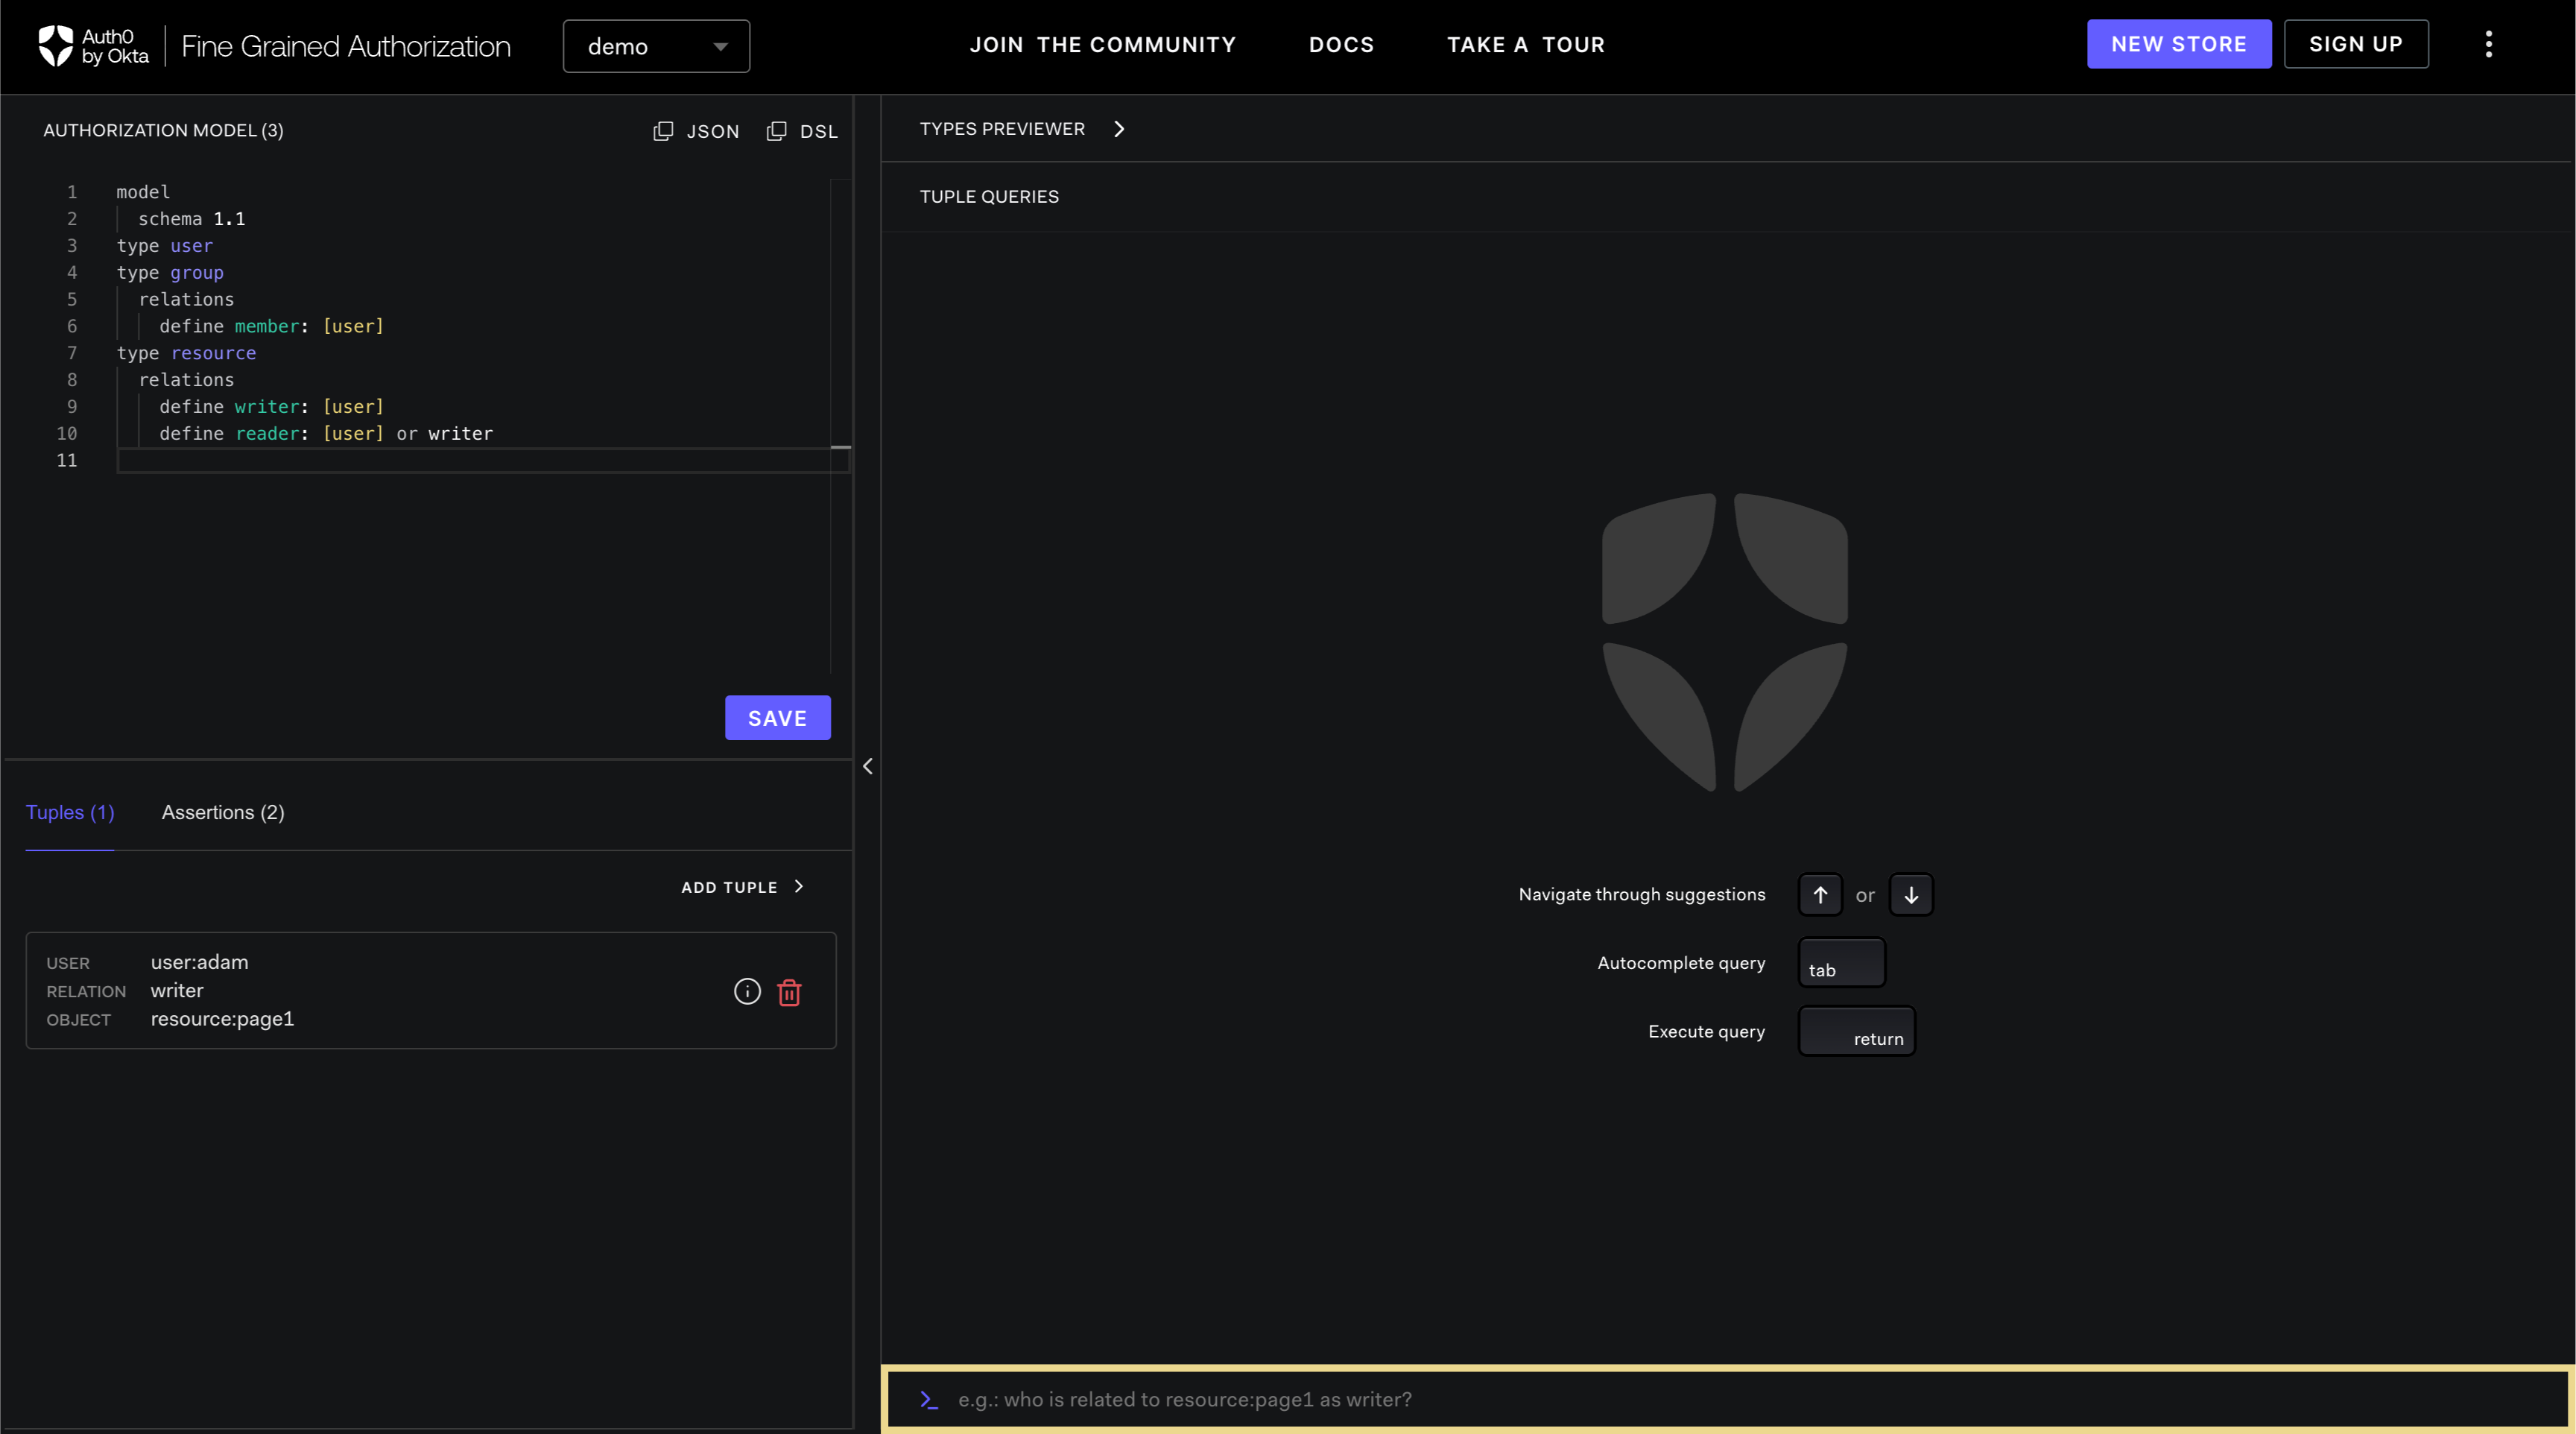
You may also run relationship tuple queries to view how the relationship is established between a user and an object. To do this, click the TUPLE QUERIES tab in the previewer panel at the lower right half of the screen.
-
After TUPLE QUERIES tab is clicked, you will be shown the TUPLE QUERIES panel where you can type the query at the text box.
There are two types of queries that can be asked:
Is x related to y as z?
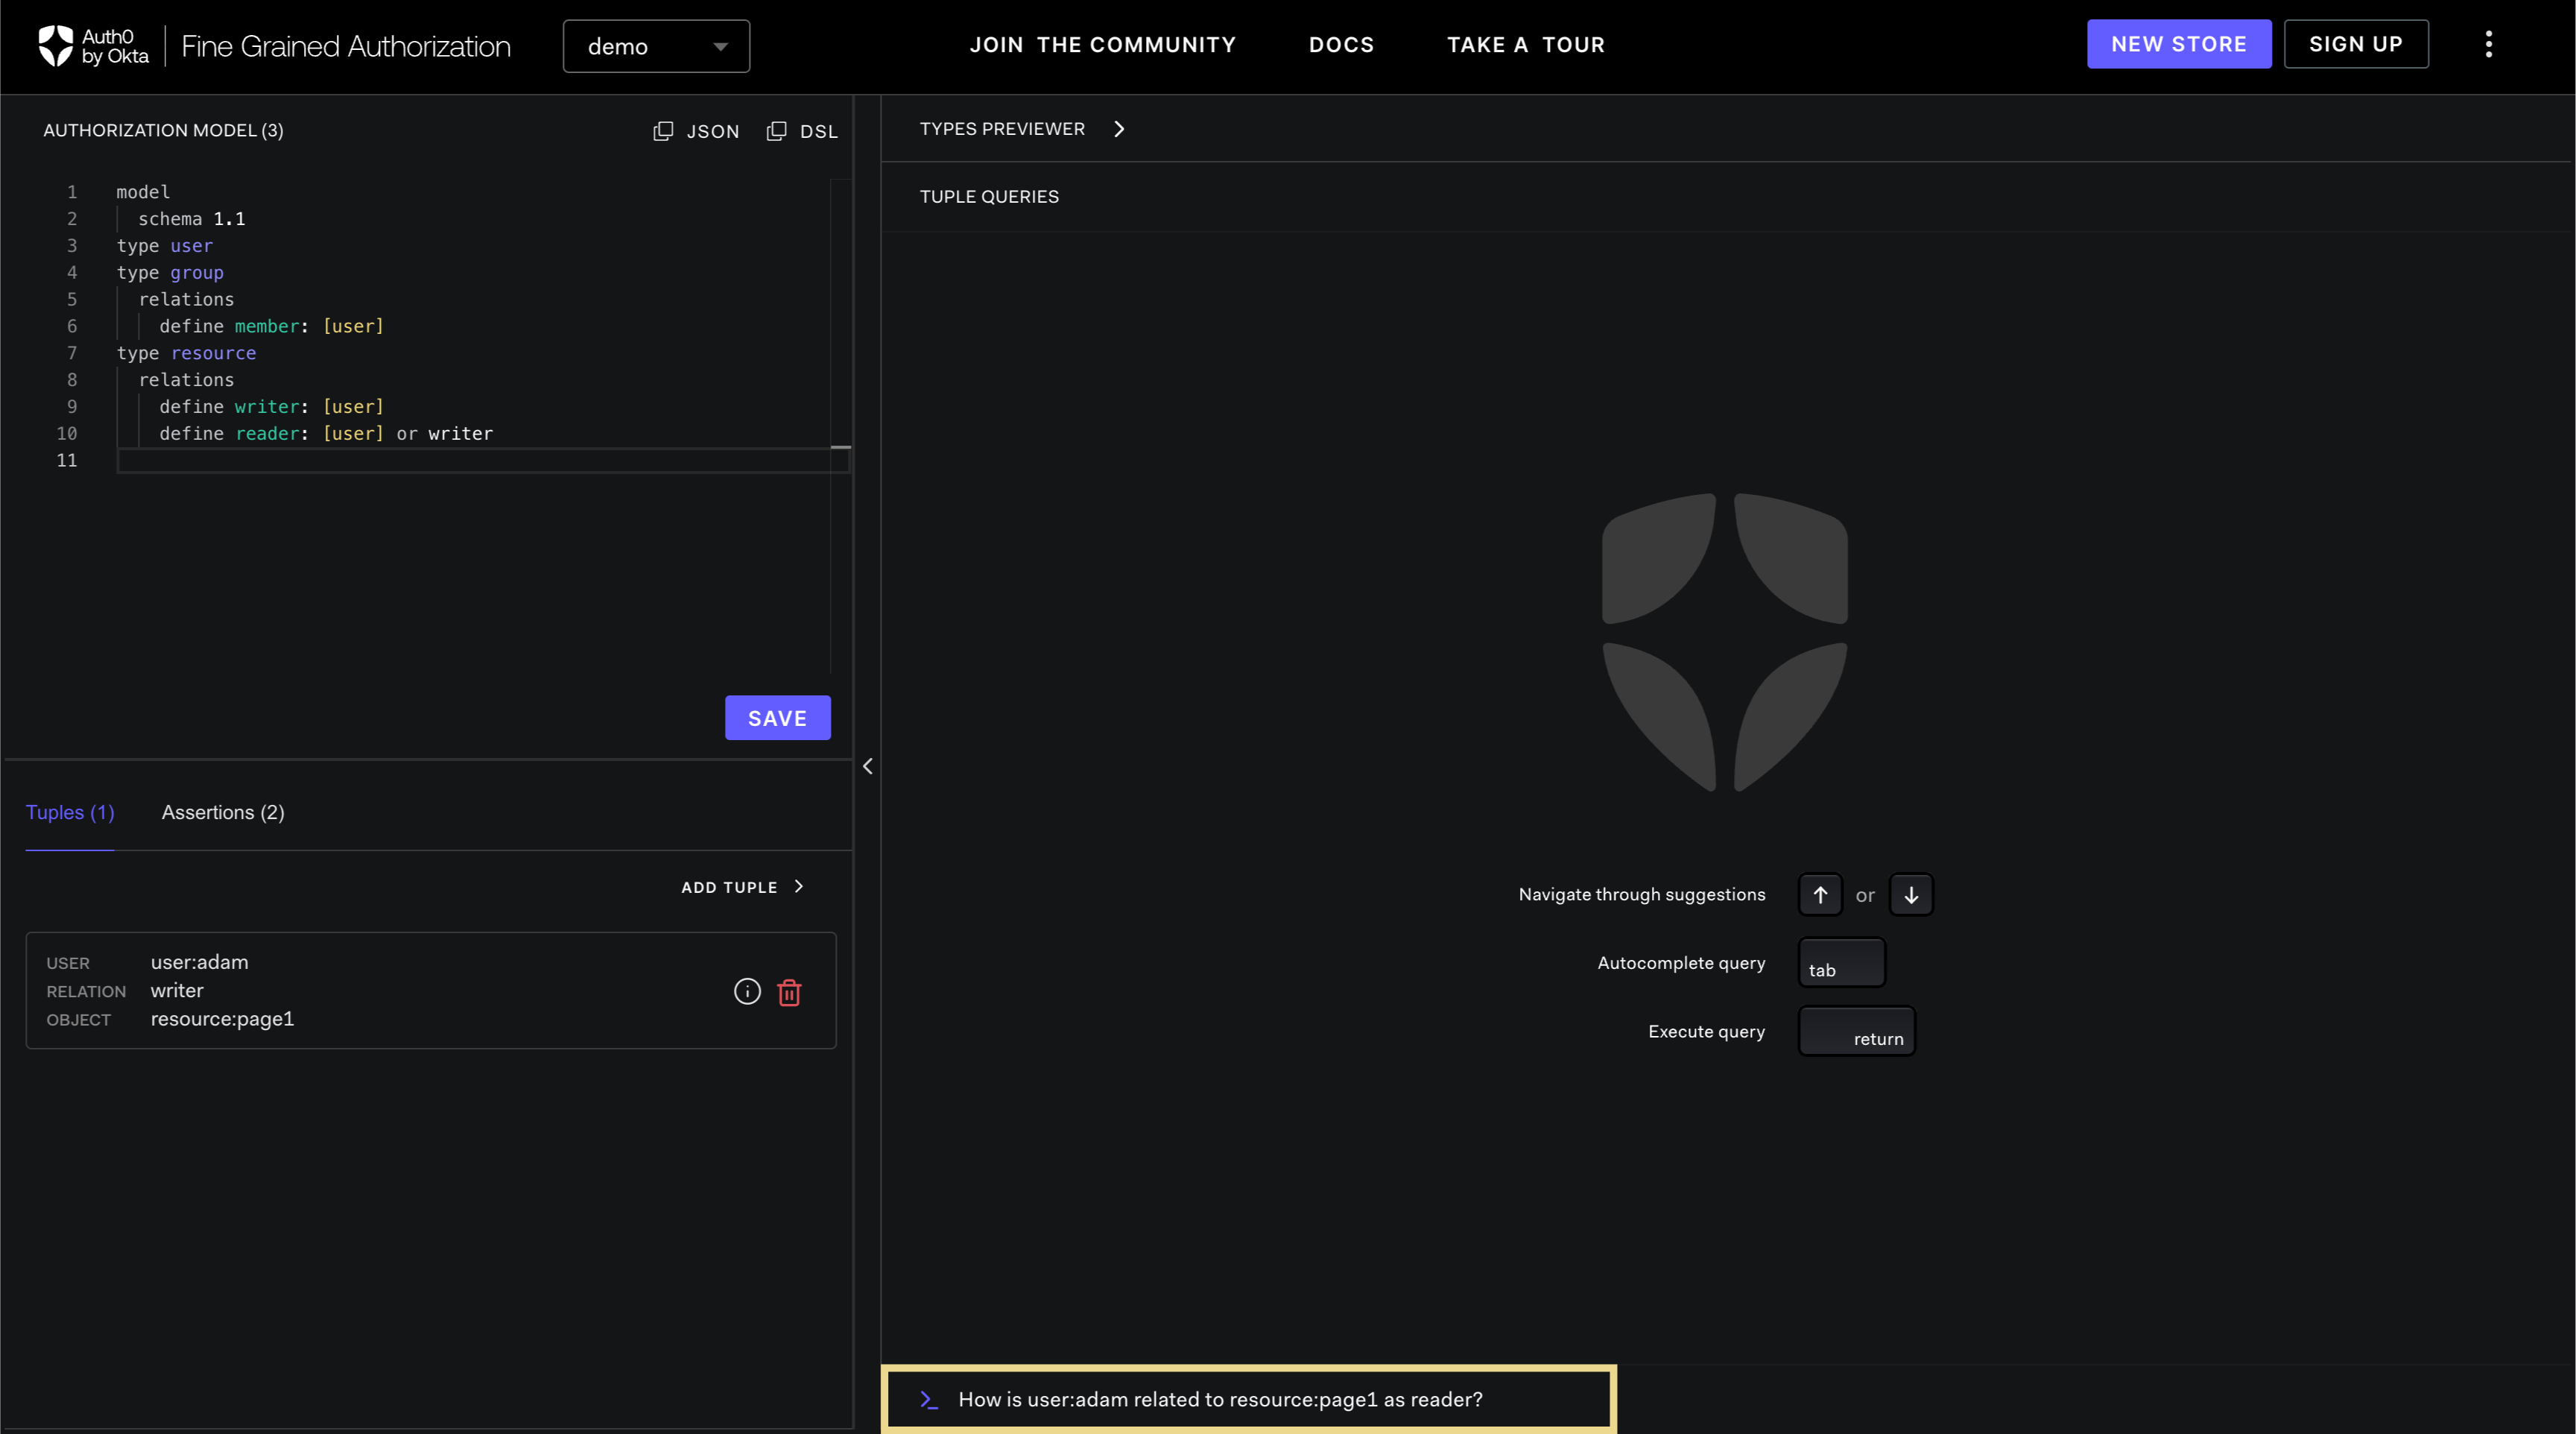
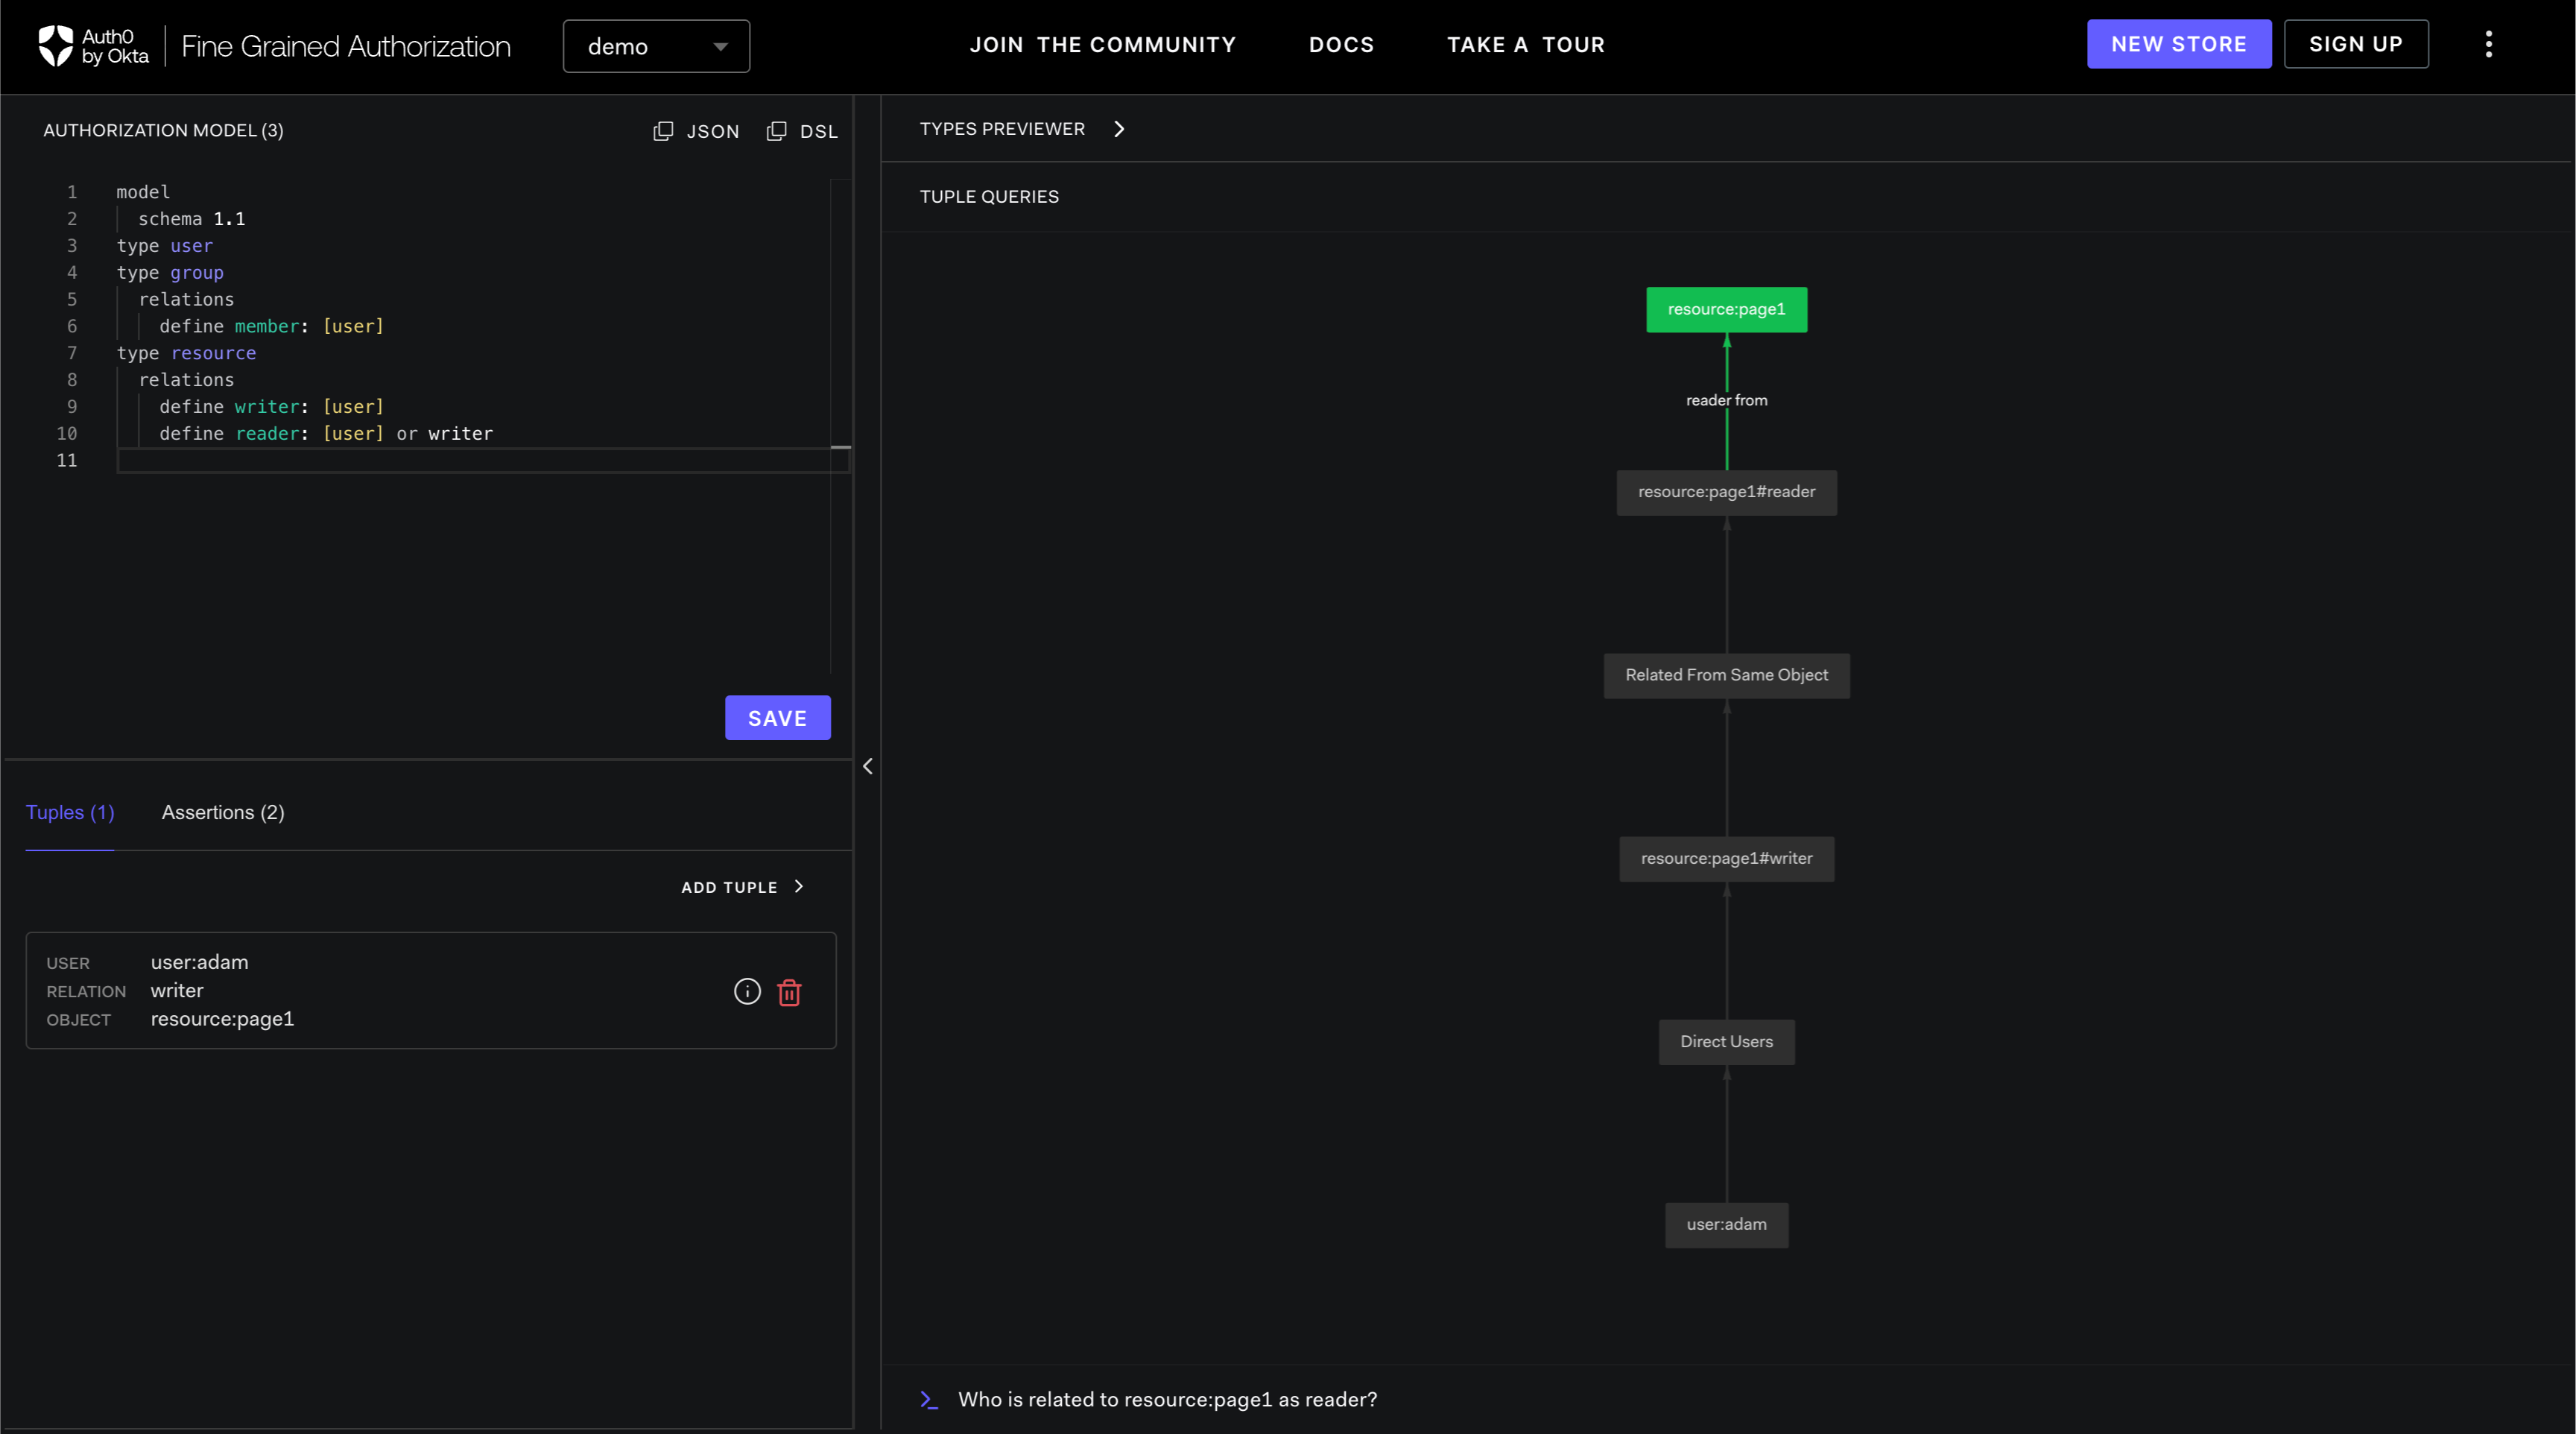
The first type of query is of the form: "Is x related to y as z?". This form of query will provide visualization on why the relationship exists between user and object.
-
In the query box, type "Is adam related to resource:page1 as reader?" and type Enter.
-
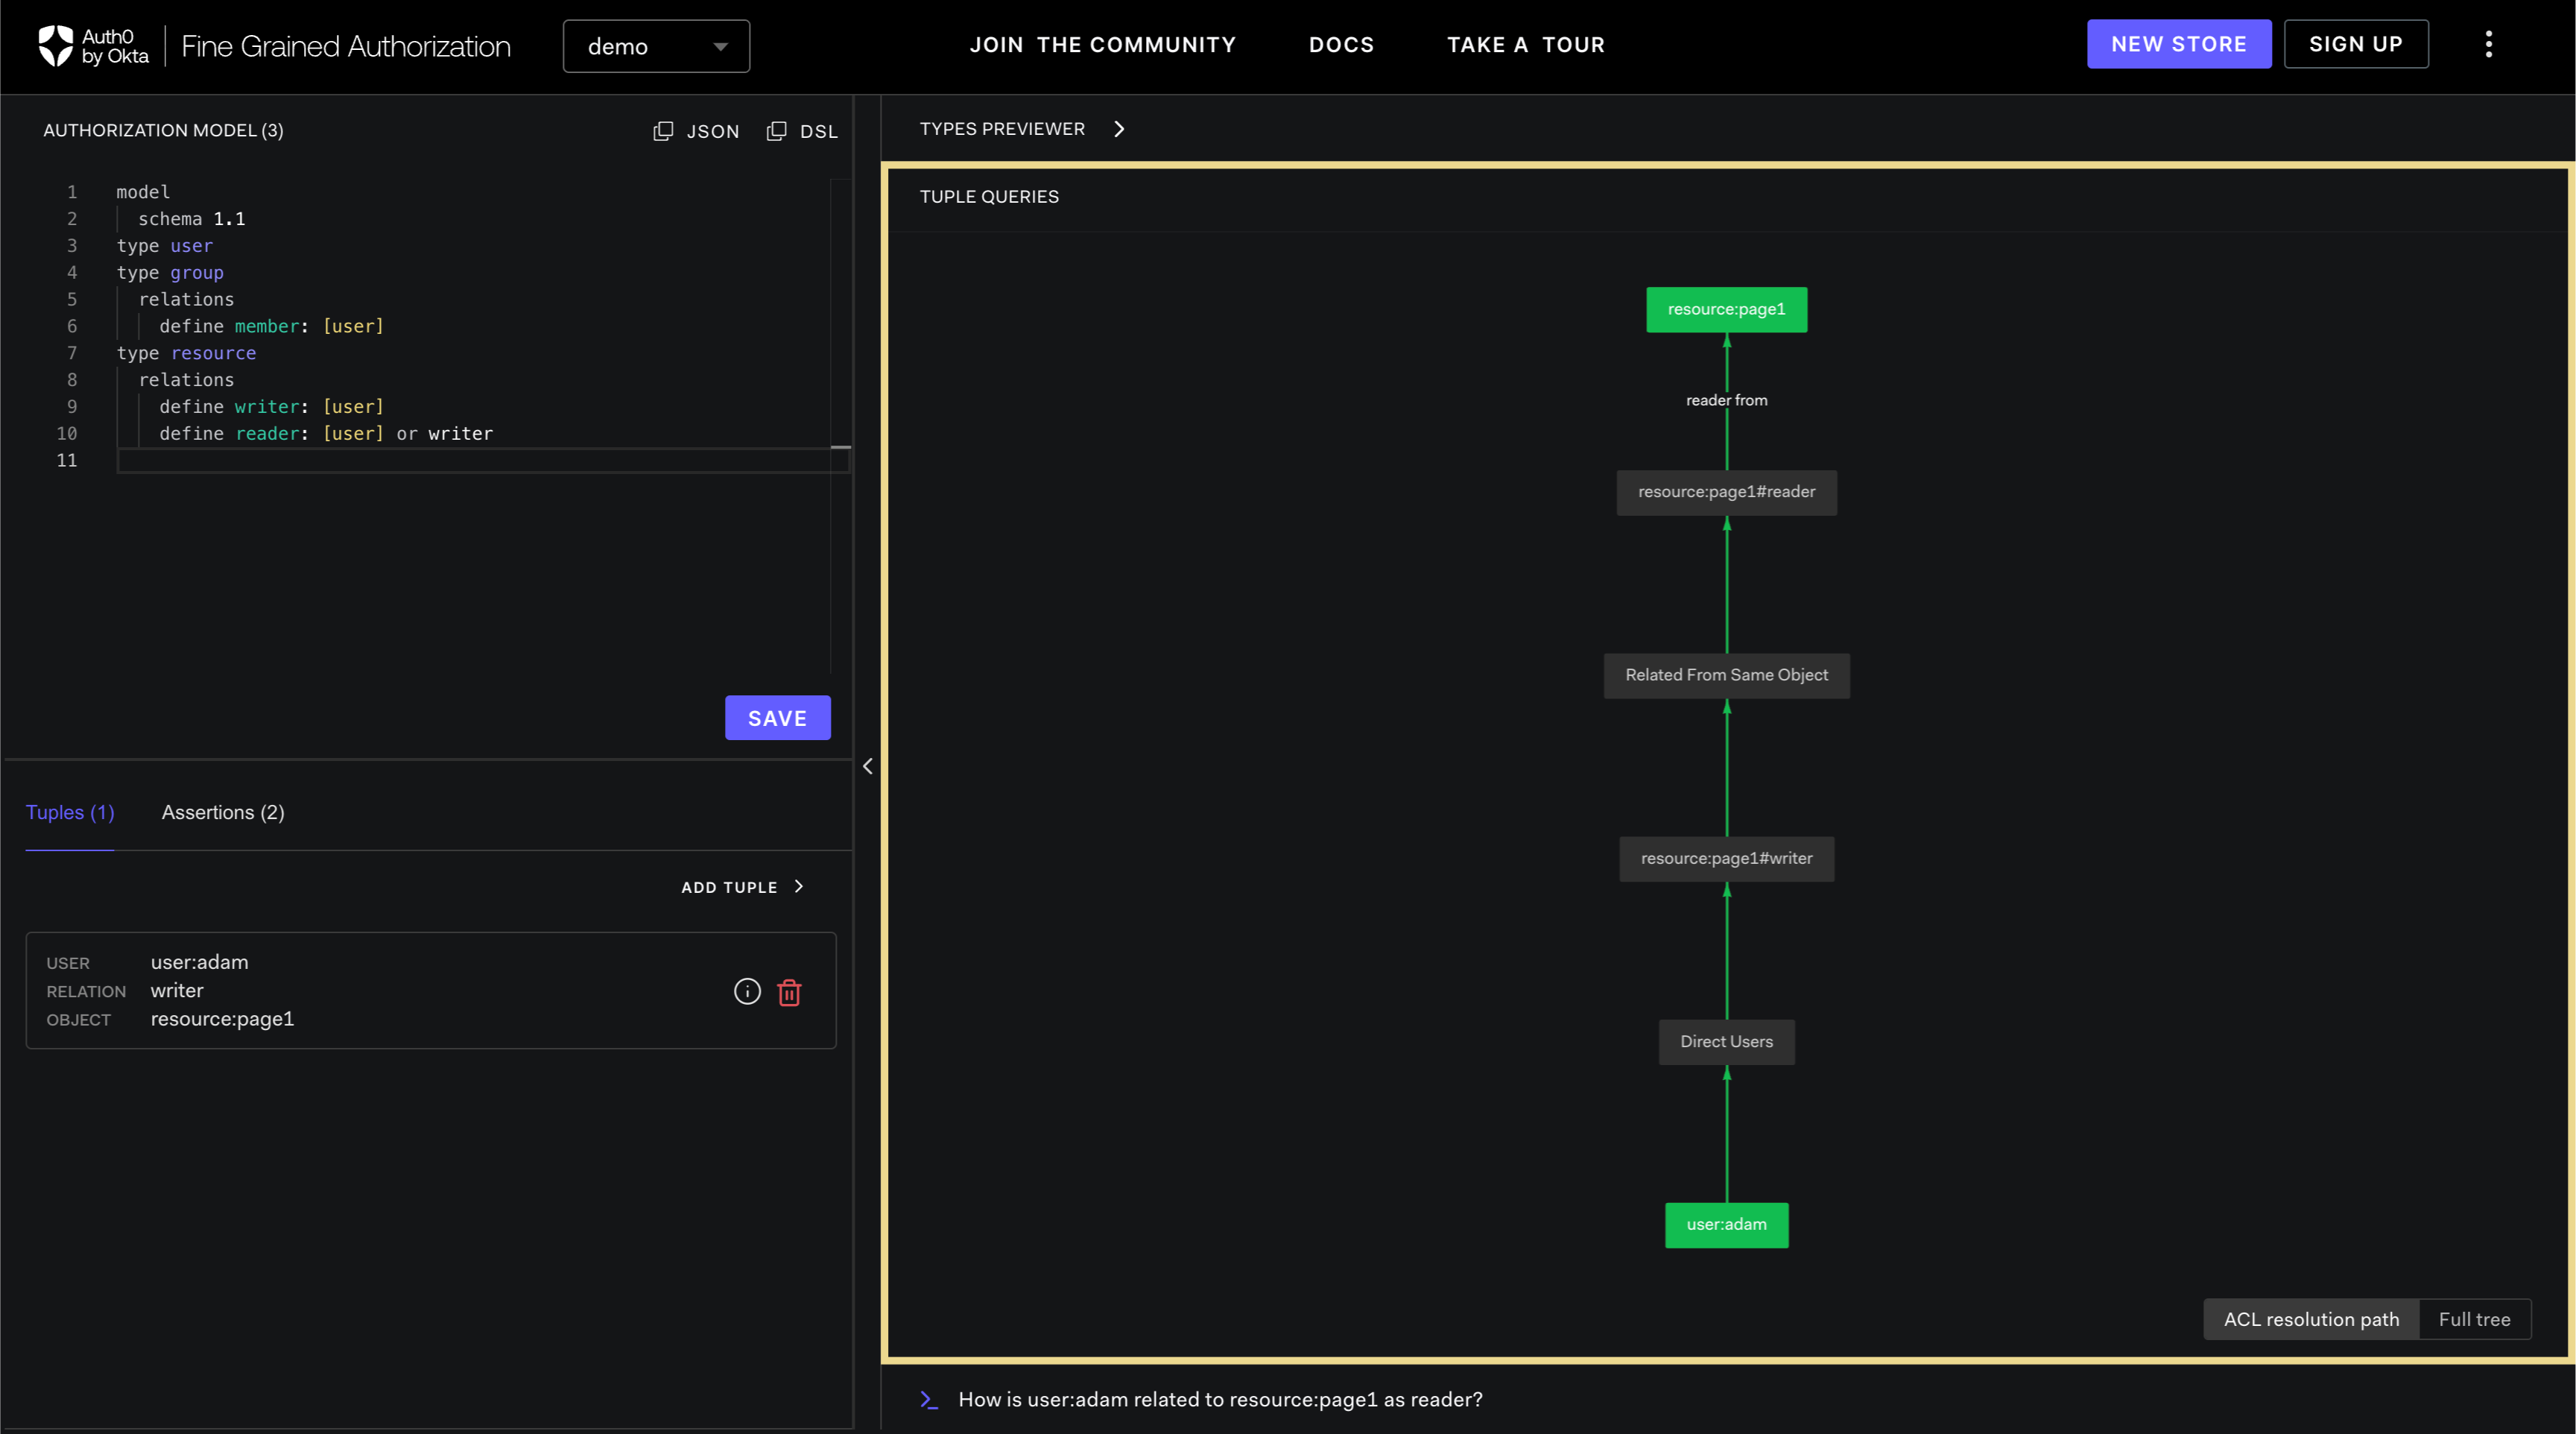
A successful query will show visualization on how the relationship is established in the TUPLE QUERIES panel.
-
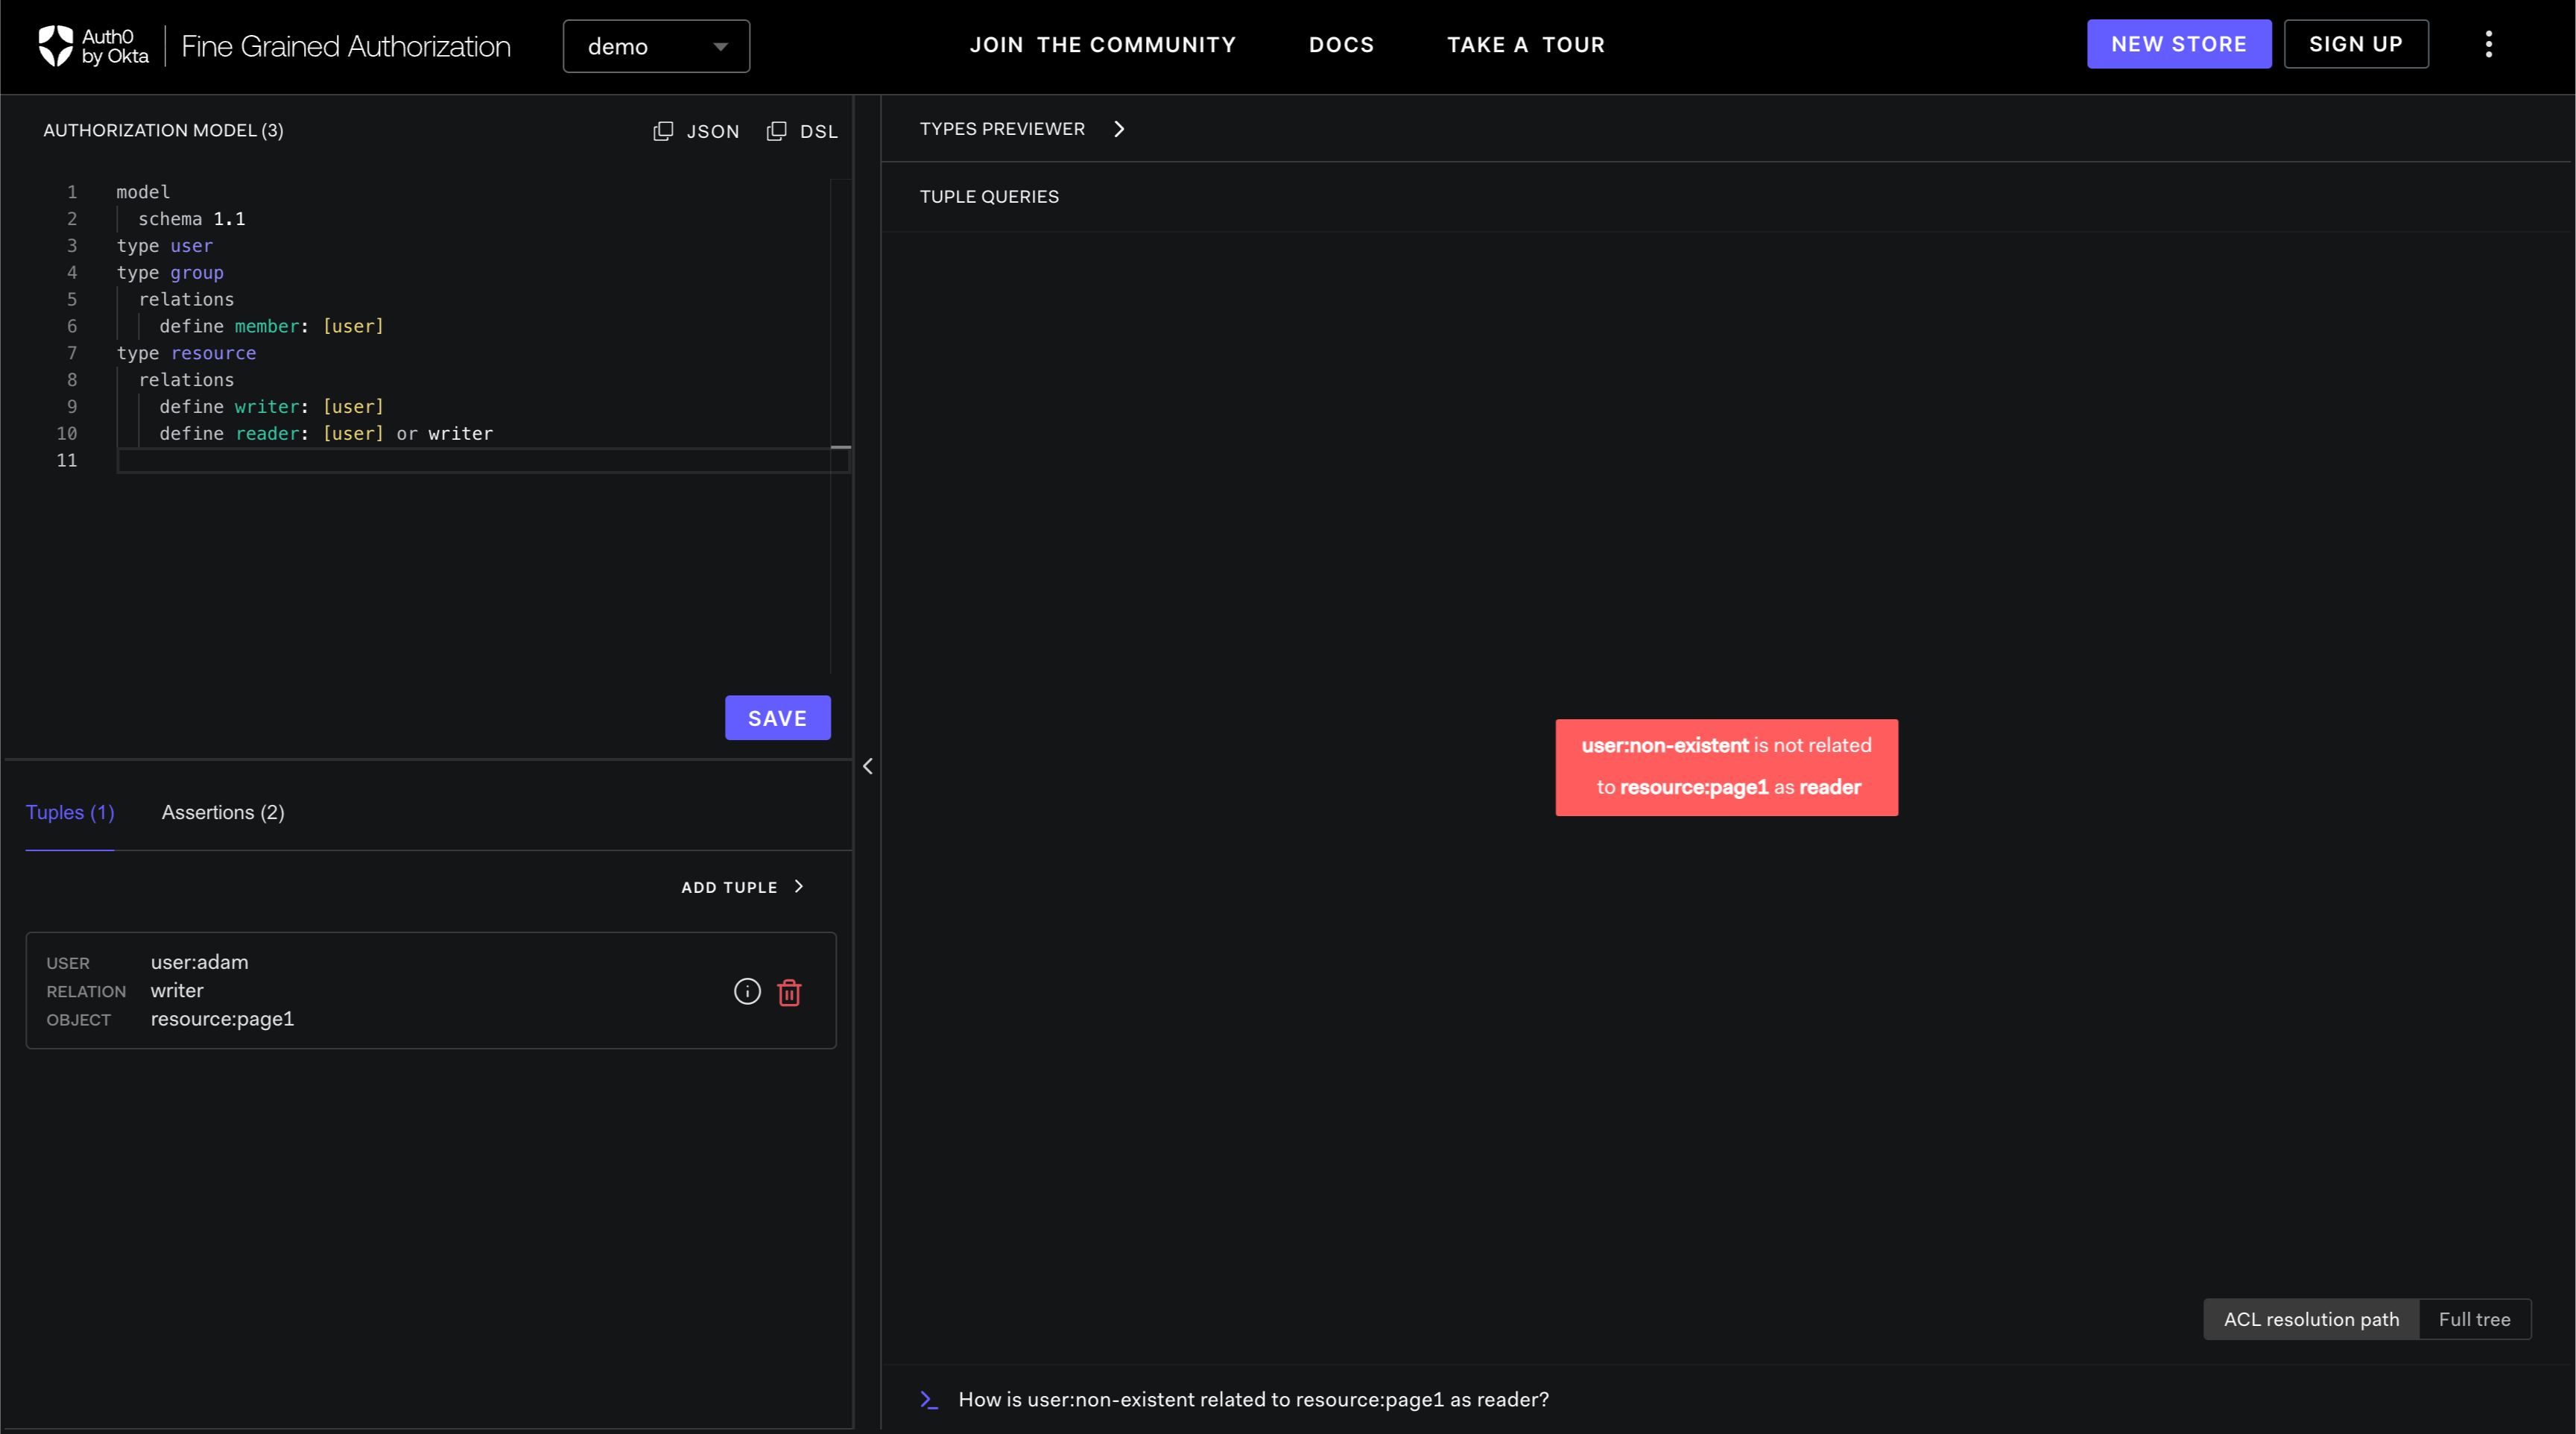
An unsuccessful query will be denoted with a red box in the TUPLE QUERIES panel.
Who is related to y as z?
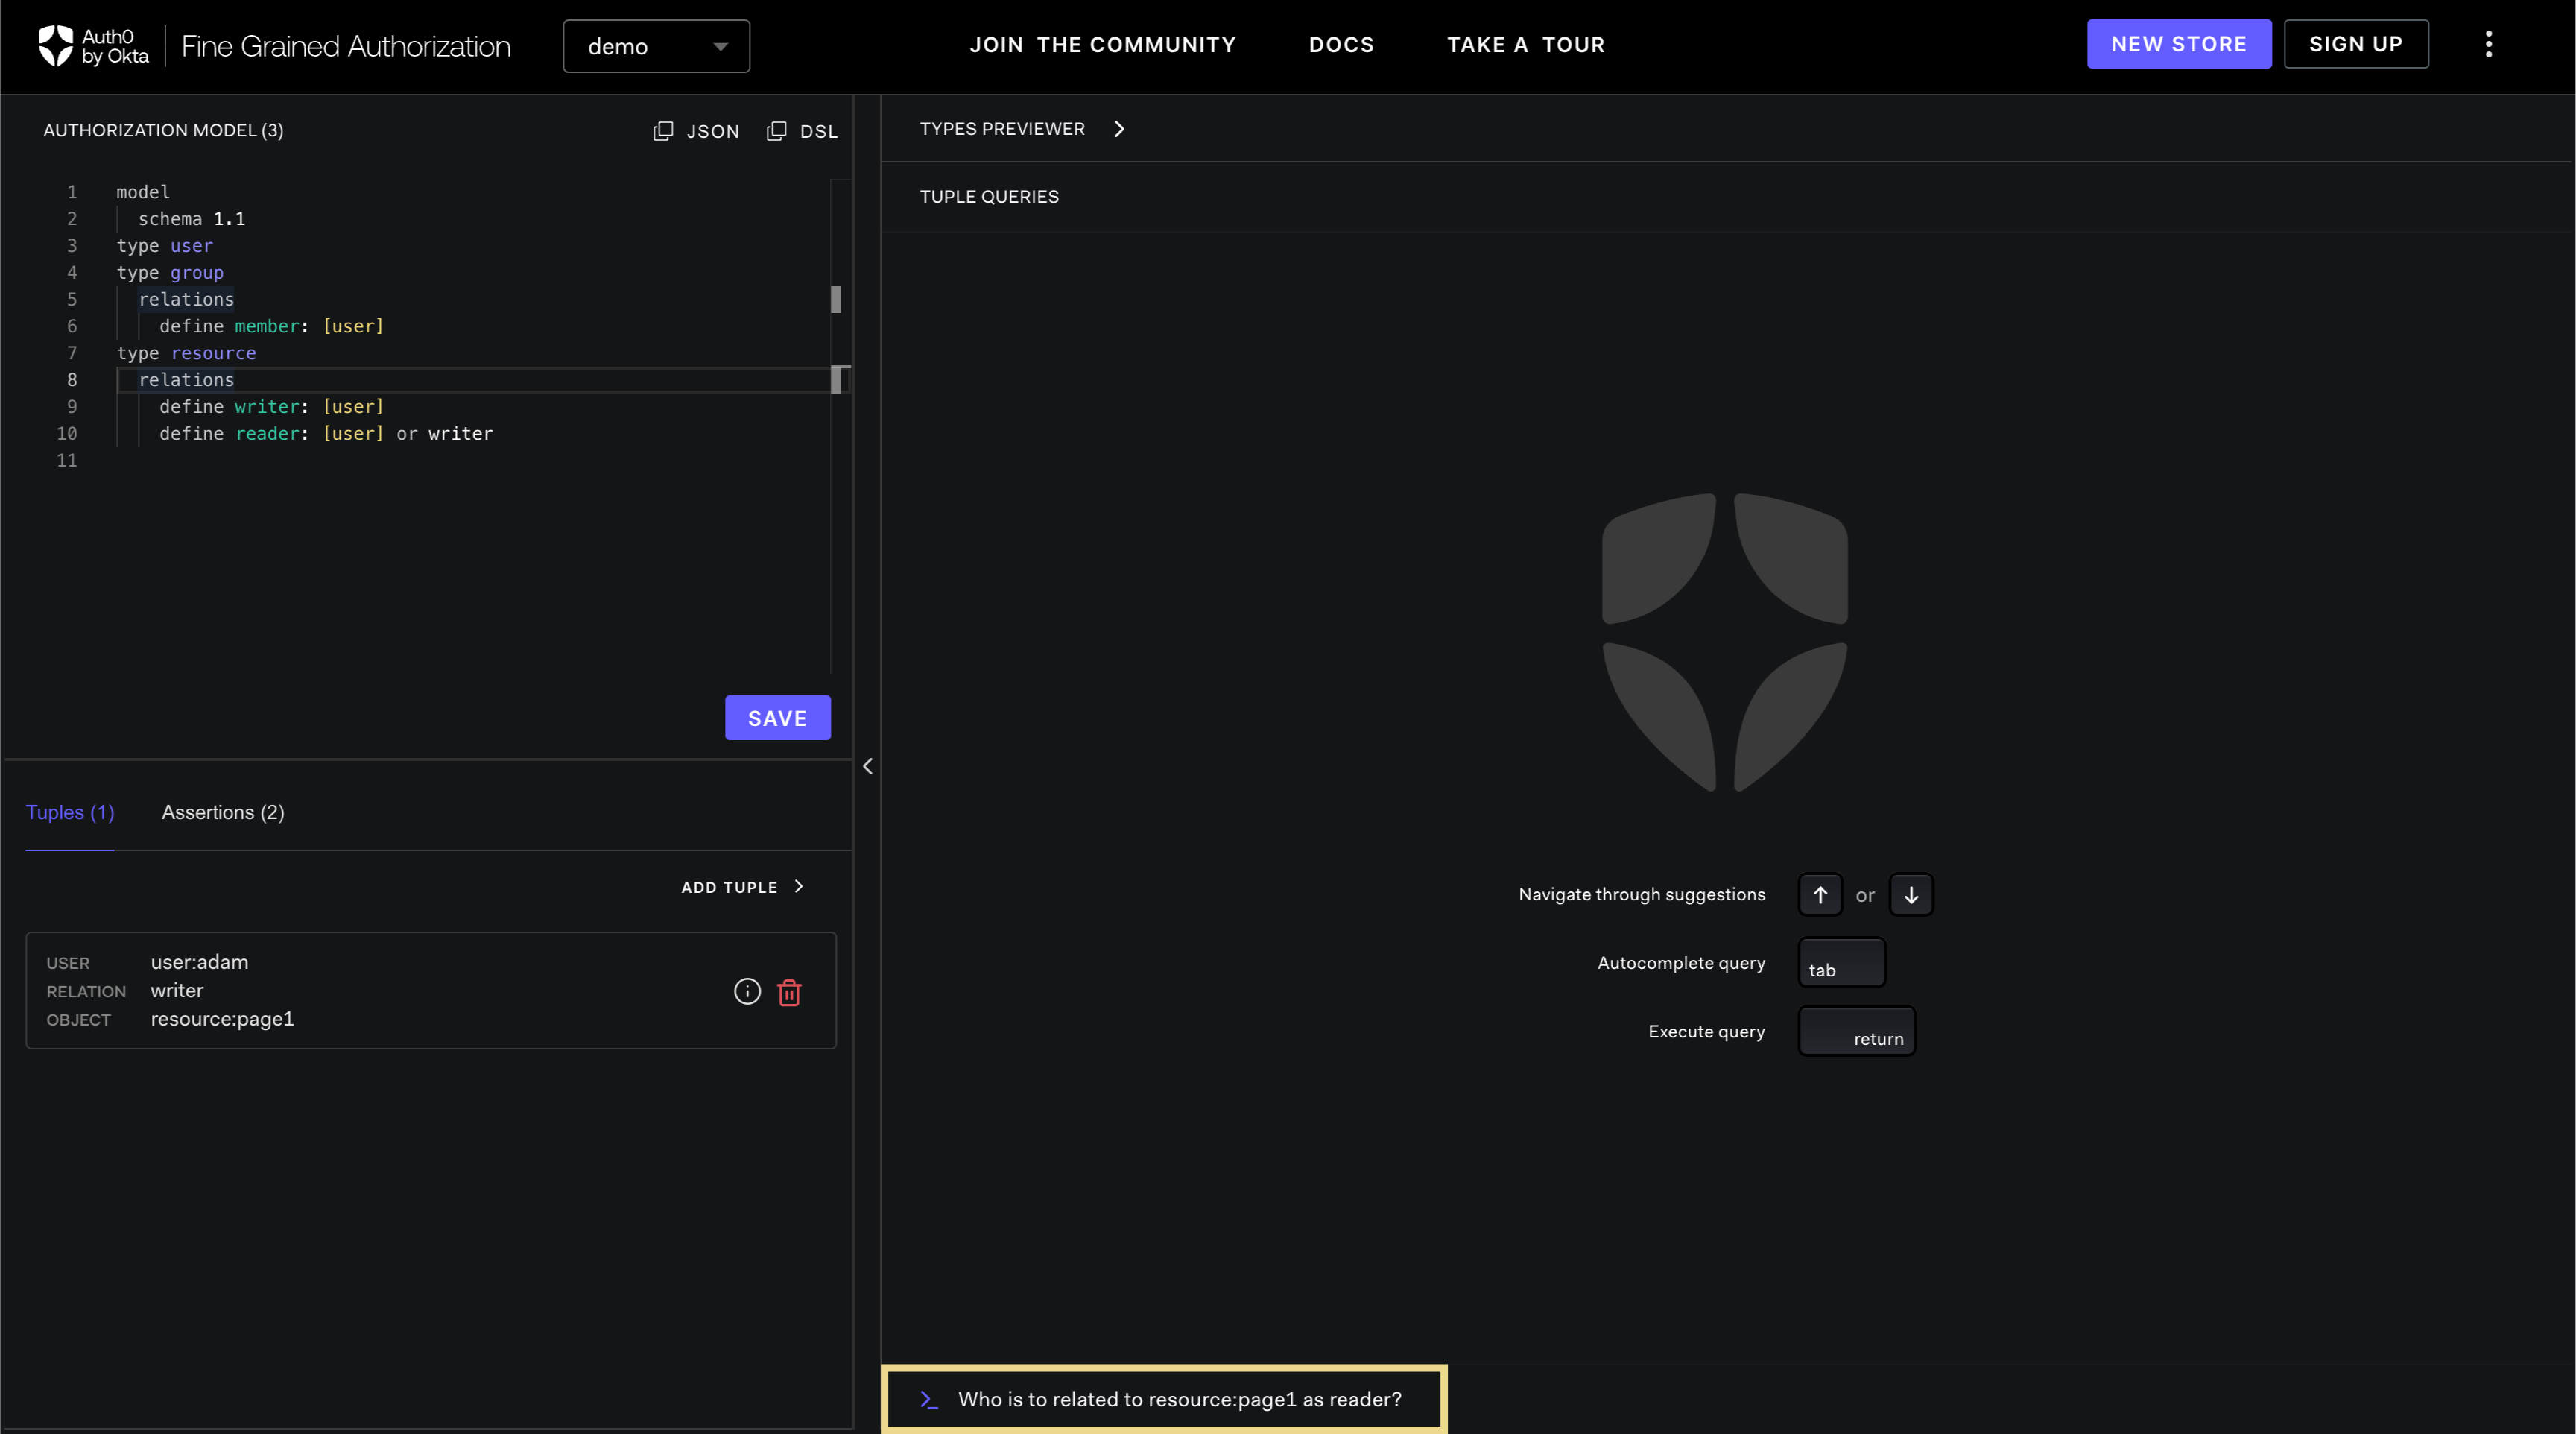
The second type of query is of the form: "Who is related to y as z?". This form of query will provide visualization on who has a particular relationship with an object.
-
In the query box, type "who is to related to resource:page1 as reader?" and type Enter.
-
A successful query will show visualization on all the users that have the relationship in the TUPLE QUERIES panel. As it can be seen, only adam has reader relationship with resource:page1.
Getting store ID
The store ID is a value that uniquely identify the store. To obtain the store ID:
-
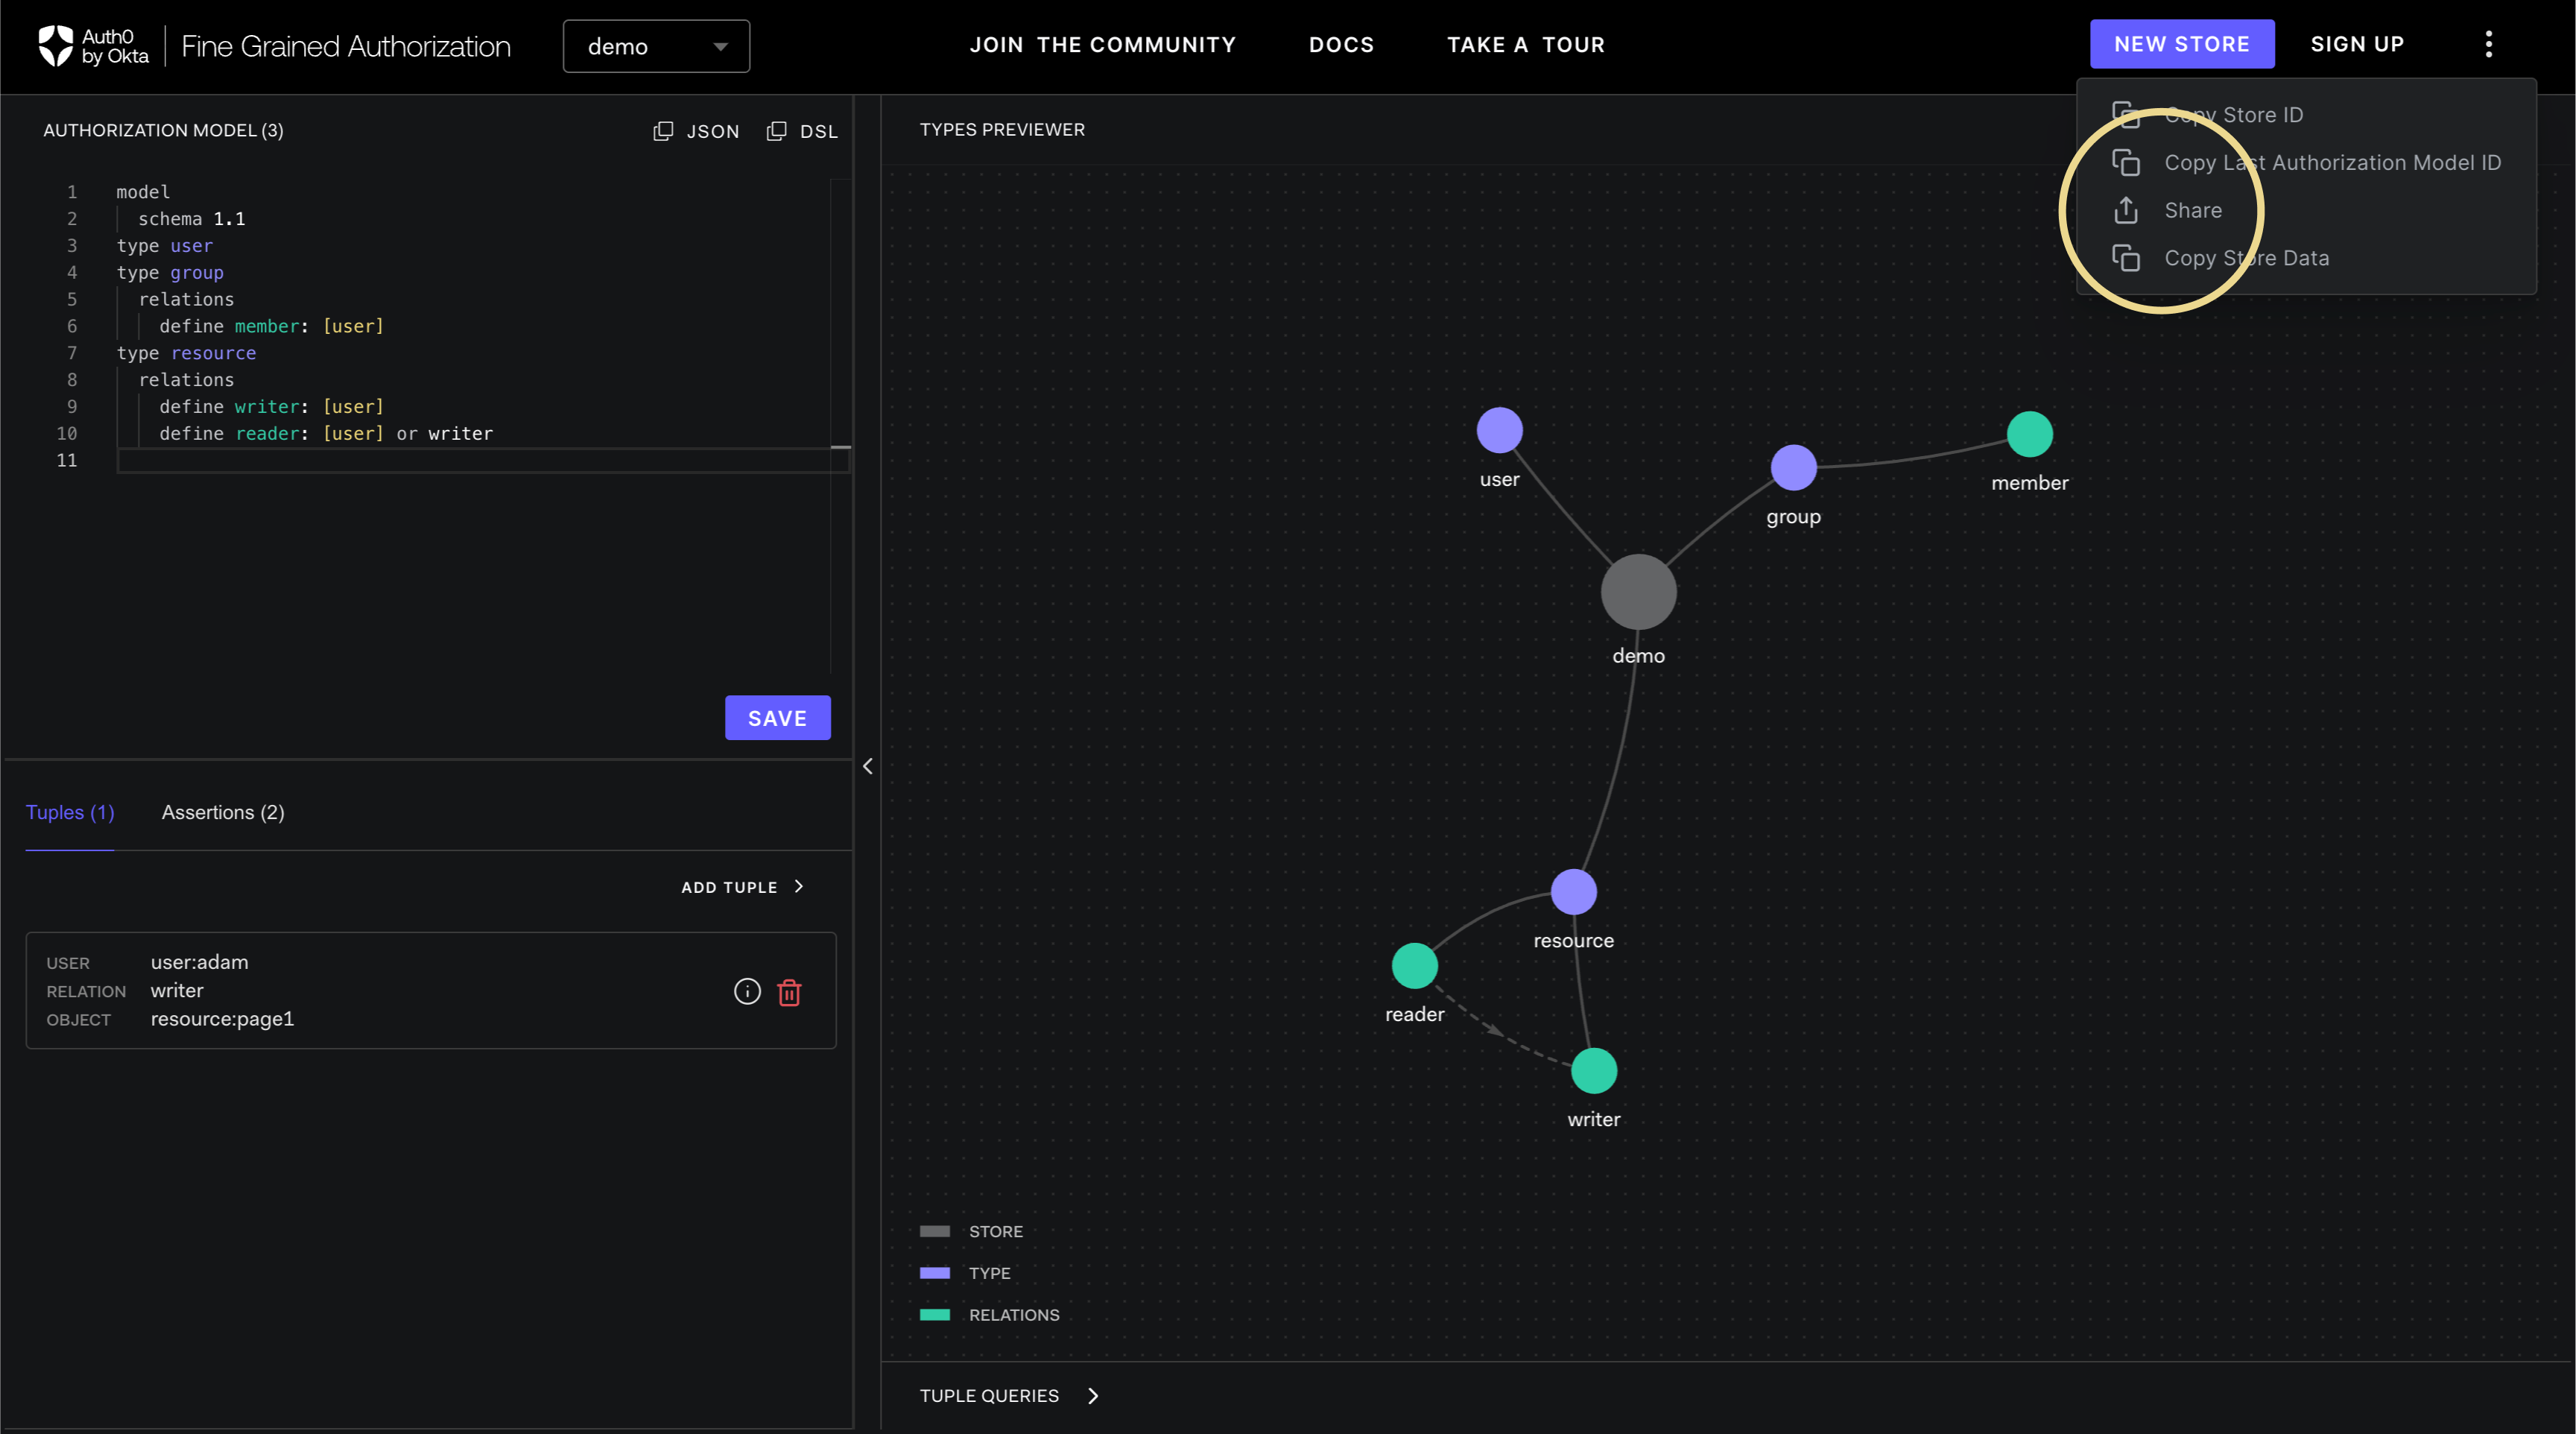
Click on the three dots button on the top-right of the screen.
-
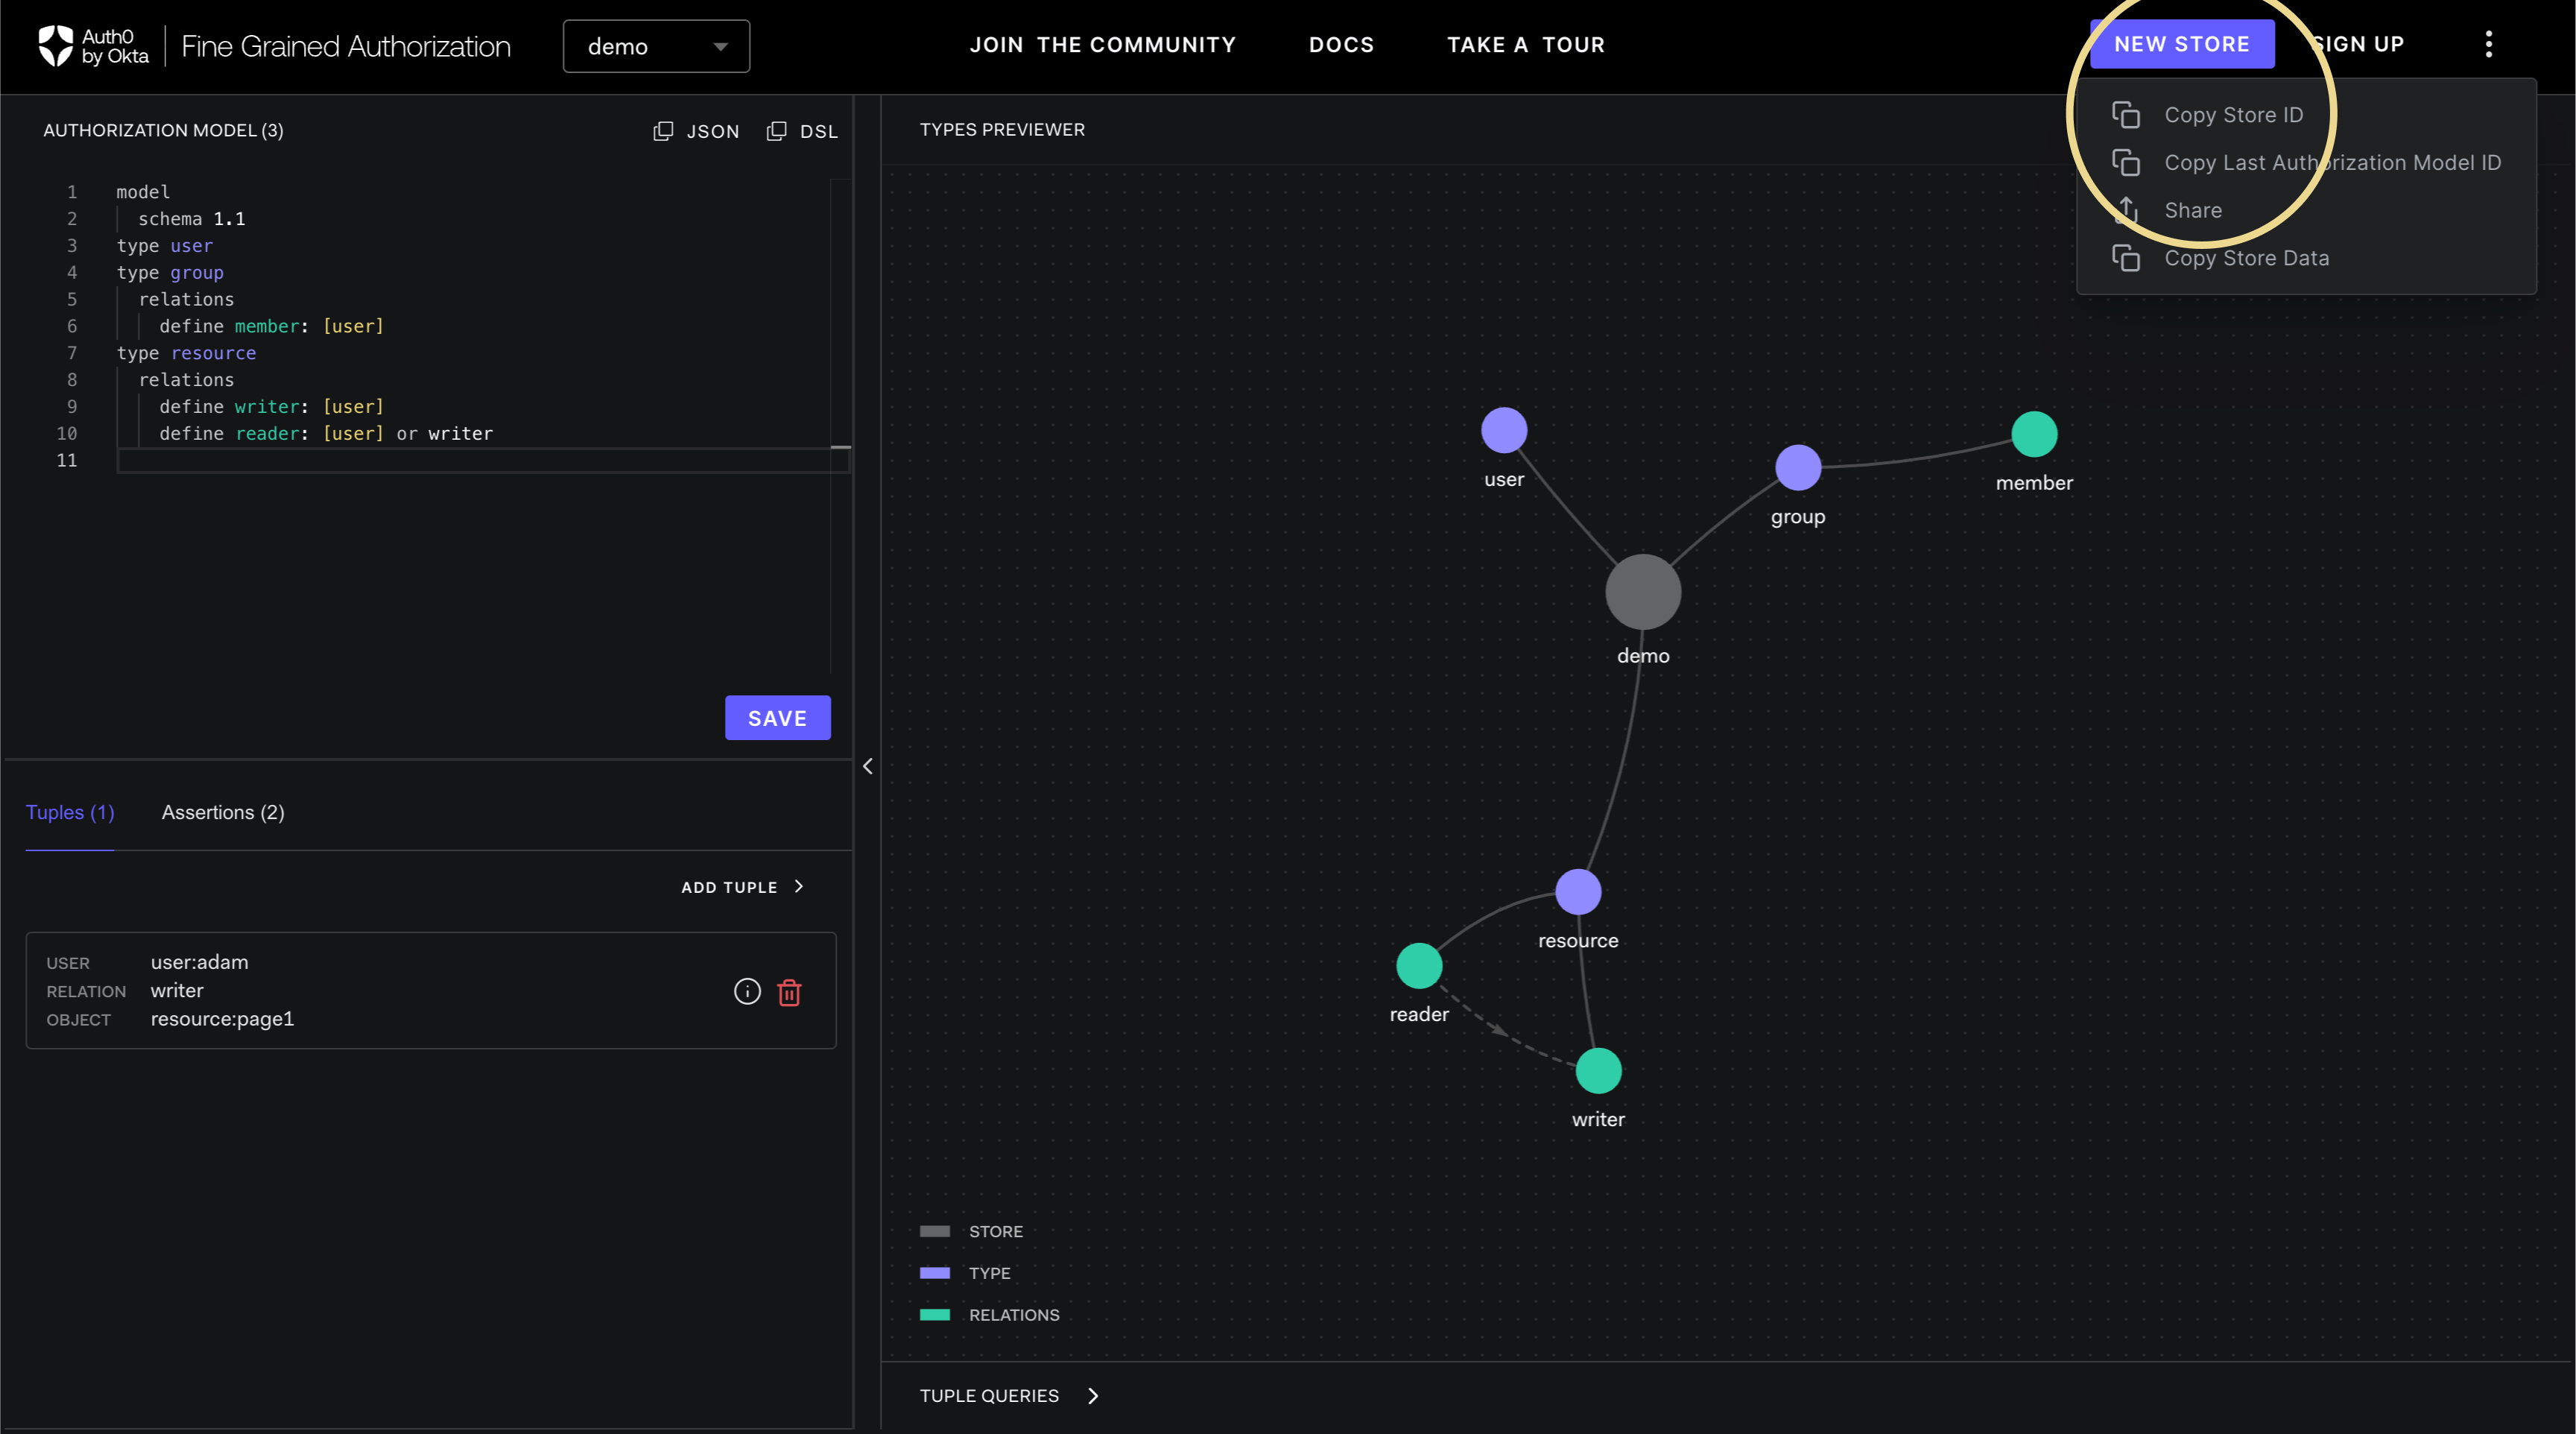
Select Copy Store ID on the top-right of the screen.
-
The store ID is in the clipboard.
Sharing the store
You can also share the store to others by sending them the playground's store URL. To share the store:
-
Click on the three dots button on the top-right of the screen.
-
Select Share on the top-right of the screen.
-
The playground's store URL is in the clipboard.
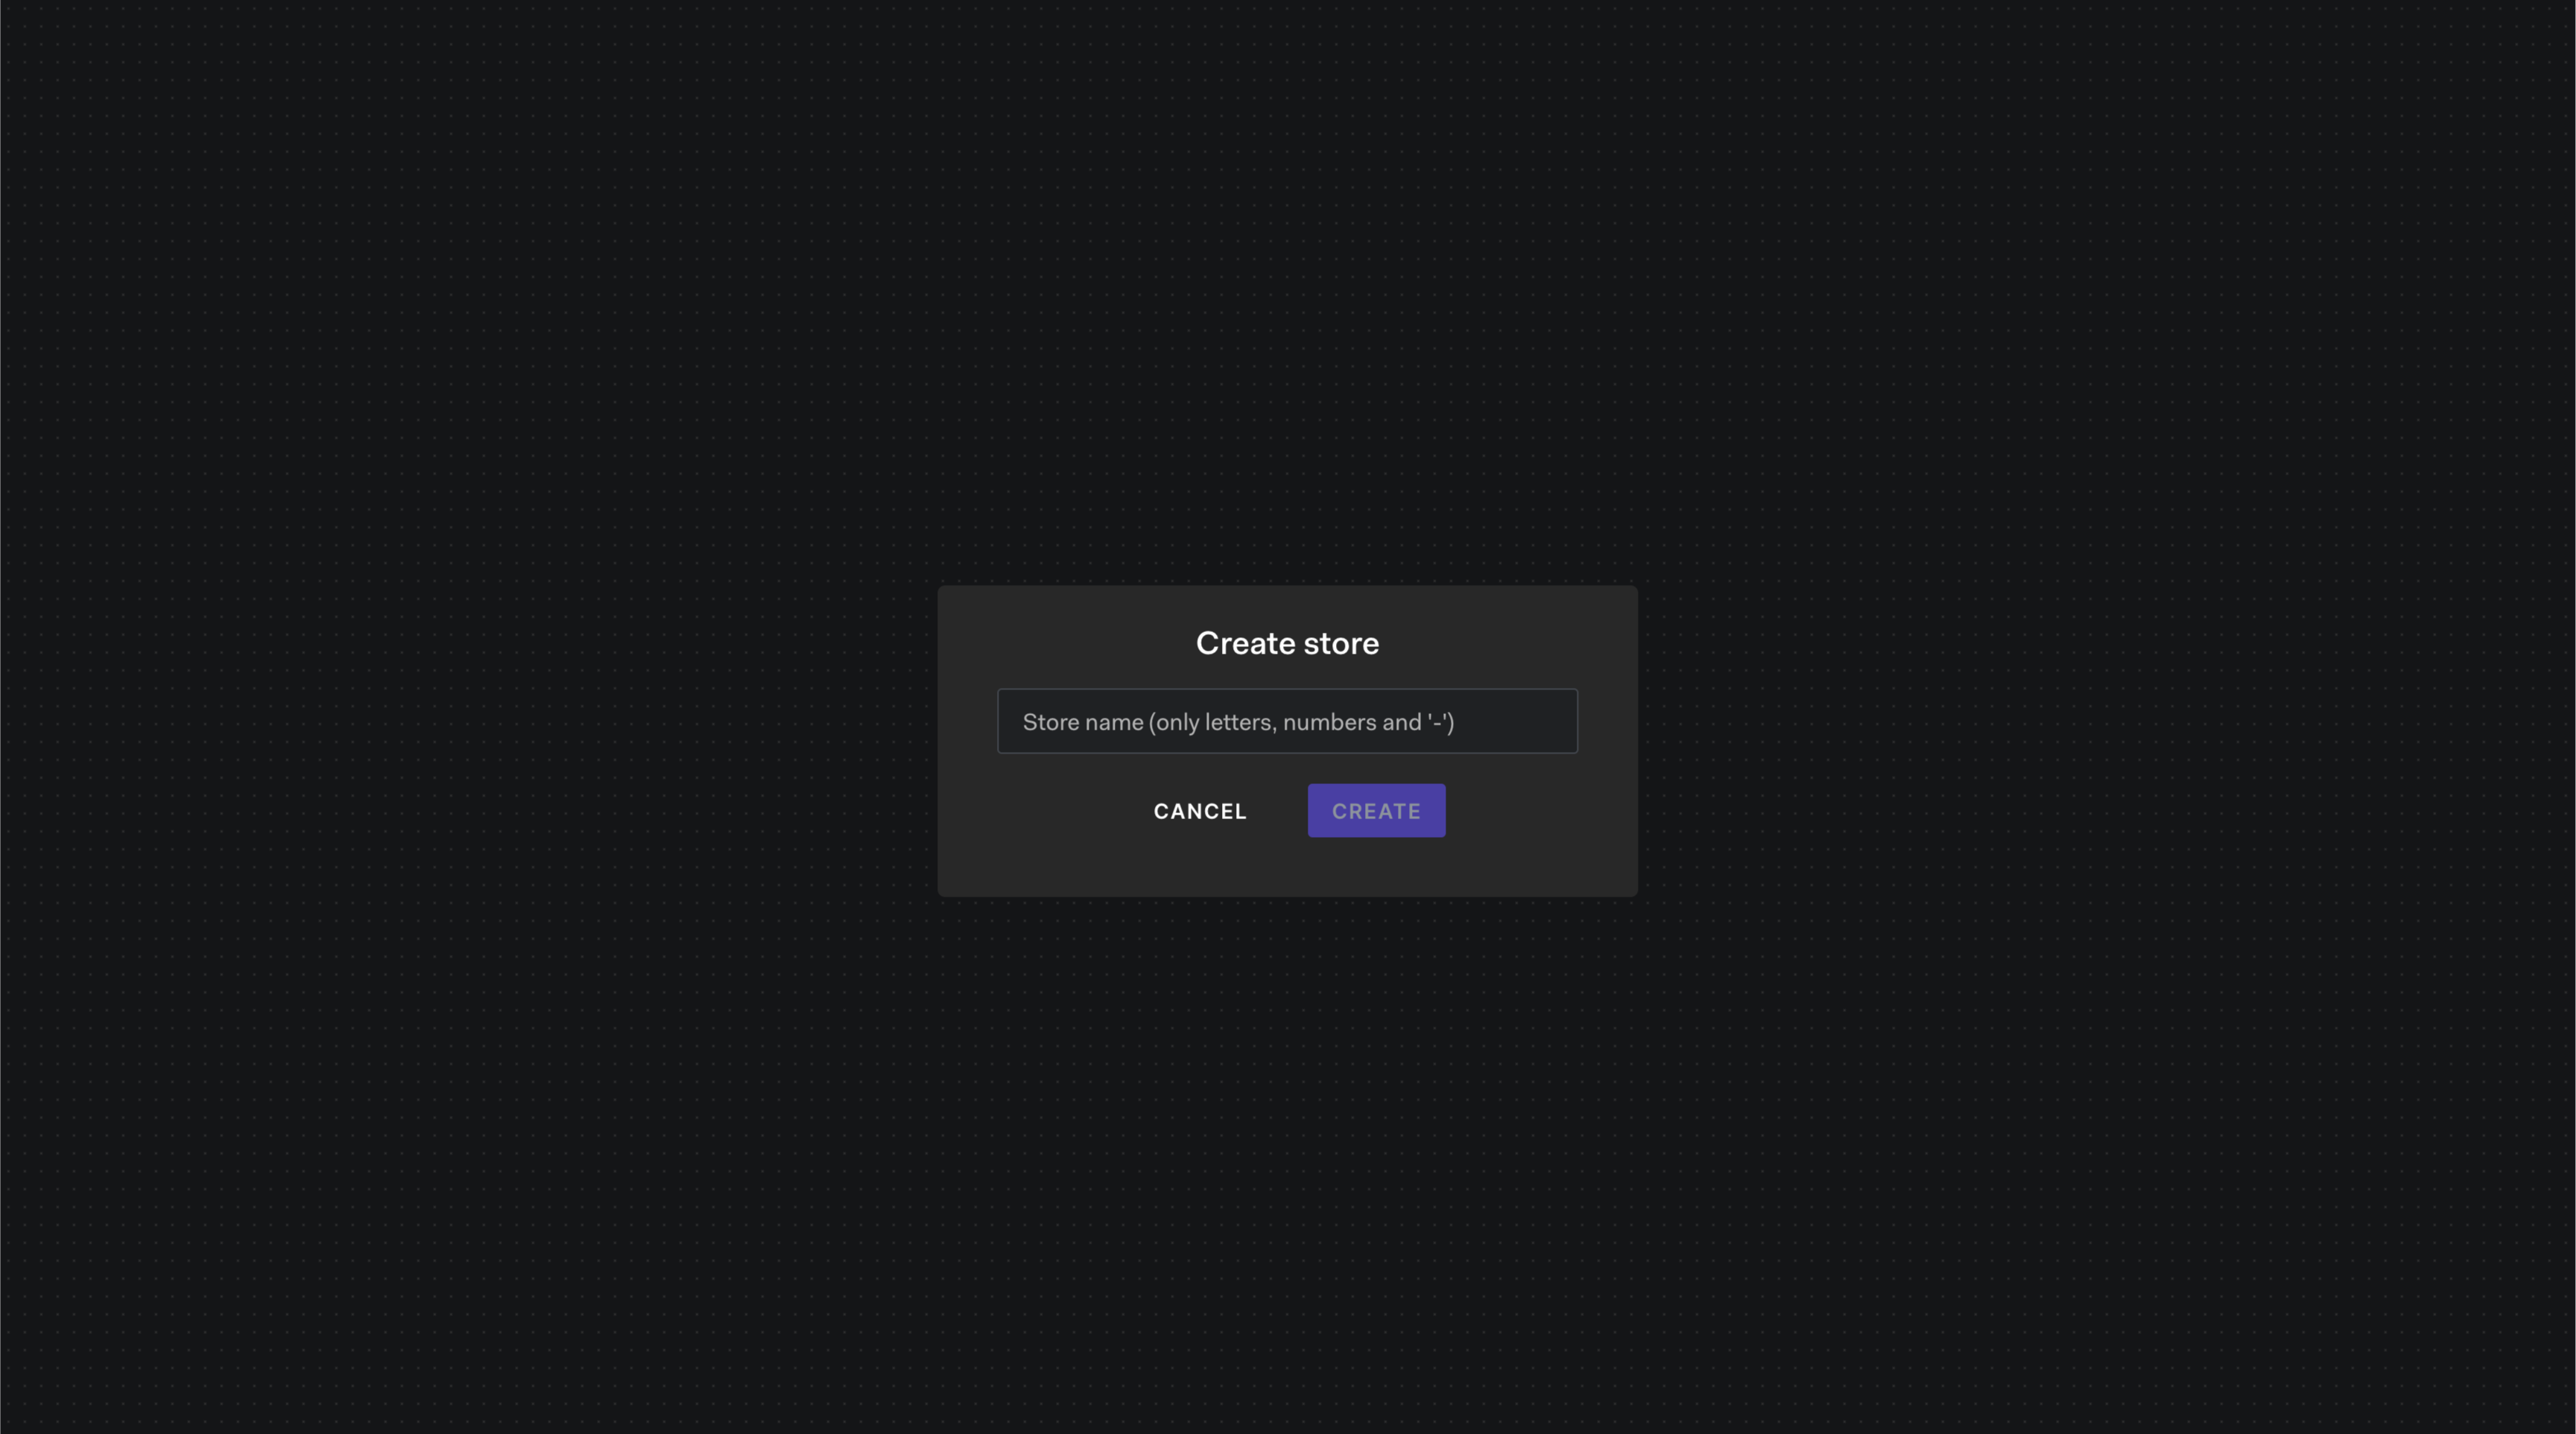
-
To load the playground's shared store, paste the URL in the address bar and press enter. You will be asked to Create store. Enter a name that you wish to uniquely identify this store.