Getting started with Auth0 FGA
Auth0 FGA is a scalable authorization service for developers that allows you to implement authorization for any kind of application and smoothly evolves as complexity increases over time.
Inspired by Google’s Zanzibar, Google’s internal authorization system, Auth0 FGA relies on Relationship-Based Access Control (ReBAC), which allows developers to implement Role-Based Access Control and provides additional capabilities to implement Attribute-Based Access Control. Auth0 FGA is based on OpenFGA, an open-source project owned by the Cloud Native Computing Foundation for which Auth0/Okta is a core maintainer.
This guide demonstrates how you can get started with FGA by managing the basic relationship architecture for a shared file system.
Create an account
The first step to working with Auth0 FGA is to create an account to access an FGA dashboard to manage your stores, relationship tuples, and API calls.
- Navigate to Auth0 FGA and select either Log in or Sign up.
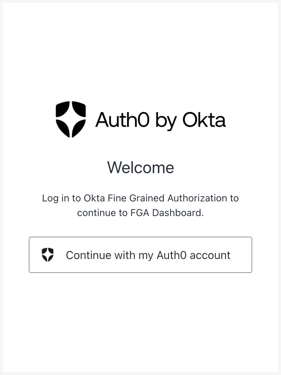
- Select Continue with my Auth0 account. If you don’t have an existing Auth0 account, you will be able to create one..
- This screen prompts you to set up an FGA account for use with the FGA dashboard. Fill in the required information, including a Jurisdiction, which is the geographic location for where the authorization data will be stored.
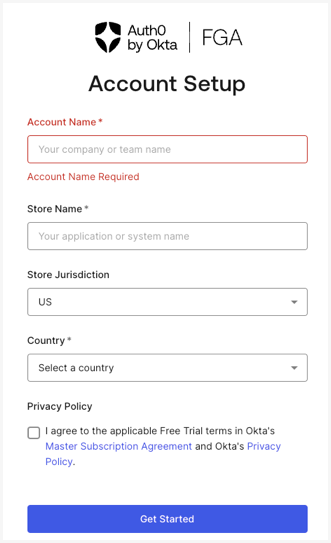
- Fill out the required fields and select Submit.
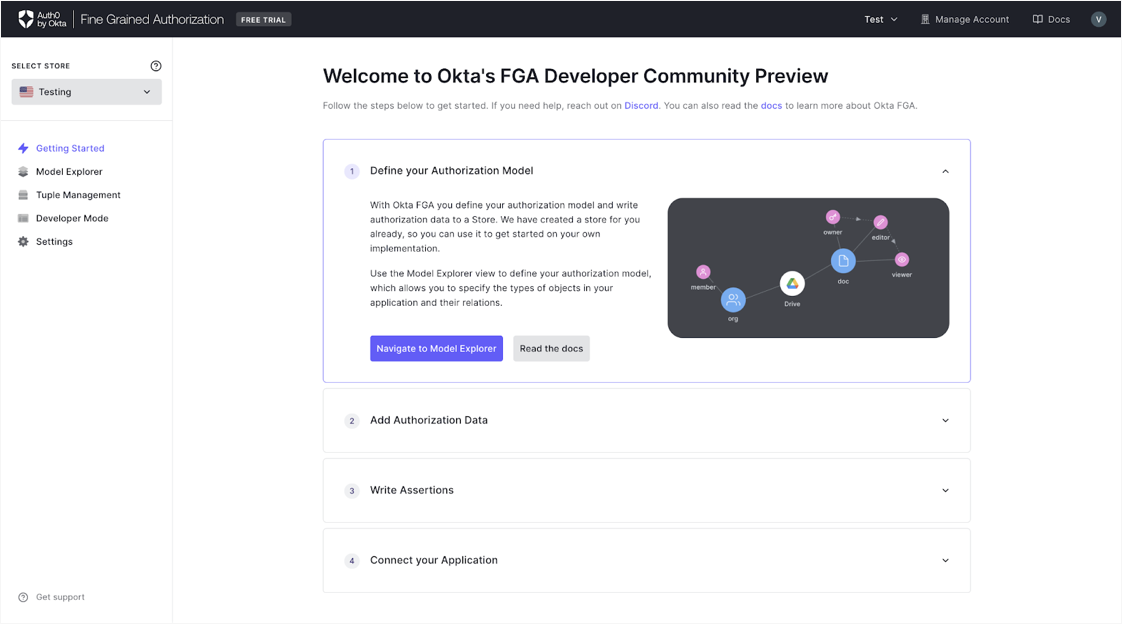
Note: On first login, you are prompted to take a guided tour of the Auth0 FGA dashboard. Feel free to walk through the demo or bypass it and come back later. You can always access the guided tour by clicking the Guided Tour button at the top of each navigation section.
Build an authorization model
After creating an FGA account, the first step in setting up your access requirements is to build an authorization model. This model defines the application structure for the access relationships.
In our example, we’ll build a model for granting owner access privileges to a shared document for our user, john.
-
Click Navigate to Model Explorer to Define your Authorization Model.
-
In the Model Explorer page, input the following code snippet:
modelschema 1.1type usertype documentrelationsdefine owner: [user]define viewer: [user] or ownerdefine can_share: owner -
Click Save.
After saving the authorization model, the Previewer updates with a visualization of the new authorization model and provides a new Model ID corresponding to the latest model.
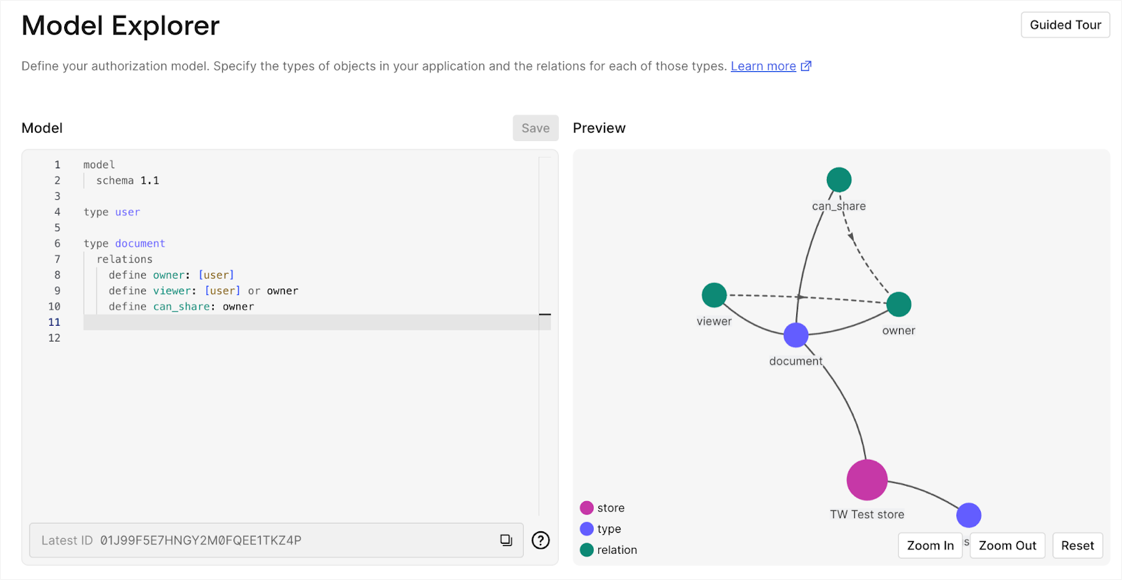
The authorization model that we’ve built now uses modeling schema 1.1 to define a user, and defines relations that a given user has the ability to be assigned owner and viewer permissions, as well as the ability to share our document.
Apply this model by adding a Tuple to create the relationship between the user and the document.
Add Tuples
Now that we’ve defined our authorization model, we need to assign a user and permission level for access to our document. To do this, we’ll create a Tuple. A tuple represents a relationship between a user and an object and is used to store your application's authorization data.
- Navigate to Tuple Management in the left-hand navigation to open the Tuple Management dashboard.
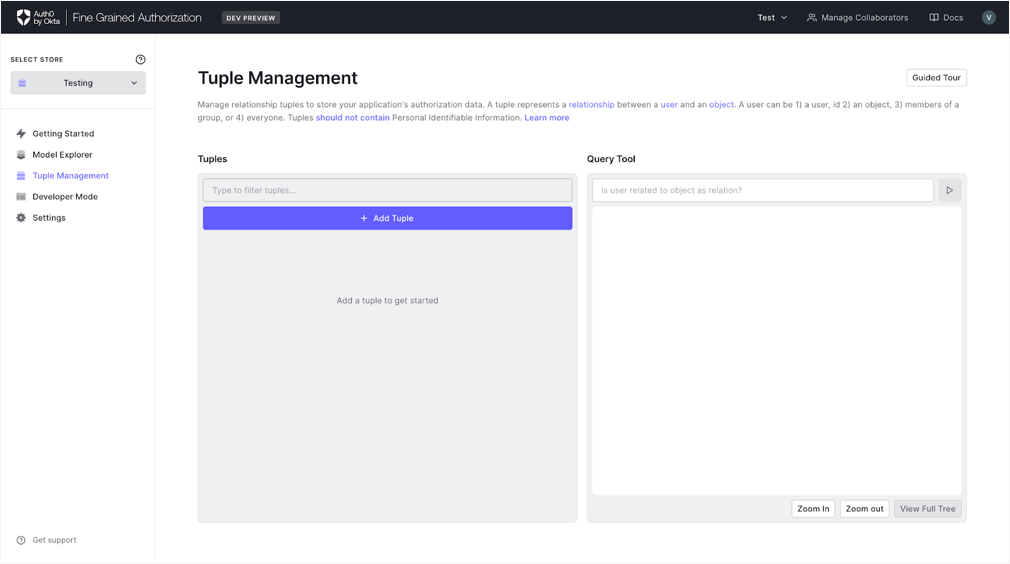
- Click +Add Tuple to add new relationship tuples.
- In the user text box, type in the user identifier. For this guide, input
user:john. - In the object line, select the object for which you want to grant
user:john'saccess level. Selectdocument, and give it a unique identifier. For this example, use1. - In the relation drop-down selector, choose
owner. - Click Add Tuple to save your changes.
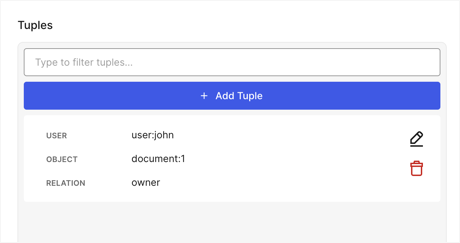
Your Tuple is now available in your Store. You can edit or delete your Tuple at any time, using the edit or trash icon.
Now, we’ve created an authorization model that defines our document and possible access levels associated with it. Next, we created a Tuple that declares our user, john, should be granted owner privileges to our document.
Verify your model
After creating an authorization model and an associated Tuple to define your access relationships, you can verify your model using an assertion.
As mentioned earlier, we’ve defined that john should have owner access to our document. Let’s test our model using an assertion.
Note: You must have a Tuple in your Store before adding an Assertion.
Add Assertion
The Developer Mode page provides a single-page view with panels to manage your authorization model, relationship tuples, and assertions.
Note: If this is your first time visiting this screen, you are prompted with the Guided Tour. Feel free to walk through the demo or bypass and come back later. You can always access the guided tour by clicking the Guided Tour button at the top of each navigation section.
- Navigate to Developer Mode in the left-hand navigation to view your current authorization model, tuples, and assertions.
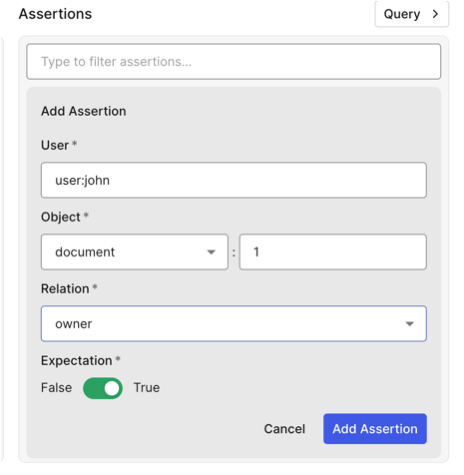
- Click +Add Assertion.
- Fill in the assertion fields with the values we defined earlier:
- User:
john - Object:
document:1 - Relation:
owner
- User:
-
Click Add Assertion.
-
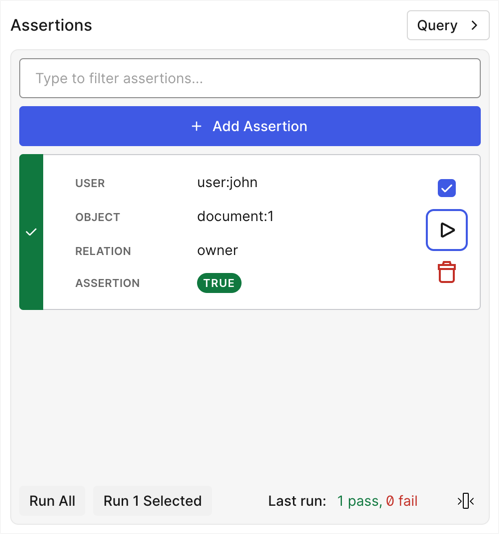
Click the Run button on your assertion to test the model.
If the test is successful, you should see the True response with a green check mark validating your model.
Create API Client Credentials
To begin calling the API, you will need API Client Credentials.
- Navigate to Settings in the Dashboard’s sidebar menu.
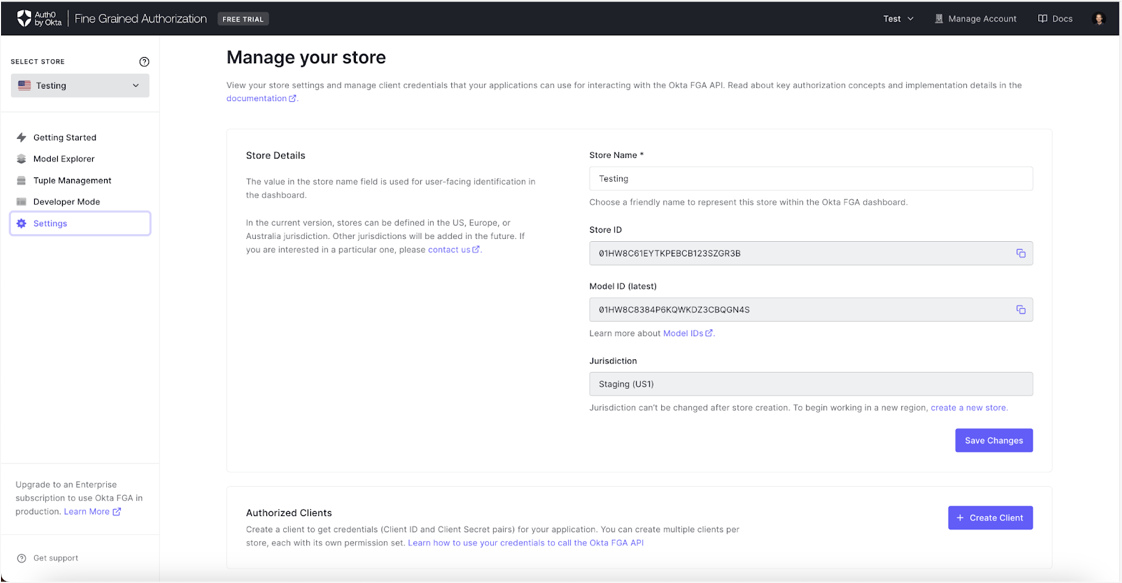
- If you do not have the client secret, you will be presented with the Create Client button. Click Create Client.
- Enter a client name in the provided text box.
- Select the permission set(s) required for this specific client.
- Click Create when complete.
- Make sure to copy the Store ID, Client ID, and Client Secret values.
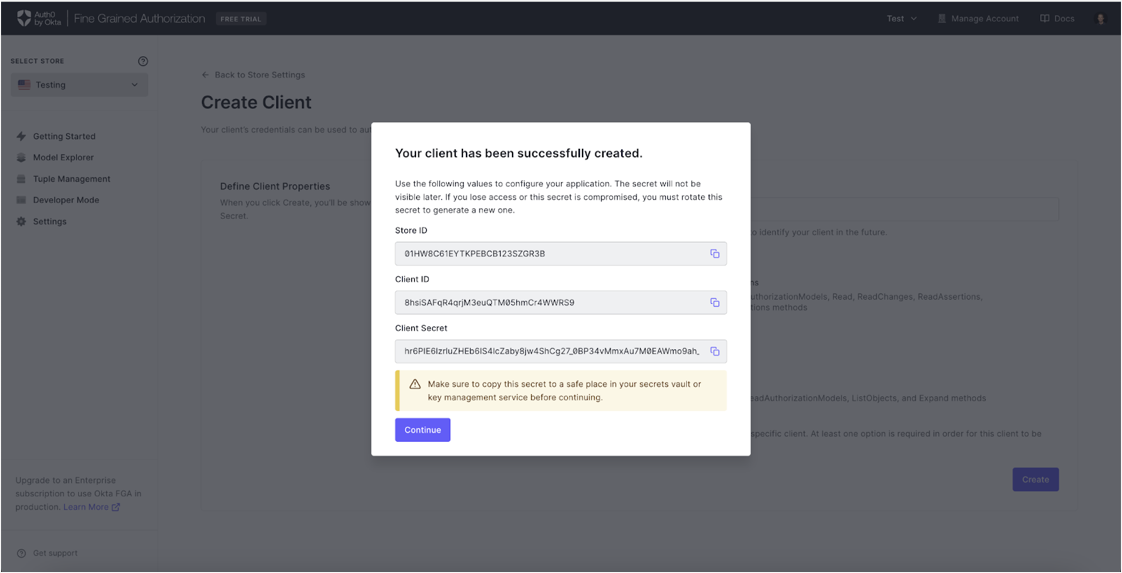
Note: You will not be able to see the client secret again after this step. It will need to be regenerated if it is lost if compromised in any way.
Call the API
Now that you’ve created your client and obtained your client credentials, you can use curl to authenticate and make requests in the command line. Copy the following snippet to your favorite text editor and replace the variables with your API keys received in #Create API Client Credentials.
FGA_API_URL='https://api.us1.fga.dev'
FGA_API_TOKEN_ISSUER="auth.fga.dev"
FGA_API_AUDIENCE='https://api.us1.fga.dev/'

# Change these variables
FGA_STORE_ID='YOUR_STORE_ID'
FGA_CLIENT_ID='YOUR_CLIENT_ID'
FGA_CLIENT_SECRET='YOUR_CLIENT_SECRET'
Replace the FGA API URL if it is different from https://api.us1.fga.dev. API URLs are unique to the region the store was created in. Don’t forget the / at the end of the audience URL. It is easy to miss. Print or echo the variables in your terminal to confirm they are working before continuing to the next step.
Run these commands to make sure the variables are saved properly
echo $FGA_API_URL
echo $FGA_API_TOKEN_ISSUER
echo $FGA_API_AUDIENCE
echo $FGA_STORE_ID
echo $FGA_CLIENT_ID
echo $FGA_CLIENT_SECRET
Authenticate
You can use your client ID and client secret to get an access token, which can then be used for authorized API calls.
To obtain a token using OAuth 2.0, you can send a POST request to the FGA token issuer endpoint with your client ID and client secret using curl.
curl --request POST \
  --url https://$FGA_API_TOKEN_ISSUER/oauth/token \
  --header 'content-type: application/json' \
  --data '{
    "client_id": "'$FGA_CLIENT_ID'",
    "client_secret": "'$FGA_CLIENT_SECRET'",
    "audience": "'$FGA_API_AUDIENCE'",
    "grant_type": "client_credentials"
  }'
OPTIONAL if you have jq installed
FGA_API_TOKEN=$(curl --request POST \
  --url https://$FGA_API_TOKEN_ISSUER/oauth/token \
  --header 'content-type: application/json' \
  --data '{
    "client_id": "'$FGA_CLIENT_ID'",
    "client_secret": "'$FGA_CLIENT_SECRET'",
    "audience": "'$FGA_API_AUDIENCE'",
    "grant_type": "client_credentials"
  }' | jq -r '.access_token')
Replace CLIENT_ID and CLIENT_SECRET with your actual credentials.
If successful, this command will return a JSON response containing your access token.
{
  "access_token": "eyJhbGciOiJSUzI1NiIs.Ino4TzF1WEp.UMkZ5UHRqZ3RmZDZoMiJ9",
  "scope": "check:tuples expand:tuples list:objects list:users read:assertions read:authorization_models read:changes read:tuples write:assertions write:authorization_models write:tuples",
  "expires_in": 86400,
  "token_type": "Bearer"
}
Save the token using the command below and replace YOUR_ACCESS_TOKEN with the access_token from the response above. It will be used in the following commands.
FGA_API_TOKEN="YOUR_ACCESS_TOKEN"
Run this command to make sure it saved the access token properly. If successful, your system should return the access token you received above.
echo $FGA_API_TOKEN
Make an API Request
Once you have your access token, you can make requests to the API by including the token in the Authorization header of your request to FGA.
Perform an Authorization Check
For example, use curl to check if John can share the document:
curl --request POST \
  --url $FGA_API_URL/stores/$FGA_STORE_ID/check \
  --header "authorization: Bearer $FGA_API_TOKEN" \
  --header 'content-type: application/json' \
  --data '{
    "tuple_key": {
      "user": "user:john",
      "relation": "can_share",
      "object": "document:1"
    }
  }'
Response:
{
  "allowed": true,
  "resolution": ""
}
Write A Tuple
If John can share the document, then we can now share the document with the external user Anne by writing a tuple to FGA assigning Anne as a viewer on document:1.
Set Anne as a viewer of document:1
curl --request POST \
  --url $FGA_API_URL/stores/$FGA_STORE_ID/write \
  --header "authorization: Bearer $FGA_API_TOKEN" \
  --header 'content-type: application/json' \
  --data '{
    "writes": {
      "tuple_keys": [
        {
          "user": "user:anne",
          "relation": "viewer",
          "object": "document:1"
        }
      ]
    }
  }'
Response
{}
*A blank response is good. It means the Write succeeded without any errors.
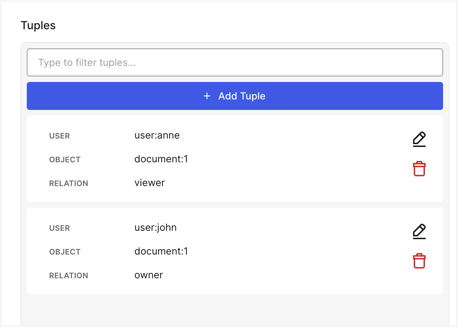
To verify that your Tuple was created correctly:
- Navigate back to the FGA Dashboard > Tuple Management.
- Refresh the page.
Your Tuple should appear as written.
Verify that sharing the document worked
Let's make two more important Checks.
- Check that Anne can now view the document:1
- Check that Anne cannot share the document (since she only has the viewer relationship)
Can Anne view document:1?
curl --request POST \
  --url $FGA_API_URL/stores/$FGA_STORE_ID/check \
  --header "authorization: Bearer $FGA_API_TOKEN" \
  --header 'content-type: application/json' \
  --data '{
    "tuple_key":
      {
        "user": "user:anne",
        "relation": "viewer",
        "object": "document:1"
      }
  }'
Response
{
  "allowed": true,
  "resolution": ""
}
Can Anne share document:1?
curl --request POST \
  --url $FGA_API_URL/stores/$FGA_STORE_ID/check \
  --header "authorization: Bearer $FGA_API_TOKEN" \
  --header 'content-type: application/json' \
  --data '{
    "tuple_key":
      {
        "user": "user:anne",
        "relation": "can_share",
        "object": "document:1"
      }
  }'
Response
{
  "allowed": false,
  "resolution": ""
}
Now that you have created and validated a working Authorization model, you can expand on it and tailor it for your individual requirements and use cases. For more information on building with Auth0 FGA, see Overview of Modeling.